
Transferring products between clinic locations
If you run more than one clinic, you'll sometimes need to move stock between them — restocking, balancing inventory, or preparing for a launch.
This feature keeps a record of every move. Once you've physically moved the products, open the transfer and confirm the received quantities. Pabau marks the transfer as complete and updates the stock levels at both locations.
Step 1: Navigate to Product Transfer
Start by logging in to your Pabau account using your login credentials.
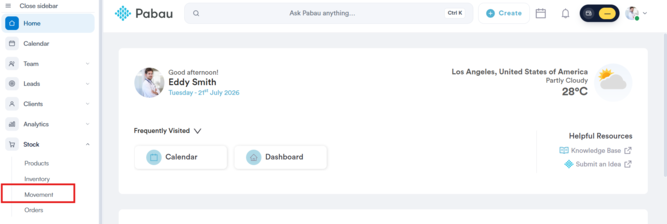
Then, navigate to "Stock" in the left sidebar menu, and click on "Movement" to open the Inventory Movement page.
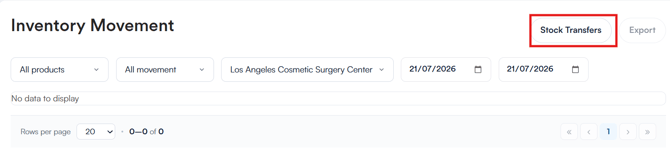
On the Inventory Movement page, click on the "Stock Transfers" button in the top right corner of the screen to open the Product Transfer page.
Step 2: Create a Transfer
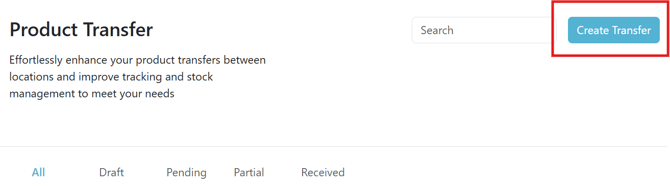
On the Product Transfer page, click on the "Create Transfer" button in the top right corner of the screen.
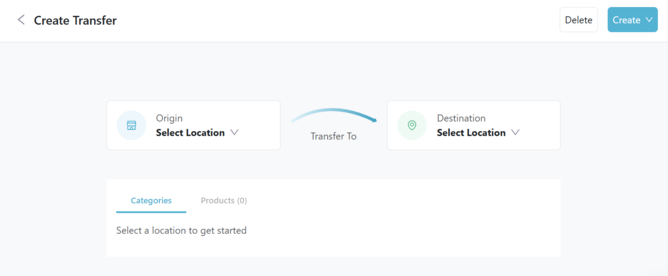
Select the Origin location, which is where the stock is currently held, and the Destination location, which is where the stock will be sent.
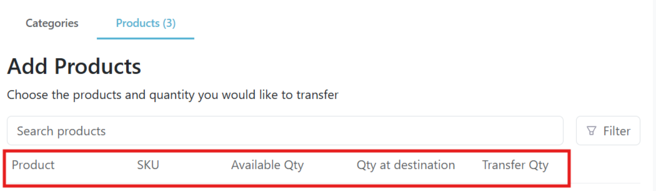
Then, choose the products you want to transfer, either by clicking on a category under the "Categories" tab, or by switching to the "Products" tab to search for specific items.
After you click a category, its products are listed. Use Search products to find a product by name, or the All, For transfer and Not for transfer options to narrow the list. For each product, the table shows the SKU, the quantity Available at the origin and the quantity At destination.
NOTE: Why is a product missing? The list only shows active products that have stock at the origin location. A product with no stock recorded there, or none left, isn't listed, and a category with no such products doesn't appear at all. Choose Not for transfer to see products whose stock at the origin is zero. To transfer one of them, first update its stock level at the origin location. Search matches product names only, not SKUs.
Enter the amount you want to move in the "Transfer Qty" field; this cannot exceed the available quantity at the origin.
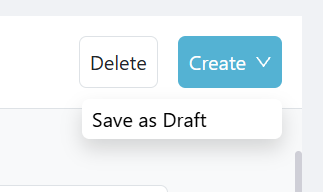
Once you're done with the details, click on the "Create" dropdown in the top right corner of the screen to finalize the transfer, or select "Save as Draft" to finish setting it up later.
Step 3: Track Transfers
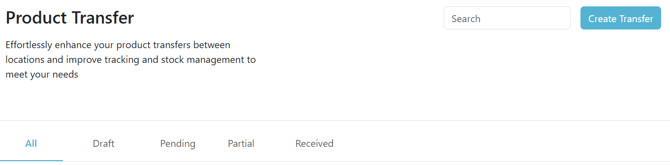
On the Product Transfer page, use the "All" "Draft" "Pending" "Partial" and "Received" tabs to filter transfers by status. Each transfer displays its reference number, origin, destination, status, received quantity, who created and received it, transfer value, and estimated arrival date.
Click on the three-dot icon next to a transfer to edit or delete it.
Step 4: Receive and Confirm a Transfer
Once the stock arrives at the destination, open the transfer and confirm the received quantities. Pabau marks the transfer as complete and updates the stock levels at both locations automatically.
By following these steps, you can transfer products between your clinic locations in Pabau.
Was this guide helpful? Let us know by voting below - your feedback helps us write clearer articles.
For more guides, browse the related articles below or use the search bar at the top of the page. You can also watch our video learning series, the Pabau Academy, or visit the Support page for additional help.