
Batch tracking records the batch number and expiry date of every delivery of a product. Pabau then keeps a running count of what is left in each batch, flags batches that are about to expire, and lets you record exactly which batch was used on a client. This guide shows you how to switch it on, either for one product at a time or for all your products at once with Quick setup.
NOTE: This feature is being rolled out to clinics gradually. If you don't see it in your account yet, message us via the in-app chat.
NOTE: Changing these settings needs the Can modify product permission. Without it, Quick setup is greyed out, and hovering over it shows You don't have permission to edit products.
Step 1: Set the Measure and Dosage
To set up a single product, click Setup in the sidebar, then Products under Catalogue. Open the product (or click New Product) and scroll the General tab to Measurement & dosage. Pabau uses these settings to work out how many doses each batch holds.
- Choose the Measure. For injectables this is usually Vial (ml) or Vial (units). Then enter the Vial Size.
- Enter the Per treatment dosage: how much of the vial one treatment uses.
- If one vial is used across several treatments, switch on This vial allows multi dosages and enter the Default dose size. Pabau fills in Uses in vial from the vial size and dose size; change it if your vial gives a different number of uses.
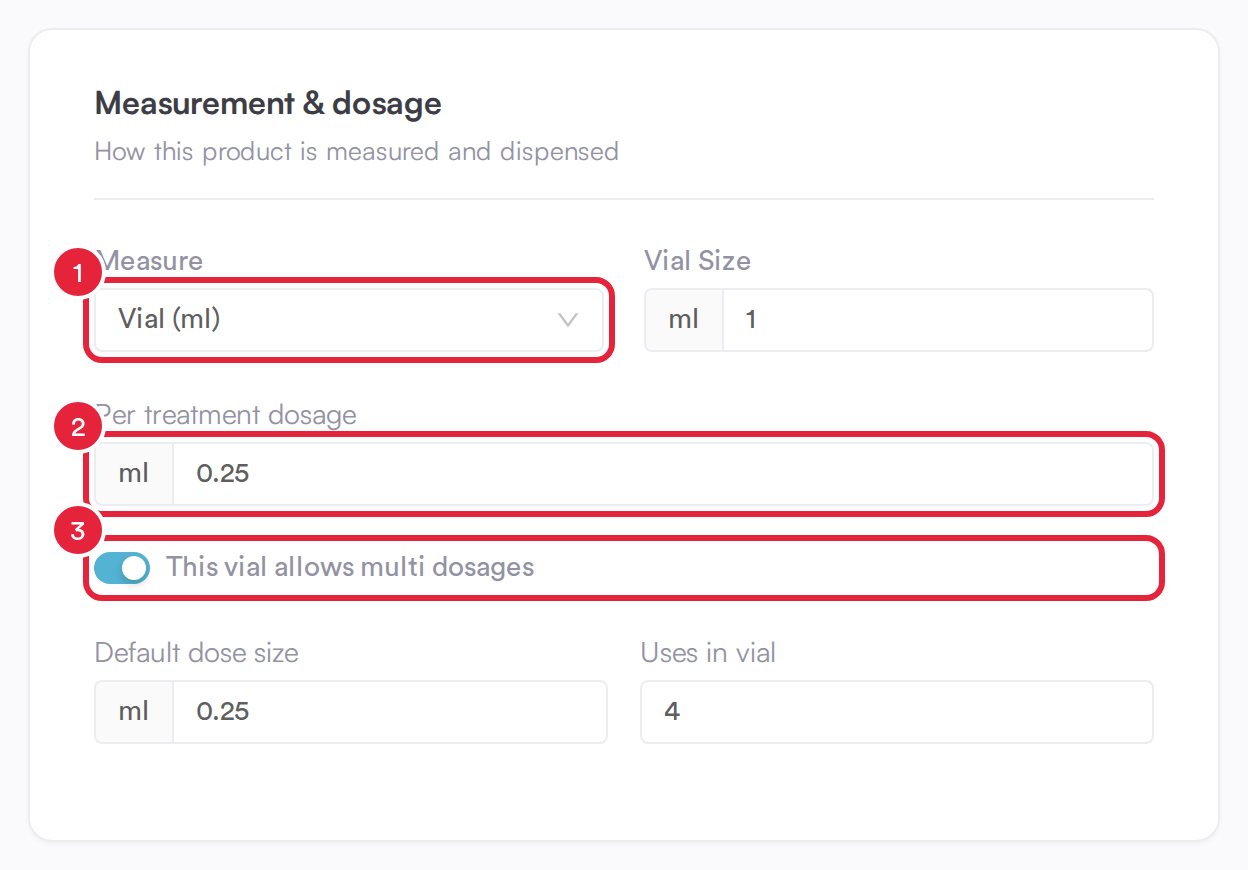
A 1 ml vial with four 0.25 ml doses
Step 2: Switch On Batch Tracking
In the Batch tracking section below:
- Switch on Requires batch # and expiry date recording.
- Choose the Expiry basis:
- Days after first use: once a vial is opened, it can only be used for a set number of days.
- Use expiry date: batches expire on the expiry date recorded when you receive them, with no usable period after opening.
- For Days after first use, enter the number of days, for example 28.
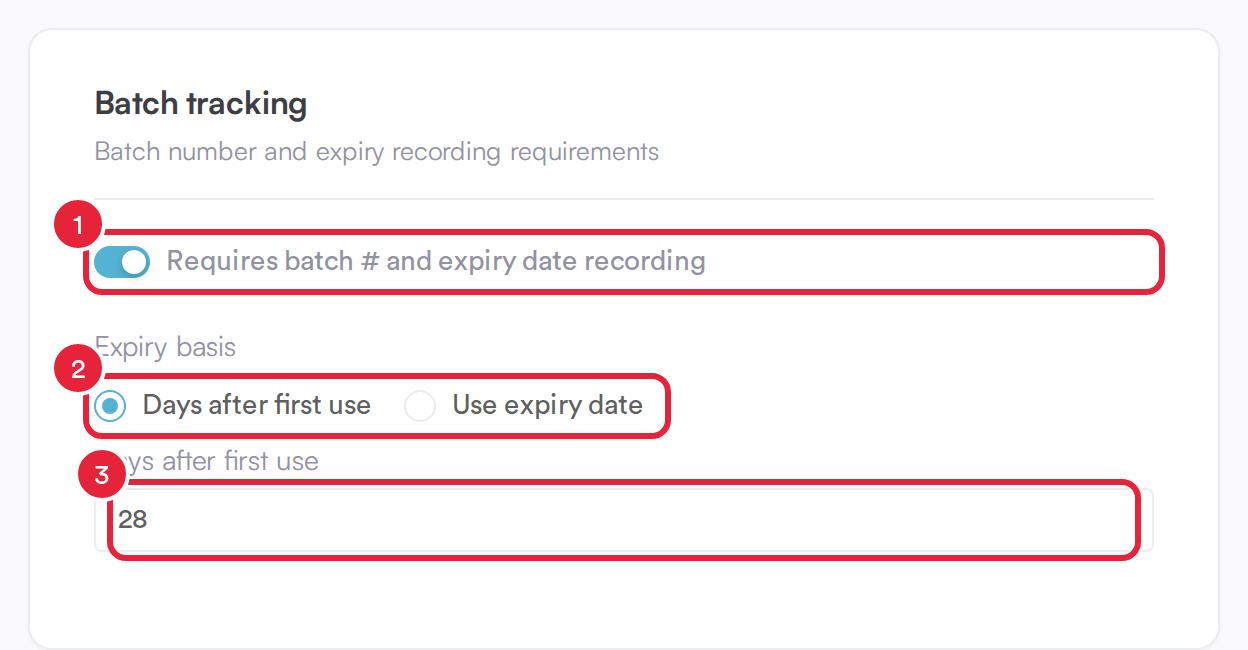
Batch tracking with a 28-day usable period after opening
Click Save (or Create for a new product) in the top right corner.
TIP: Pabau switches batch tracking on for you when you choose an Injectables or Consumables category, or when the product name includes "Botox" or "Filler". Switch it off if you don't need it for that product.
IMPORTANT: Once a product requires batch recording, you can't complete the receipt of a purchase order for it until you've entered its batch number, expiry date and quantity.
Step 3: Open Quick Setup
To set up many products at once:
- Click Stock in the sidebar and open the Batches tab.
- Click Quick setup.
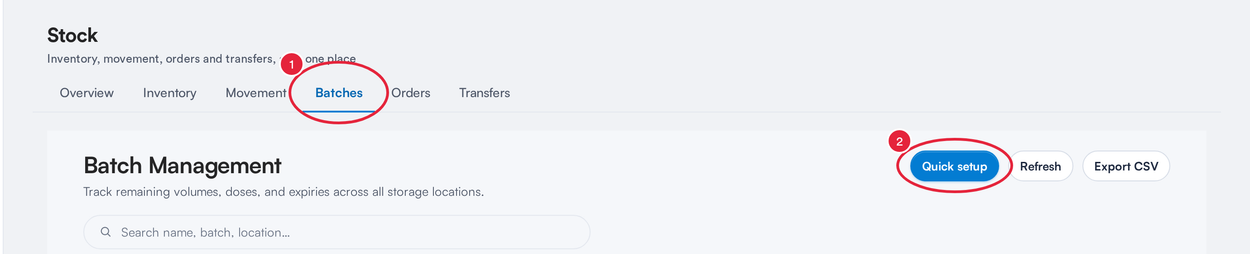
Stock → Batches → Quick setup
Step 4: Find Your Products
Quick batch setup lists all your active retail, consumable and injectable products, A to Z, with their batch tracking and dosage settings side by side.
- Type in Search products or categories, or pick a category from All categories.
- Choose All, Tracked or Not tracked to see only the products you still need to set up.
- The count on the right shows how many products are tracked, for example 2 of 45 products tracked.
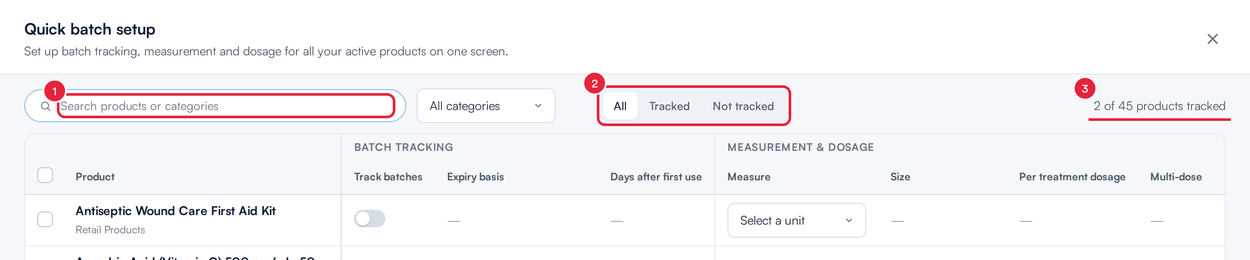
Search and filter the product list
Step 5: Change Settings Product by Product
Each row has the same settings as the product form, under Batch tracking and Measurement & dosage:
- Switch on Track batches.
- Choose the Expiry basis and, for Days after first use, enter the days.
- For a vial, set the Size and Per treatment dosage, and switch on Multi-dose if the vial is shared across treatments. Scroll right to fill in Default dose size and Uses in vial.
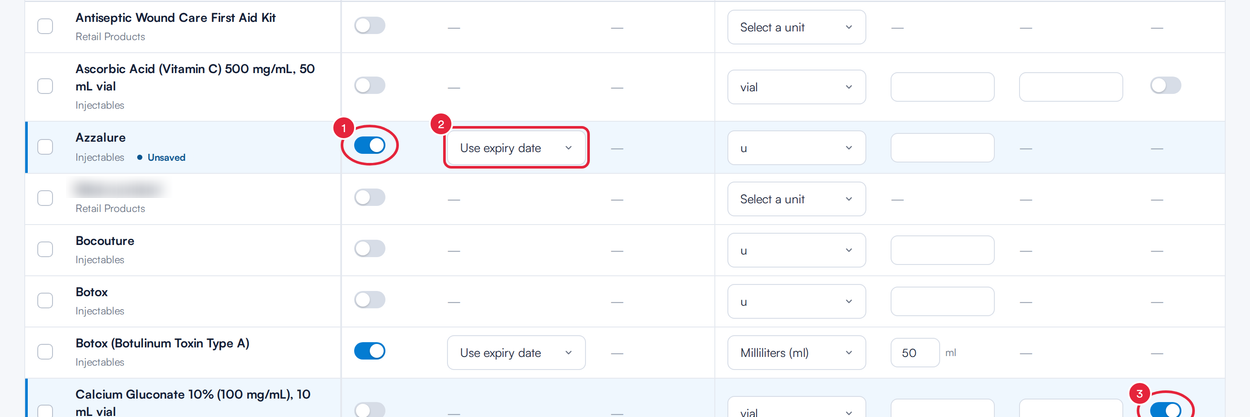
Changed rows are marked Unsaved
Step 6: Change Several Products at Once
- Tick the box beside each product you want to change. The box in the header row selects every product shown.
- Use the bar that appears: Turn tracking on, Turn tracking off or Set measure…. Clear selection unticks them all.
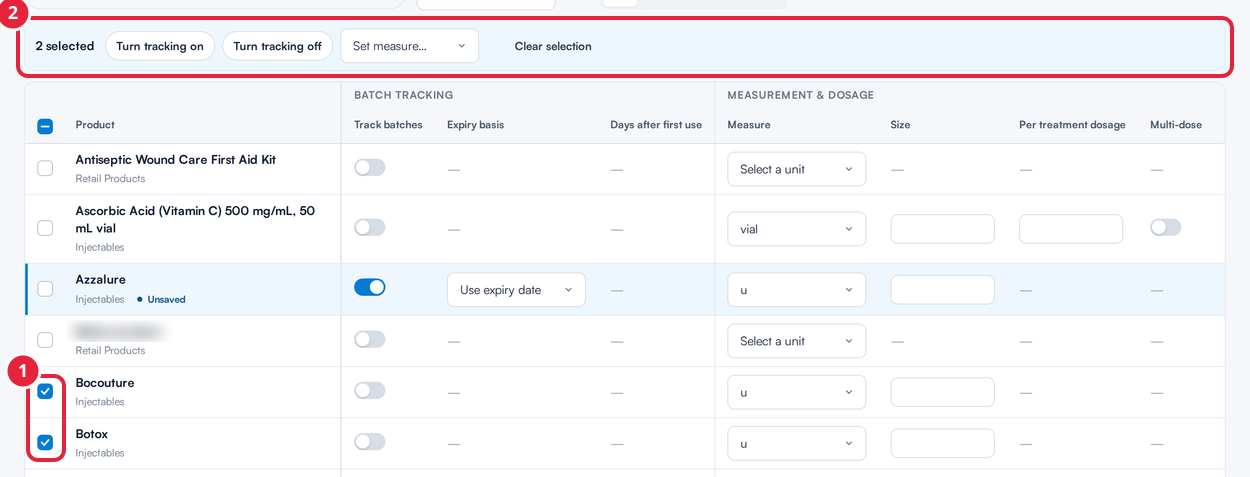
Apply one change to every selected product
NOTE: Dosage settings only apply to vials. If you set a measure that isn't a vial, Pabau asks Clear dosage on N products? first, because their per-treatment dosage and multi-dose settings will be removed when you save. Click Change measure to go ahead, or Cancel.
Step 7: Save Your Changes
Nothing is saved until you save it. The bar at the bottom shows how many changes are waiting, for example 2 unsaved changes.
- Click Save changes. You'll see Batch setup saved for N products.

Save every change in one go
If some products can't be saved, you'll see Some products weren't saved and those rows are marked Not saved. Hover over the label to see why, fix the row and save again. To undo your edits instead, click Discard changes. If you click Close with changes still unsaved, Pabau asks Discard unsaved changes?: click Keep editing to go back, or Discard.
TIP: Tracking a product doesn't create any batches yet. Batches are added when you receive a purchase order and enter the batch numbers and expiry dates of the delivery.
What's next?
Was this guide helpful? Let us know by voting below - your feedback helps us write clearer articles.
For more guides, browse the related articles below or use the search bar at the top of the page. You can also watch our video learning series, the Pabau Academy, or visit the Support page for additional help.