💡In this example, we've created a rebooking reminder for clients who had a completed appointment the last week, making it perfect for IV therapy or LED facial appointments.
You can adjust the timings exactly as you need, to send it out 12 weeks after an anti-wrinkle treatment, for example, or six months after a dermal fillers treatment.
This example uses the Schedule trigger.
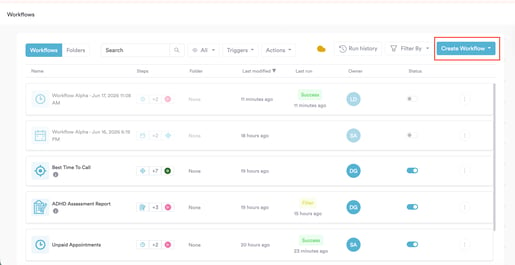
Step 1: Navigate to Workflows
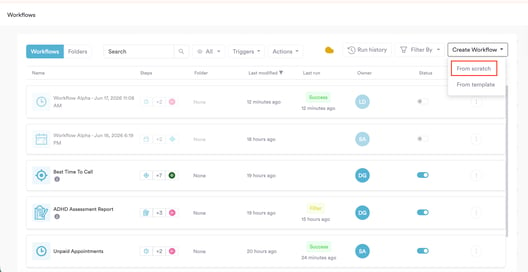
Log into your Pabau account at app.pabau.com. In the left sidebar, go to Marketing, then click Workflow. In the top right corner, click Create Workflow.
When prompted, select Start from Scratch.
Step 2: Select the Schedule Trigger
The right sidebar will open, prompting you to choose a trigger. Select Schedule.

Configure the schedule settings in the sidebar:
- Start date - set this to today's date
- At the time you want the workflow to run each week (for example, 09:00)
- End date - select Never ends
- Run rule every - set to 1 and select Week from the dropdown

Once configured, a Next run preview will appear, confirming the date and time of the first scheduled run.

Step 3: Build the PQL Query
On the same screen, check the Run a PQL search and execute actions for each work item in the query checkbox. Click Insert to open the Build PQL Query panel.

Configure the query example:
- Object - select Appointments
- Condition 1 - set Appointment Date
=LAST WEEK - Click + Add condition
- Condition 2 - set Appointment Status
=Complete

The preview at the bottom will show:
object = 'Appointments' AND Appointment Date = 'LAST WEEK' AND Appointment Status = 'Complete'
Click Insert PQL, then click Validate Query. A green confirmation will appear showing how many matching appointments were found.

NOTE: To target clients who had a specific treatment only, click + Add condition before inserting and add Appointment Service = [your treatment name].
Step 4: Add a Send Email Action
Once you click Save on the trigger, the Create panel will open automatically. Select Action.

Then click the Actions in Pabau button.

And click on Communication.

From the list select Send Email.

You will see the Configure Action - Send Email screen listing the default fields - To, From, Subject, and Message are all pre-selected and required. Click Continue.

Fill in the four required fields:
To - select Client email (trigger) from the Schedule section. This dynamically addresses the email to the client linked to each appointment.
From - select your clinic's sender address from the Other section.
Subject - use the dropdown to insert a dynamic value if needed, then type your subject line. For example, insert Client first name (trigger) followed by Time to book your next session.
Message — write your recall message in the text field. Click Insert in the toolbar to open the merge tags panel and add dynamic values anywhere in the body. The panel has two tabs:
- Compatible values — client data from the trigger, including first name, last name, email, and more, organised under Clients, User, Location, and Invoices
- Advanced formatting — trigger-level data including Date and Time, Online Booking (where you'll find the Booking URL merge tag), Client Area, and Medical forms

A simple recall message might look like this:
Hi [Client first name],
It's been a week since your last visit and we'd love to see you again.
If you're ready to book your next session, you can do so online at [Booking URL] or give us a call.
We look forward to seeing you soon.
[User full name]
If you'd prefer to send a fully designed branded email, click Email Editor at the bottom of the Message field to open a drag-and-drop builder.

Click Save Action. The action will appear as step 2 on the canvas.

Step 5: Test and Activate
Click Test Workflow in the top right corner. This performs a force run against the full dataset returned by your PQL query. Open the Run History tab to confirm the correct appointments were identified and the Send Email action completed with a Success status.

When you're satisfied, switch the toggle from Draft to Publish and click Save.

The workflow is now live. Every week, on the day and time you configured, it will automatically find every client with a completed appointment from the previous week and send them your recall email.
For more guides, refer to related articles below, select additional guides, or use the search bar at the top of the page. These guides will help you get the most out of your Pabau account.
Additionally, to help you fully utilize and understand your Pabau account, we recommend exploring additional guides and resources offered at the Pabau Academy. It offers in-depth video tutorials and lessons, offering a holistic learning experience that can equip you with the essential skills for achieving success with Pabau.