This workflow uses the Appointments: Updated trigger, which fires the moment an appointment status is changed, combined with a delay to send the email at the right time.
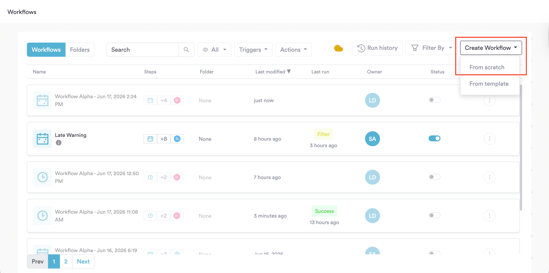
Step 1: Navigate to Workflows
Log into your Pabau account at app.pabau.com. In the left sidebar, go to Marketing, then click Workflow. In the top right corner, click Create Workflow. When prompted, select Start from Scratch.
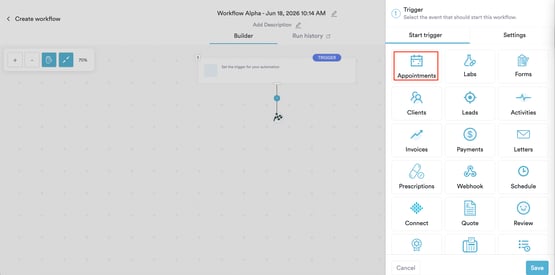
Step 2: Select the Appointments: Updated Trigger
The right sidebar will open, prompting you to choose a trigger. Select Appointments.
A list of appointment activity options will appear below the grid. Select Updated - this fires the workflow the moment an appointment is updated via the calendar, including when the status is changed to Complete.

Click on the Save button and the Create panel will open. Select Condition.
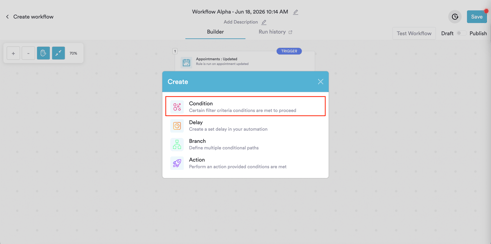
Step 3: Add Conditions
The Condition screen will open with a default condition row under Appointments. Click Appointment Date to open the field selector and choose Appointment Status from the list.

The condition will update to Where Appointment Status is Waiting. Click Waiting to open the value selector and choose Complete.

Click Add Condition to add a second condition row. This time set it to Where Service is [your treatment name]. In this example we're using Hydrotherapy Session - replace this with the treatment you want to target.

Click Add Condition to save. The condition block will appear on the canvas showing both rules joined by AND.

NOTE: The Service condition is optional. If you want the follow-up to go out after any completed appointment regardless of treatment, you only need the first condition: Where Appointment Status is Complete.
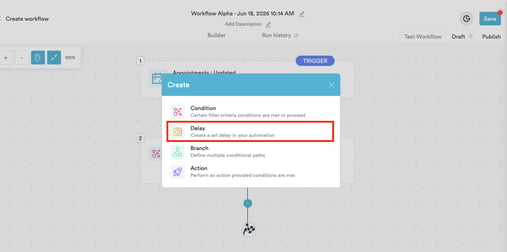
Step 4: Add a Delay
Click the + button below the Condition block on the canvas. From the Create panel, select Delay.
The Delay configuration opens with two fields - a number and a time unit. Set the number to 1 and select Day from the dropdown. This tells the workflow to wait one day after the trigger fires before sending the email.
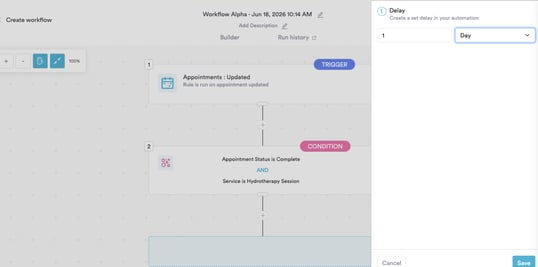
Available time units are: Minute, Hour, Day, Month, Year. Adjust to match your clinic's preferred follow-up timing.
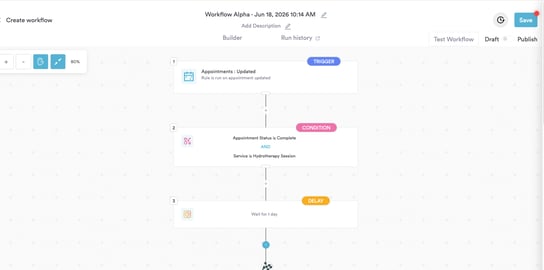
Click Save. The Delay block will appear on the canvas showing Wait for 1 day.
Step 5: Add a Send Email Action
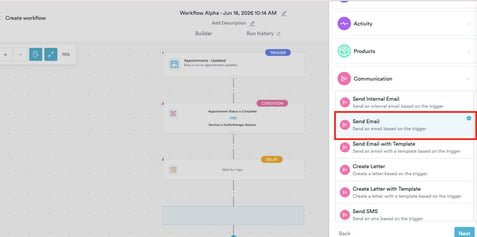
Click the + button below the Delay block. From the Create panel, select Action, then navigate to Actions in Pabau → Communication → Send Email and click Next.
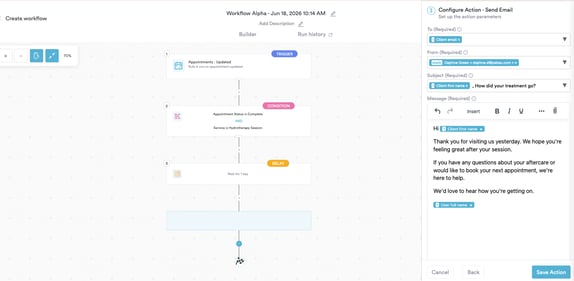
You will see the Configure Action - Send Email screen listing the default fields. Click Continue.
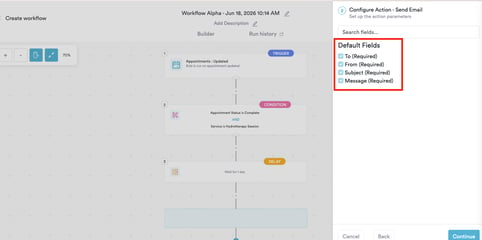
Fill in the four required fields:
To - select Client email (trigger) from the dropdown. This dynamically addresses the email to the client linked to the appointment.
From -select your clinic's sender address from the Other section.
Subject - insert a dynamic value if needed, then type your subject line. For example: [Client first name] - How did your treatment go?
Message - write your follow-up message in the text field. Click Insert in the toolbar to add merge tags from the Compatible values or Advanced formatting tabs.
A simple follow-up message might look like this:
Hi [Client first name],
Thank you for visiting us yesterday. We hope you're feeling great after your session.
If you have any questions about your aftercare or would like to book your next appointment, we're here to help.
We'd love to hear how you're getting on.
[User full name]
Click Save Action. The action will appear as step 4 on the canvas.
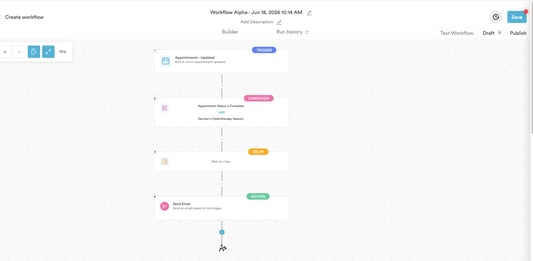
Step 6: Test and Activate
Click Test Workflow in the top right corner. Open the Run History tab to confirm the workflow ran correctly and the Send Email action completed with a Success status.
When you're satisfied, switch the toggle from Draft to Publish and click Save.

The workflow is now live. Every time an appointment matching your conditions is marked as complete, the follow-up email will go out automatically the following day.
For more guides, refer to related articles below, select additional guides, or use the search bar at the top of the page. These guides will help you get the most out of your Pabau account.
Additionally, to help you fully utilize and understand your Pabau account, we recommend exploring additional guides and resources offered at the Pabau Academy. It offers in-depth video tutorials and lessons, offering a holistic learning experience that can equip you with the essential skills for achieving success with Pabau.