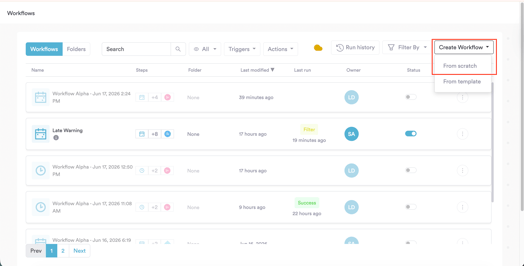
Step 1: Navigate to Workflows
Log into your Pabau account at app.pabau.com. In the left sidebar, go to Marketing, then click Workflow. In the top right corner, click Create Workflow, then select Start from Scratch.
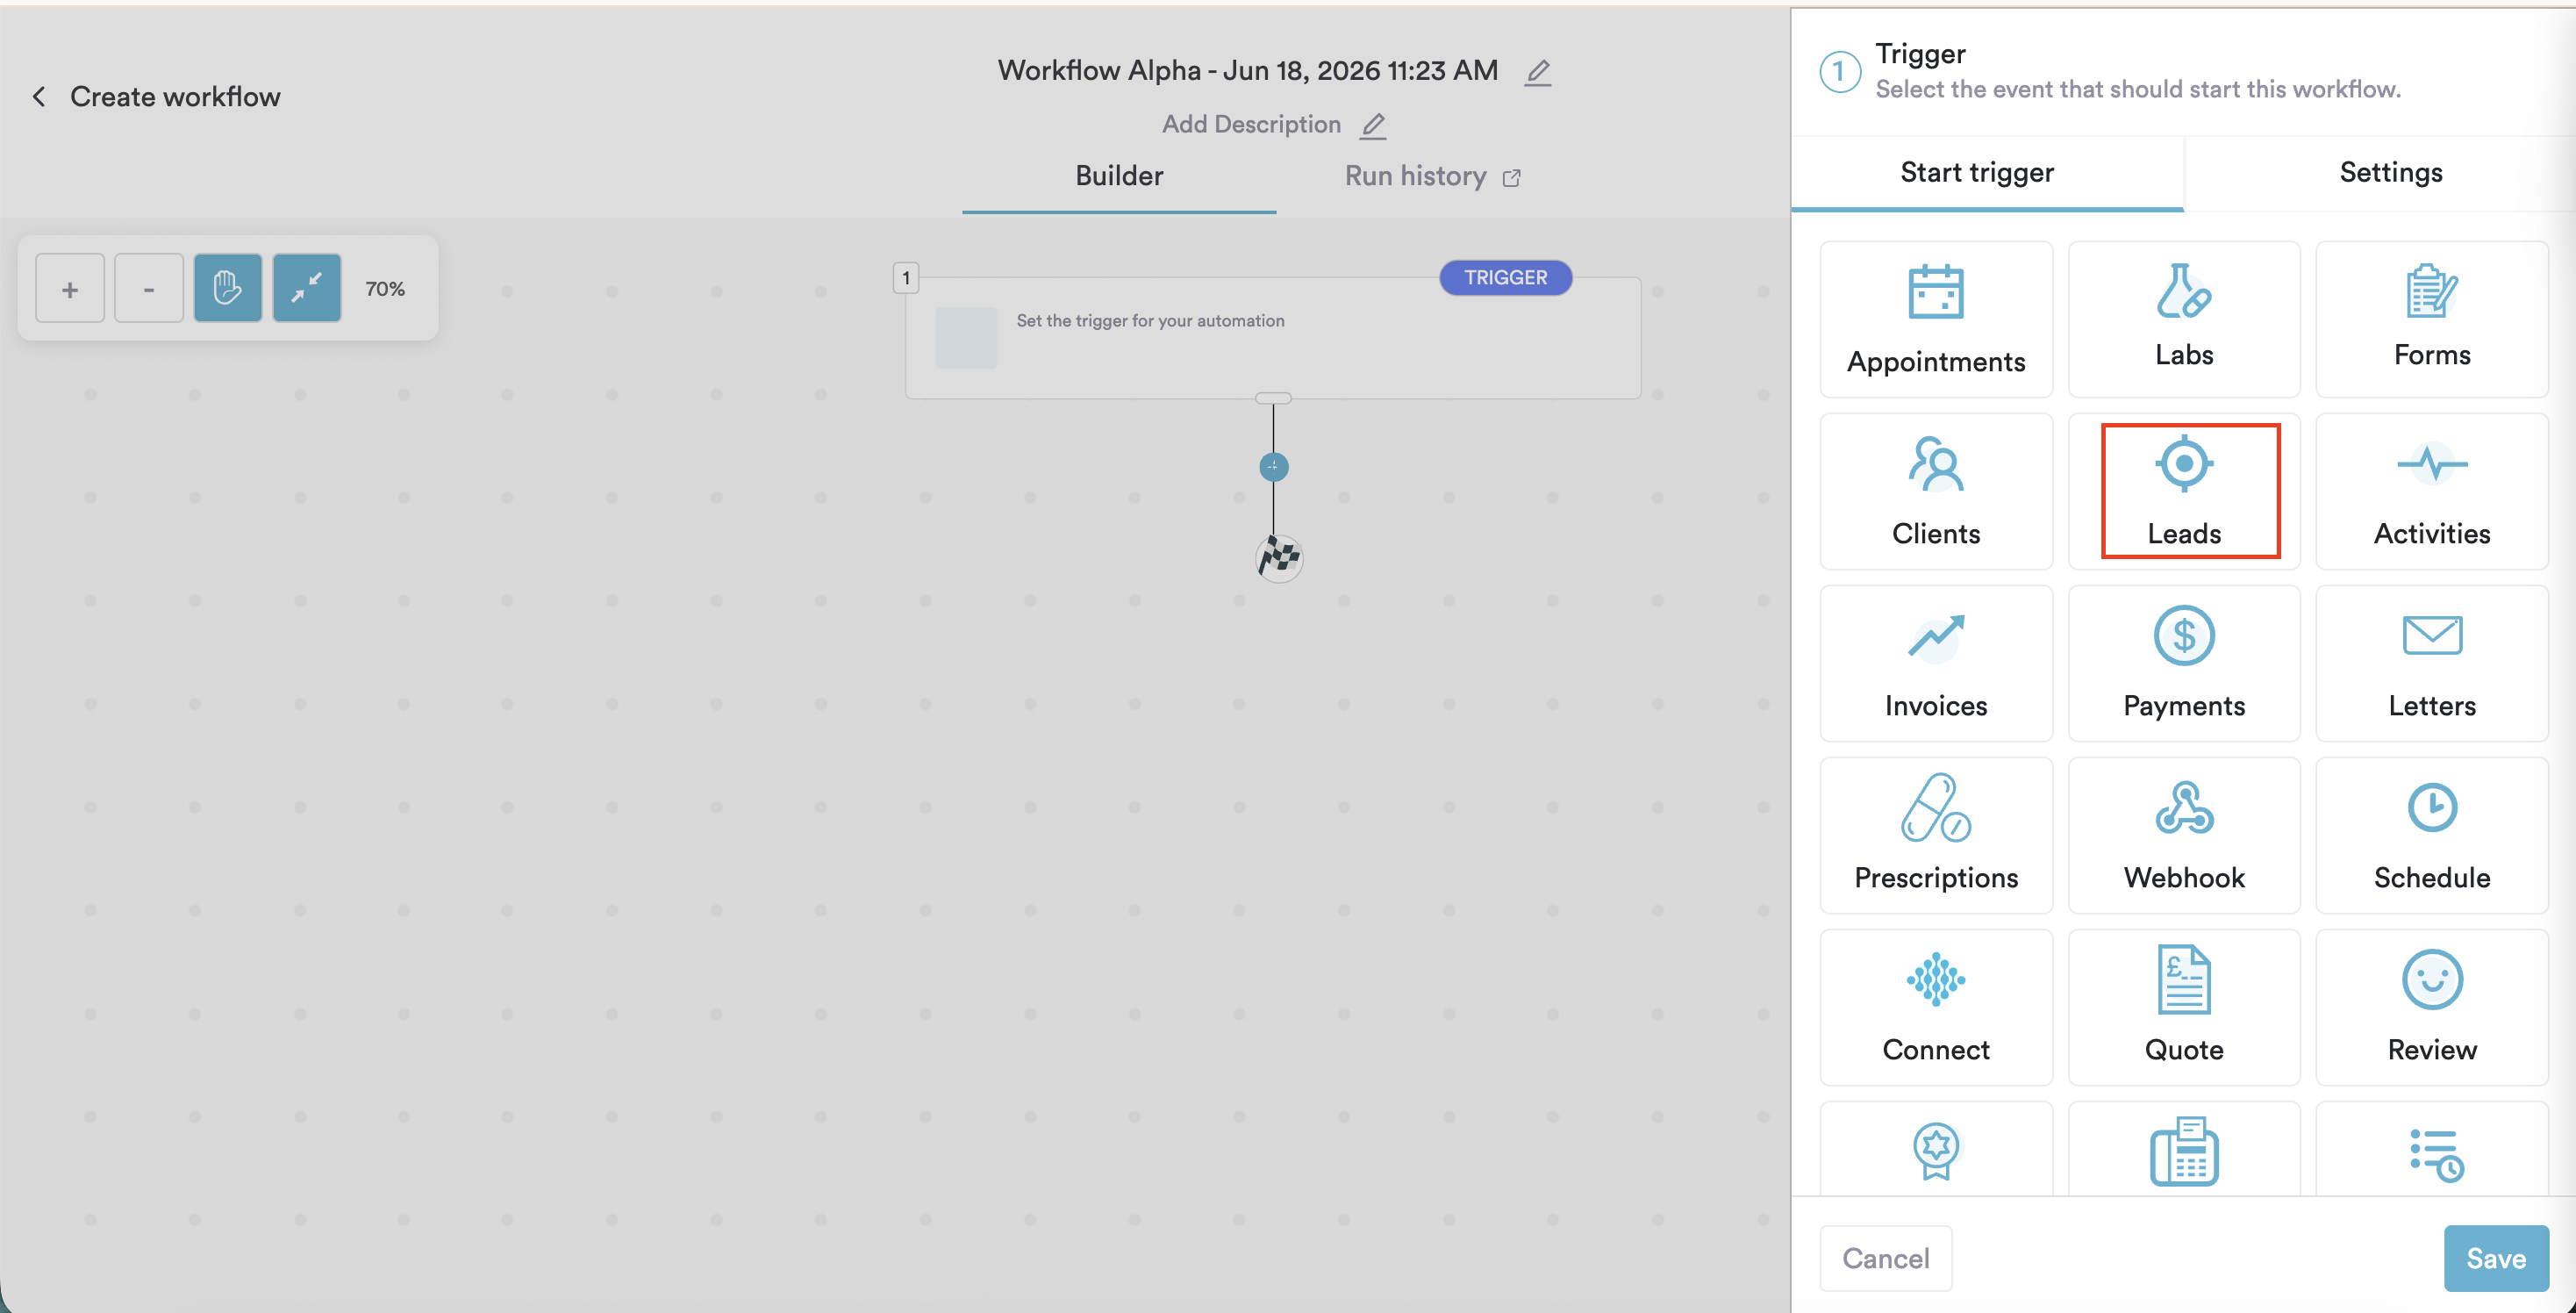
Step 2: Select the Leads: Created Trigger
The right sidebar will open prompting you to choose a trigger. Select Leads.
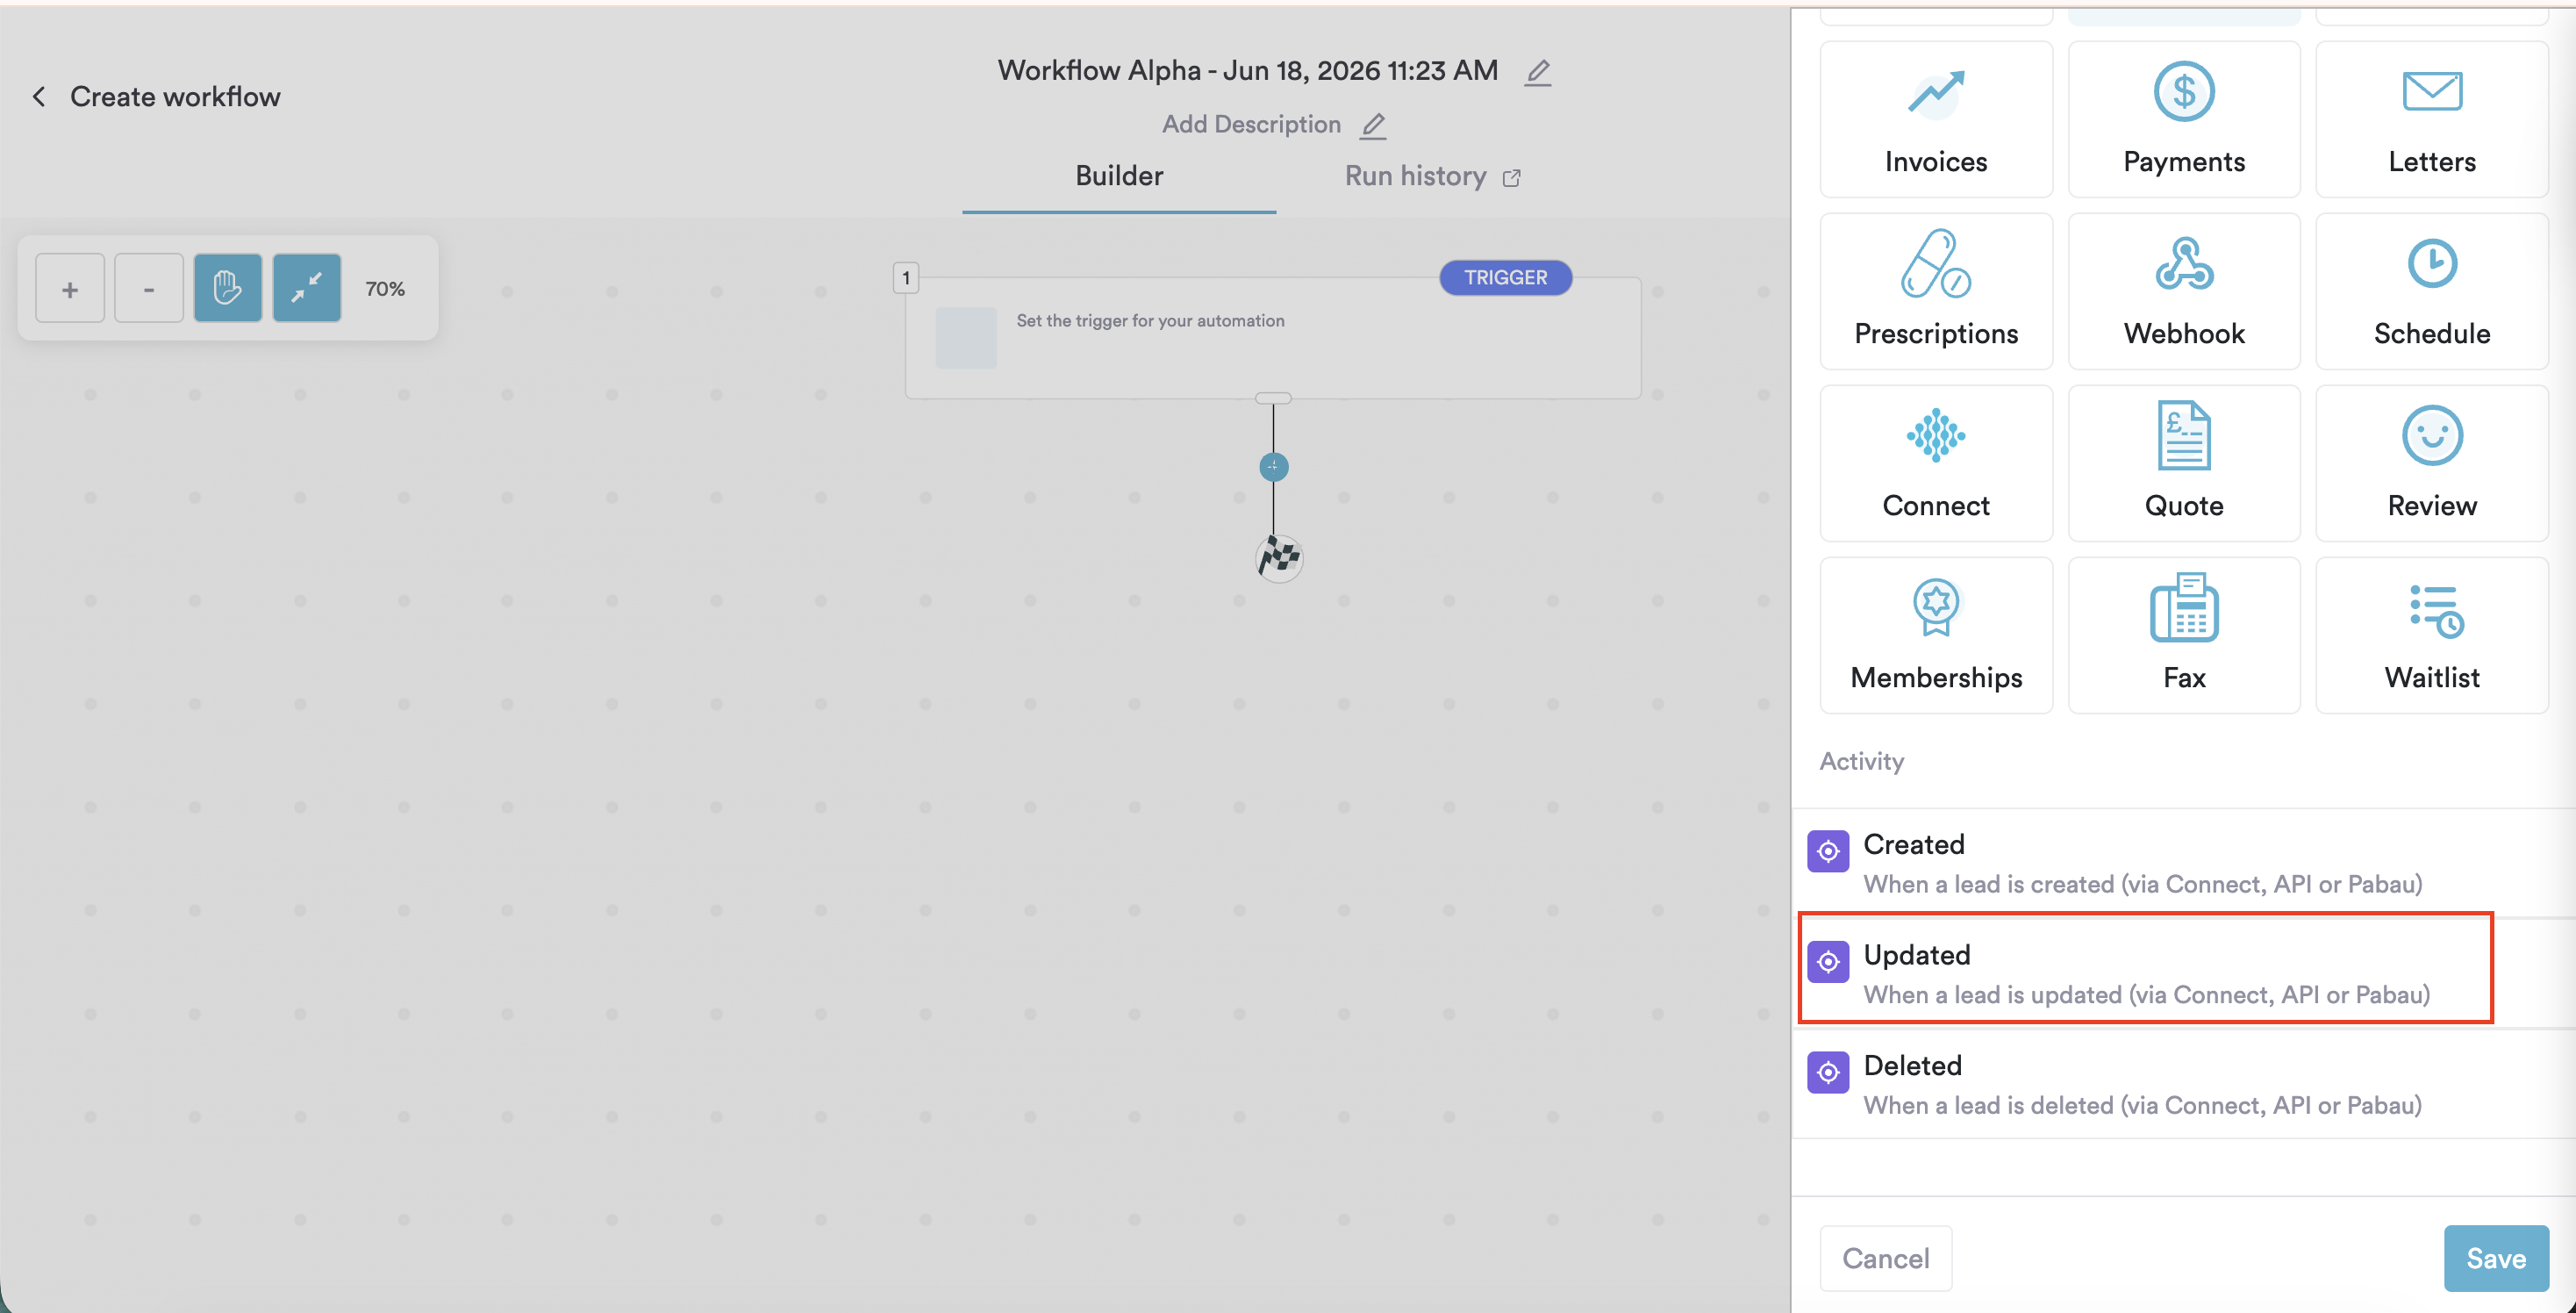
From the activity options below, select Created - this fires the workflow the moment a new lead is created in Pabau, whether via Connect, the API, or manually.
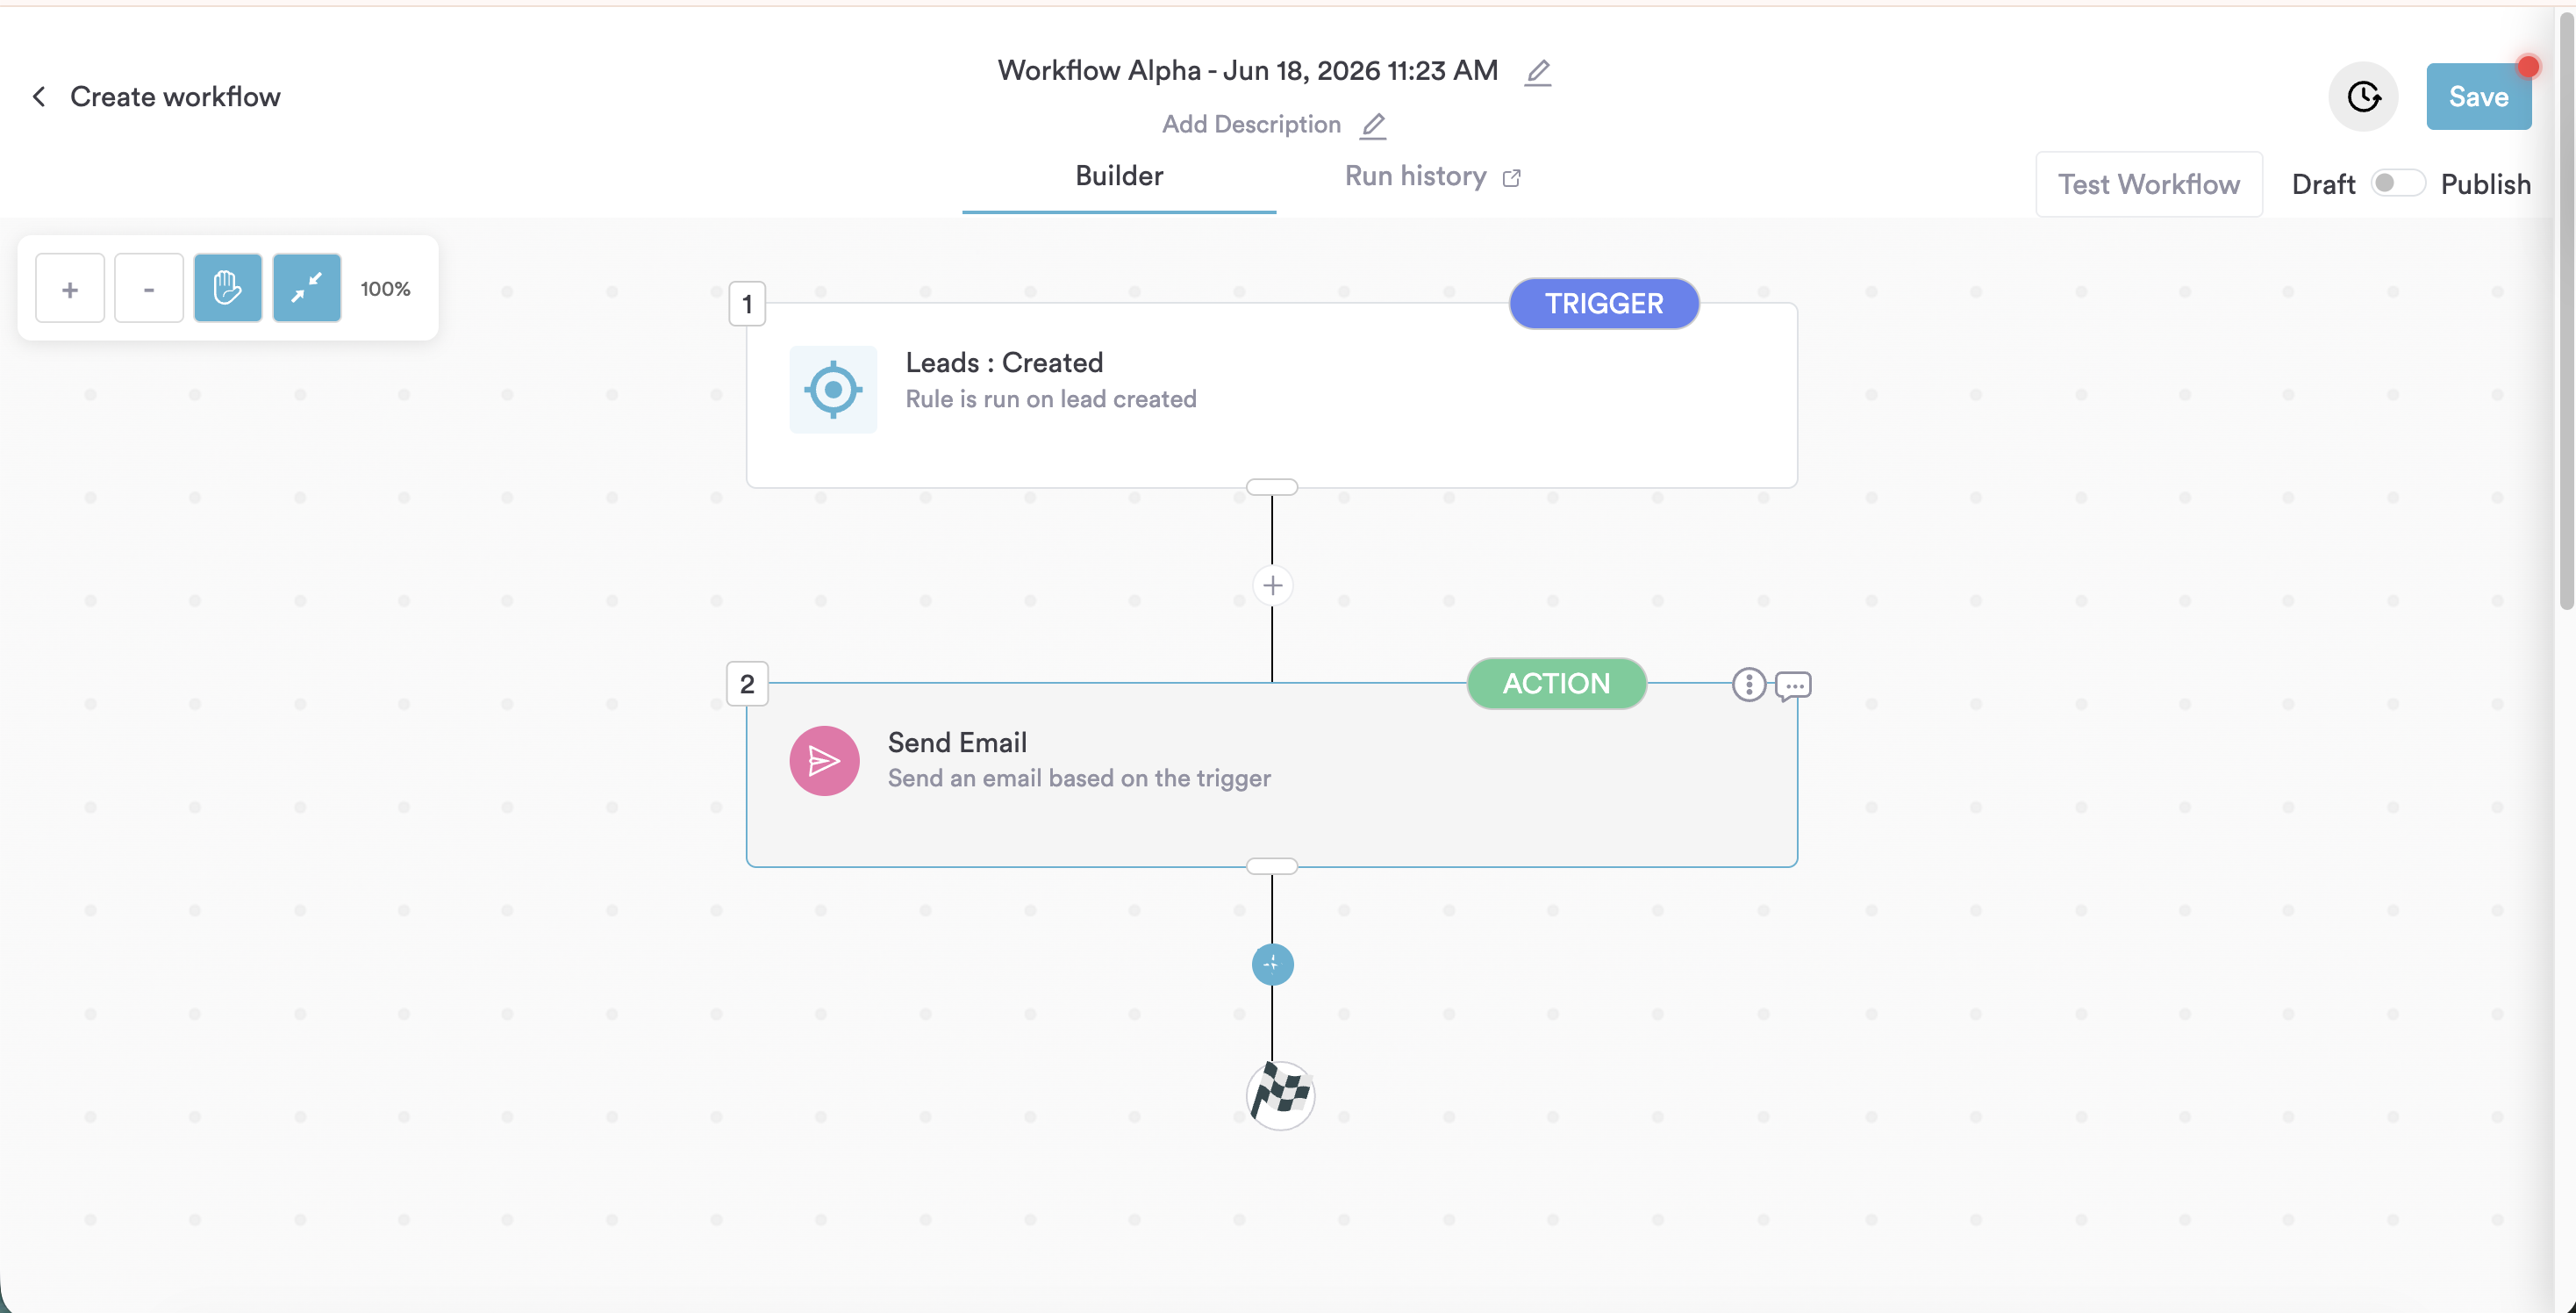
The trigger saves automatically and the Create panel opens.
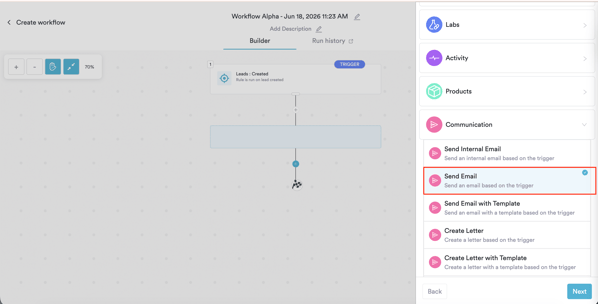
Step 3: Add a Send Email Action
From the Create panel, select Action, then navigate to Actions in Pabau → Communication → Send Email and click Continue.
You will see the Configure Action - Send Email screen listing the default fields. Click Continue.
Fill in the four required fields:
To - select Lead email (trigger) from the dropdown. This dynamically addresses the email to the lead that was just created.
From - select your clinic's sender address from the Other section.
Subject - type your subject line, for example: [Lead first name] - Thanks for getting in touch
Message - write your acknowledgement message. Click Insert in the toolbar to add merge tags. A simple example:
Hi [Lead first name],
Thank you for your enquiry — we're glad you reached out.
A member of our team will be in touch with you shortly to discuss how we can help.
In the meantime, feel free to browse our services or book a consultation online.
[Booking URL]
[User full name]

Click Save Action. The action will appear as step 2 on the canvas.
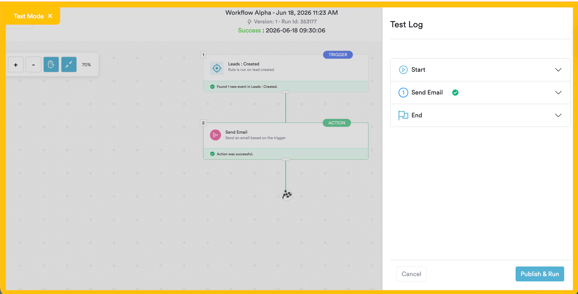
Step 4: Test and Activate
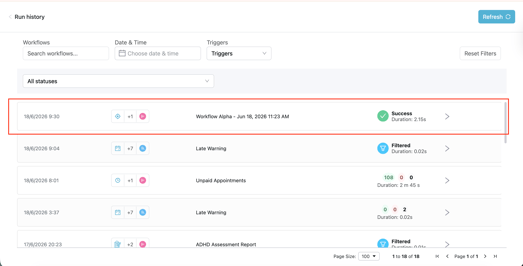
Click Test Workflow in the top right corner. Open the Run History tab to confirm the trigger fired correctly and the Send Email action completed with a Success status.
When you're satisfied, switch the toggle from Draft to Publish and click Save.
The workflow is now live. Every time a new lead is created, your acknowledgement email will go out automatically - instantly.
For more guides, refer to related articles below, select additional guides, or use the search bar at the top of the page. These guides will help you get the most out of your Pabau account.
Additionally, to help you fully utilize and understand your Pabau account, we recommend exploring additional guides and resources offered at the Pabau Academy. It offers in-depth video tutorials and lessons, offering a holistic learning experience that can equip you with the essential skills for achieving success with Pabau.