
US clinics that dispense controlled substances have to report each dispense to their state's Prescription Monitoring Program (PMP). Pabau's Controlled Substance Dispensing (ASAP) report lists the prescriptions in a date range with the details a PMP asks for, builds the standard ASAP 4.2B file, and can upload it straight to your state through the PMP Clearinghouse.
NOTE: PMP reporting applies to clinics in the United States. To upload files from Pabau you need a PMP Clearinghouse account with SFTP access. Without one, you can still download the ASAP file from Pabau and submit it yourself.
Step 1: Check Your Prescriber and Patient Details
The file is built from what is already in Pabau, so a few details need to be in place first:
- Prescribers: each prescriber's NPI and DEA numbers must be on their team member profile. See How to Set Up a Prescriber.
- Patients: the PMP requires each patient's address, date of birth, gender and phone. Records with gaps are rejected by the Clearinghouse.
- Medications: a line counts as Controlled when its name matches a drug ticked as a Controlled drug in your drug list, and Days supply comes from that drug's Duration. Lines whose names don't match a drug in the list show no days supply.
Step 2: Connect Your PMP Clearinghouse Account
- Go to Setup → App Marketplace, type PMP in Search for an app and click PMP Clearing House.
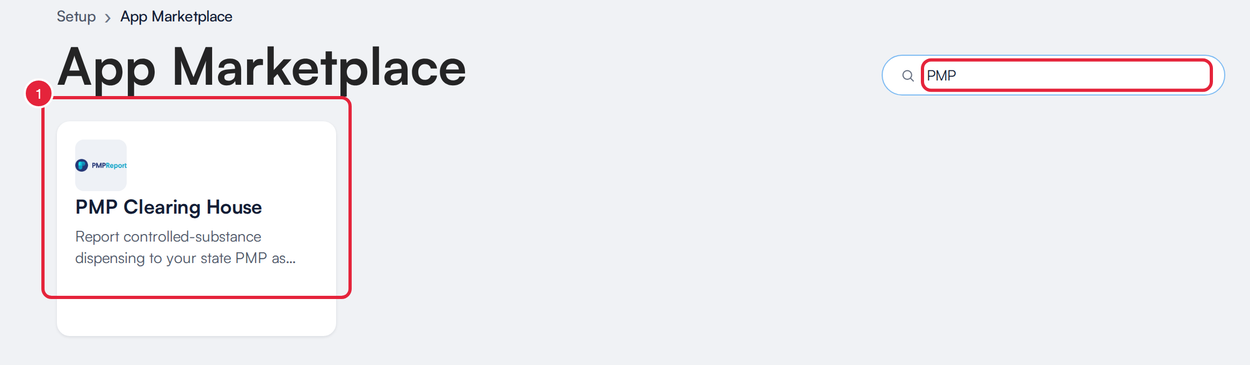
PMP Clearing House in the App Marketplace
- Under SFTP connection, click Connect SFTP.
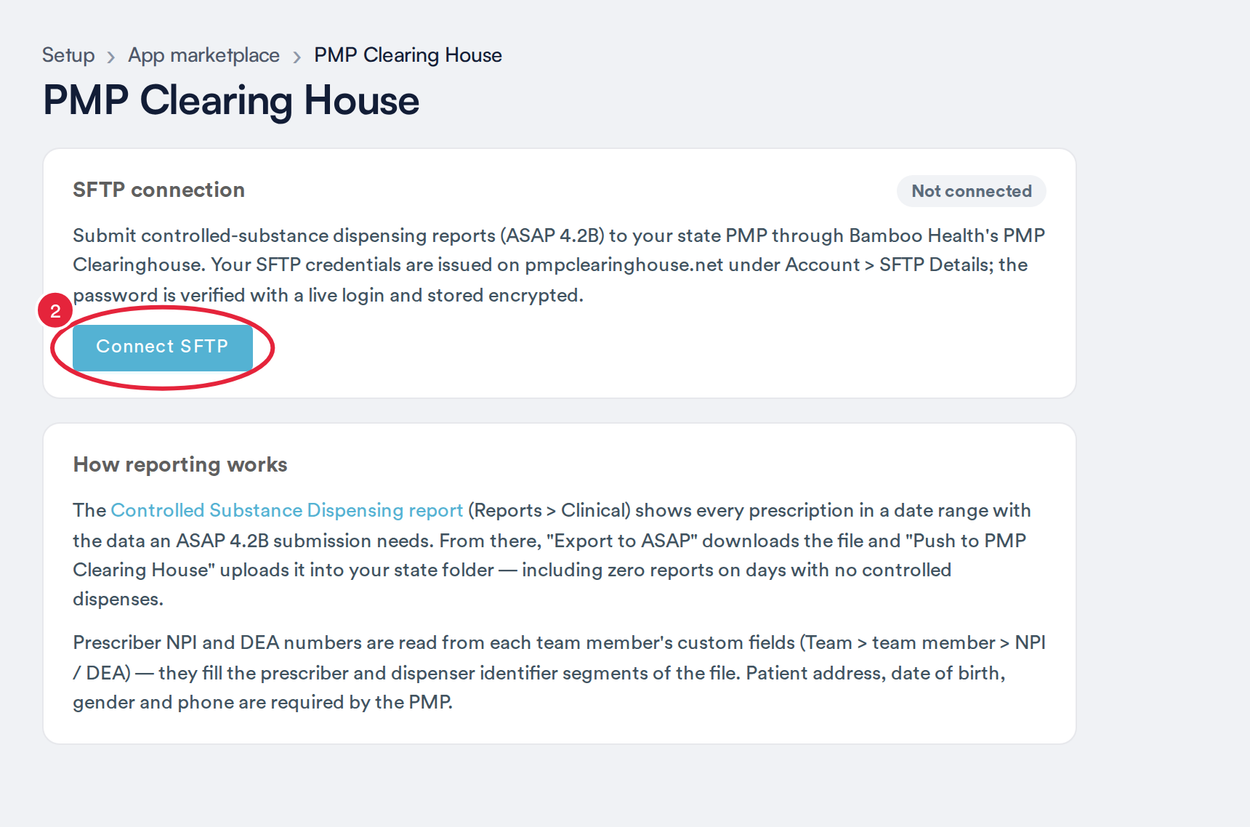
The connection card and a summary of how reporting works
- Enter your SFTP details. Your username is shown, and your password is set, on pmpclearinghouse.net under Account → SFTP Details. The window has a link that opens that page.
- Hostname is filled in for you. Only change it if the Clearinghouse gives you a different one.
- Username and Password.
- State (PMP folder): the two-letter abbreviation of your state's PMP, for example AZ.
- Click Verify & save. Pabau logs in to the Clearinghouse to check the details before saving them, and stores the password encrypted.
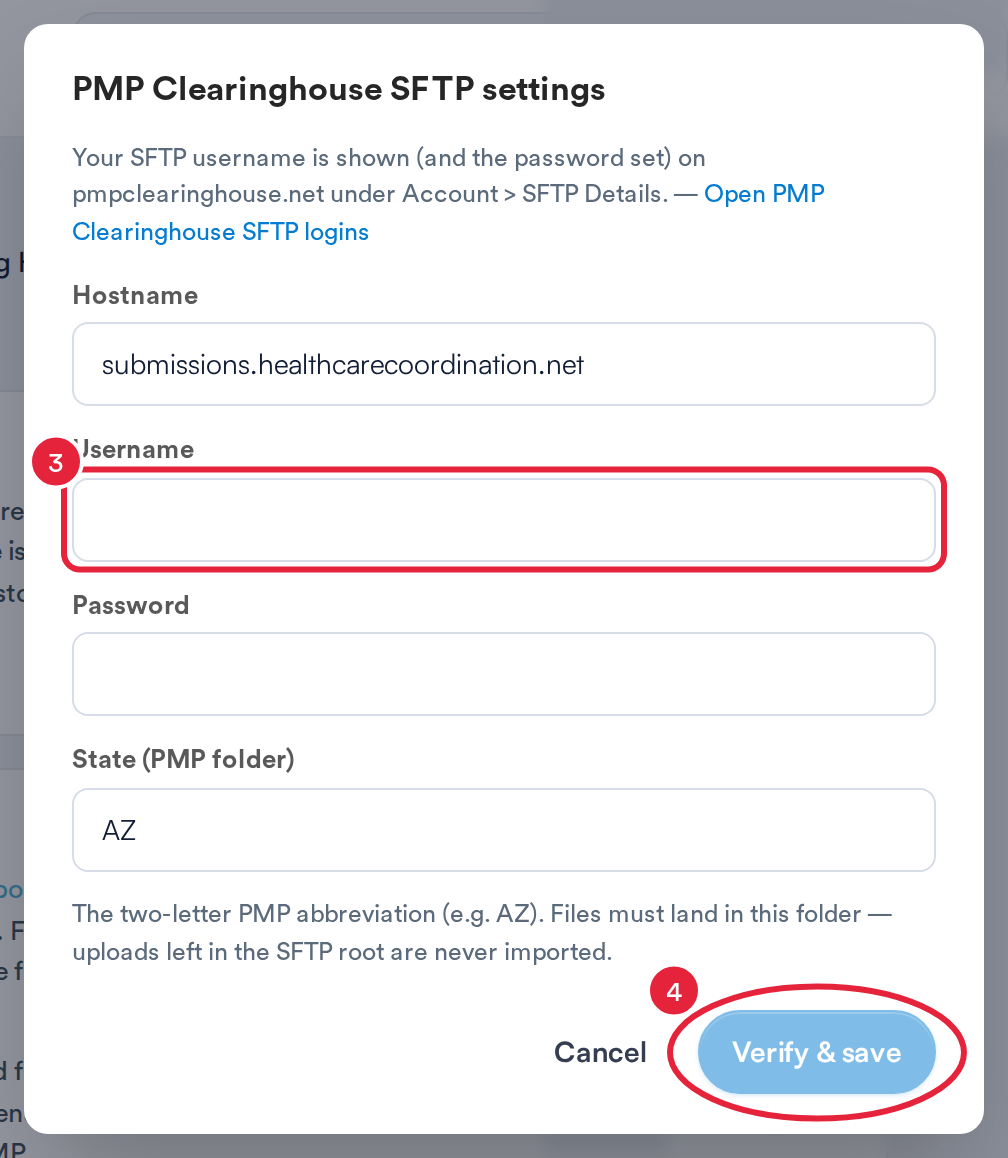
Pabau checks the login before it saves
The card then shows Connected, with the hostname, username, state folder and the date the details were verified. Click Update SFTP settings to change them.
IMPORTANT: The state folder must be the two-letter PMP abbreviation. Pabau uploads your files into that folder, and files left in the top level of your SFTP account are never imported by the PMP.
Step 3: Open the Report
- Open the Prescriptions page (More → Prescriptions) and click CS Report.

CS Report opens the controlled substance report
Step 4: Choose the Dates and Review the Lines
- Click Dates and pick a range or a preset such as Last 7 days. The report opens on today.
- Tick Controlled only to show only lines marked as controlled.
- Check the lines. There is one line per medication: prescriptions, plus the Prescription section of completed treatment notes. The columns show Dispensed, Patient, Patient ID, Rx #, Medication, Controlled, Qty, Days supply, Prescriber, NPI, DEA, Payment, Location and Appointment. Use the Columns button at the top right to add Prescriber phone, Dispenser phone, DOB and Address.
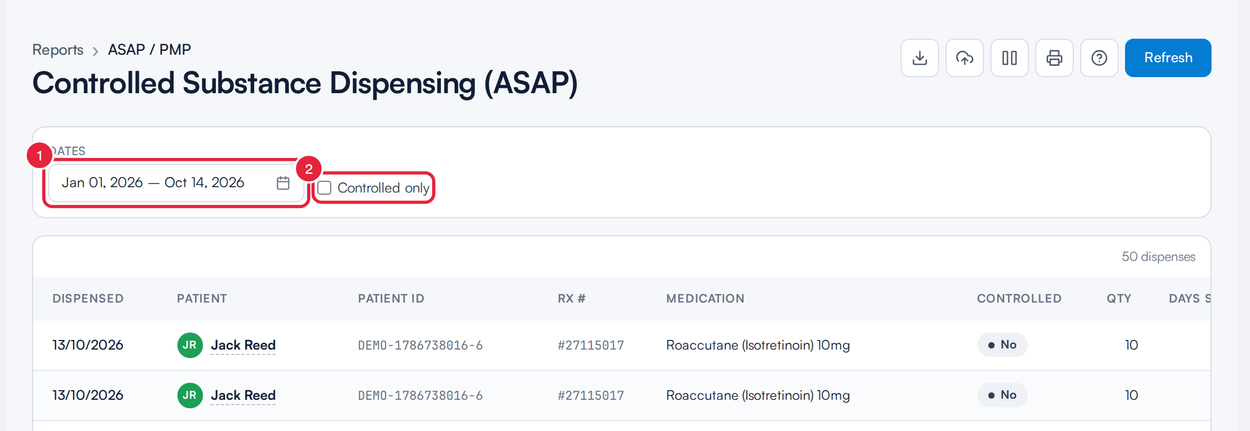
One line per medication dispensed
TIP: Click the Help button (the question mark at the top right) for a description of every column. Payment shows Insurance when the linked appointment was paid by an insurer, Private pay for any other payment, and Unknown when no payment is found.
Step 5: Link Missing Appointments
The payment type and the dispensing location come from the appointment a prescription is linked to. Where the Appointment column shows Link appointment, nothing is linked yet:
- Click Link appointment.
- Choose the client's appointment from the list. The cell changes to Linked and the line updates.
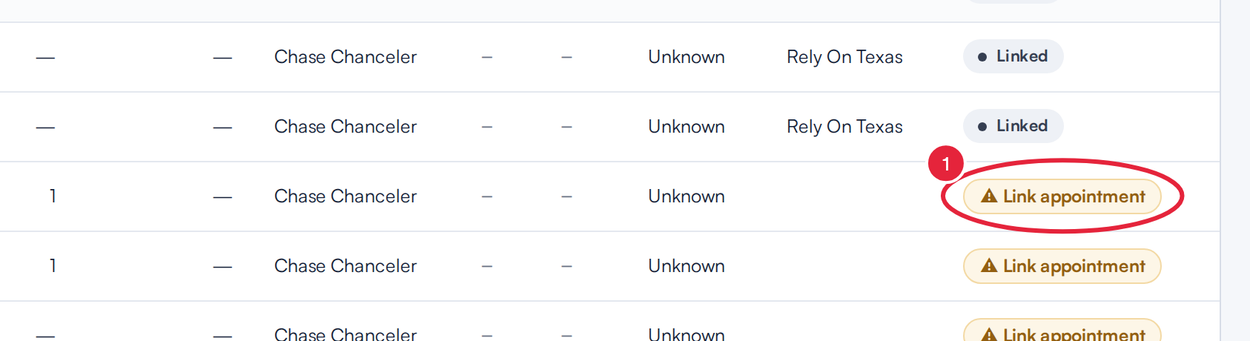
Link an appointment so payment and location can be reported
Step 6: Download or Push the File
- Click the Download button (the download arrow at the top right) and choose Export CSV for a spreadsheet of the report, or Export ASAP file for the ASAP 4.2B file to upload to the PMP yourself.
- Or click Push to PMP Clearing House (the cloud icon next to it) to upload the file to your state folder from Pabau. If you haven't connected your SFTP account yet, the settings window from Step 2 opens first.
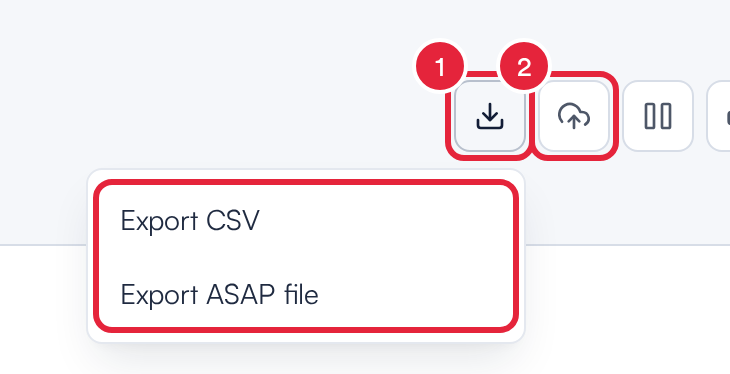
Download the file or push it straight to the PMP
Before anything is uploaded, the Push to PMP Clearing House window shows the Date range, the number of Dispenses and the Patients included. Submit as test file (TH07 = T) is switched on by default, so the Clearinghouse treats the upload as a test. Switch it off for a live submission, then click Push. Pabau confirms Report submitted to the PMP Clearinghouse (or Test file submitted…) and shows where the file was placed.
IMPORTANT: The file contains every line the report shows for the date range, so tick Controlled only first if you only report controlled substances. If there are no lines in the range, Pabau submits a zero report, which tells the PMP you had nothing to report for those dates.
What's next?
- How to Use the Prescriptions Page
- How to Set Up a Prescriber
- How to Set Up the DoseSpot Integration
- App Marketplace
Was this guide helpful? Let us know by voting below - your feedback helps us write clearer articles.
For more guides, browse the related articles below or use the search bar at the top of the page. You can also watch our video learning series, the Pabau Academy, or visit the Support page for additional help.