
When a delivery arrives, you can record the batch number, expiry date and quantity of every batch you receive. Pabau creates those batches as you book the delivery into stock, so you always know which batch a product came from, how much of it is left and when it expires.
NOTE: Viewing and tracking your batches afterwards (on the Batches tab of the Stock page, and the batch count on each order) is part of Batch Management, which is being rolled out to clinics gradually. If you don't see it in your account yet, message us via the in-app chat.
Step 1: Open the Order
Click Stock in the sidebar, open the Orders tab and click the order that has been delivered. Orders that have been placed open straight on the Receive items screen.
Step 2: Enter the Quantity Received
- Enter how many units of the product arrived in the Received box, or use the + and − buttons.
- Click Batch on that product's line. It becomes available once the line has a received quantity.
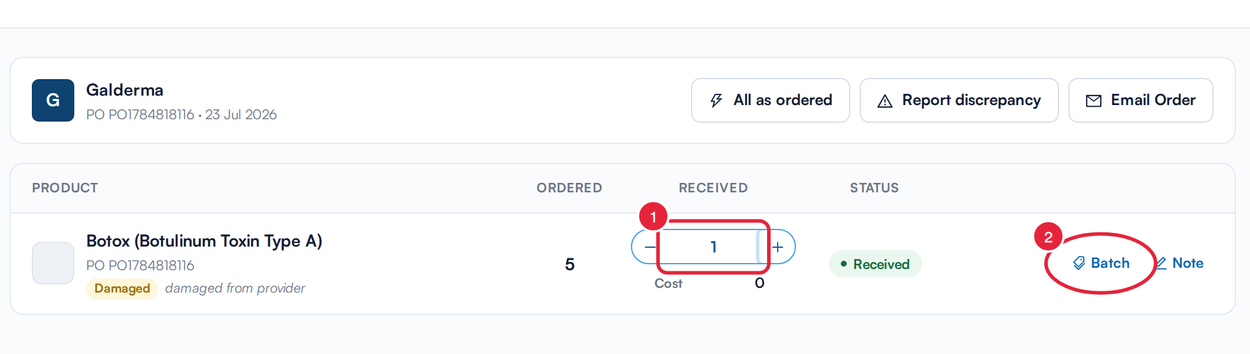
Enter the quantity, then open Batch
Step 3: Create the Batches
The Create Batch window asks you to allocate the items being received into one or more batches. For each batch:
- Type the batch number from the packaging into Enter batch no.
- Choose the Expiry Date.
- Enter the Qty in this batch.
- If the delivery contains more than one batch, click Add Batch and fill in the next one. Keep going until every item is allocated: the counter at the bottom then reads, for example, 6 of 6 allocated. Use the bin icon to remove a batch row.
- Click Save batches.
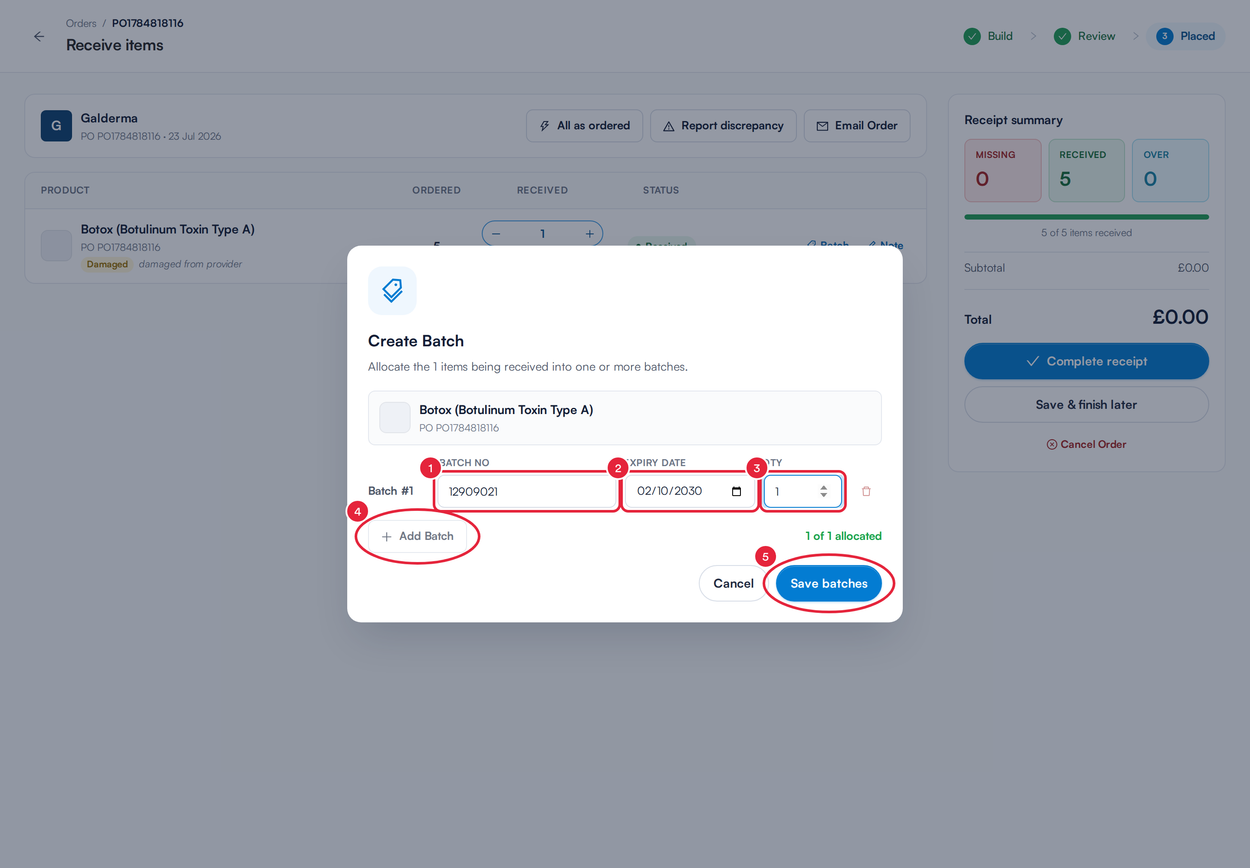
Batch number, expiry date and quantity for each batch
NOTE: Add Batch is greyed out once the full quantity is allocated. To split it differently, lower the quantity of an existing batch first.
Step 4: Complete the Receipt
- The line now shows how many batches you've added, for example 1 Batch. Click it to check or change them.
- When every line is filled in, click Complete receipt.
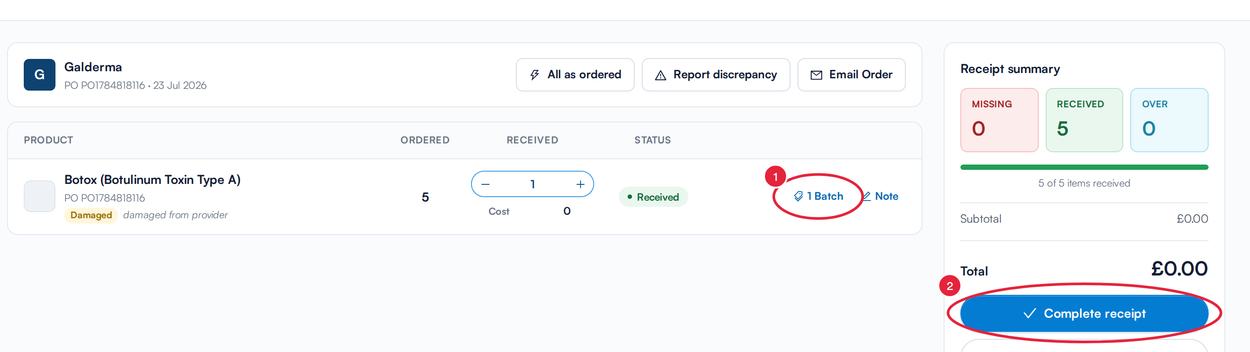
The batch count on the line, and Complete receipt
The confirmation lists the batches that will be created, each with its batch number, expiry date and quantity.
- Check them and click Yes, complete receipt. The items are added to stock and the batches are created.
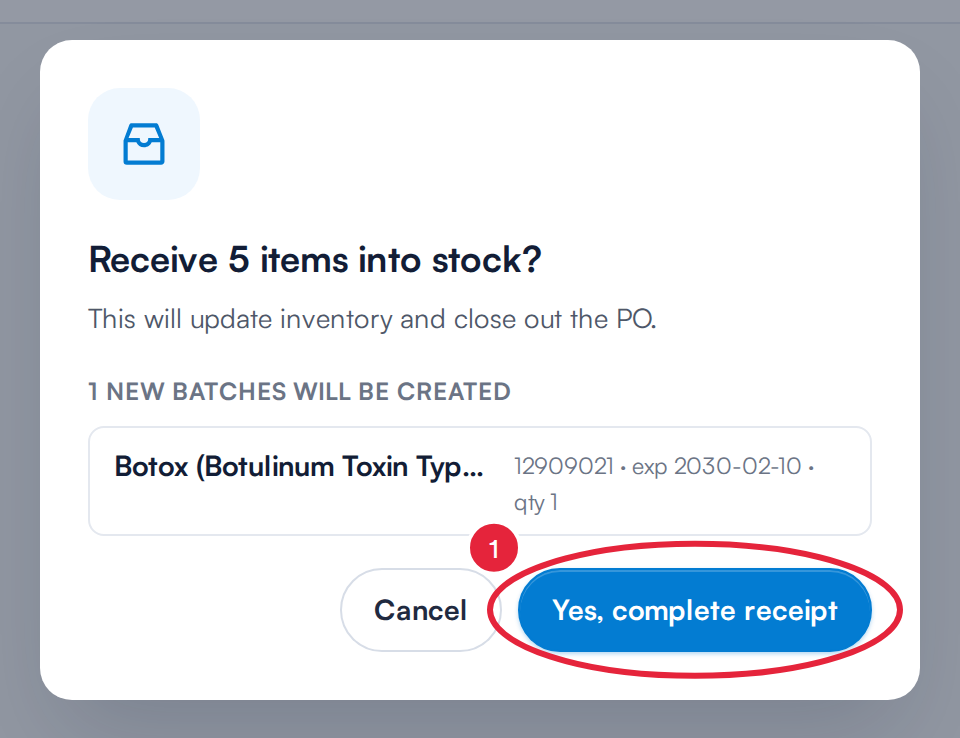
Confirm the receipt and the new batches
IMPORTANT: If a product is set up to require batch numbers and expiry dates, you can't complete the receipt until you've created its batches: Pabau shows <product> requires batch details. Create a batch for it before completing the receipt. The batch quantities for a line must also add up to the quantity you're receiving.
Step 5: Merge or Rename Duplicate Batches
If this location already holds a batch of the same product with the same batch number and expiry date, Pabau stops and shows Duplicate Batches, listing the existing batch, its location and quantity.
- Click Yes, Merge Batches to add the new quantity to the existing batch and complete the receipt. Or click Cancel, open Batch on the line again and change the batch number.
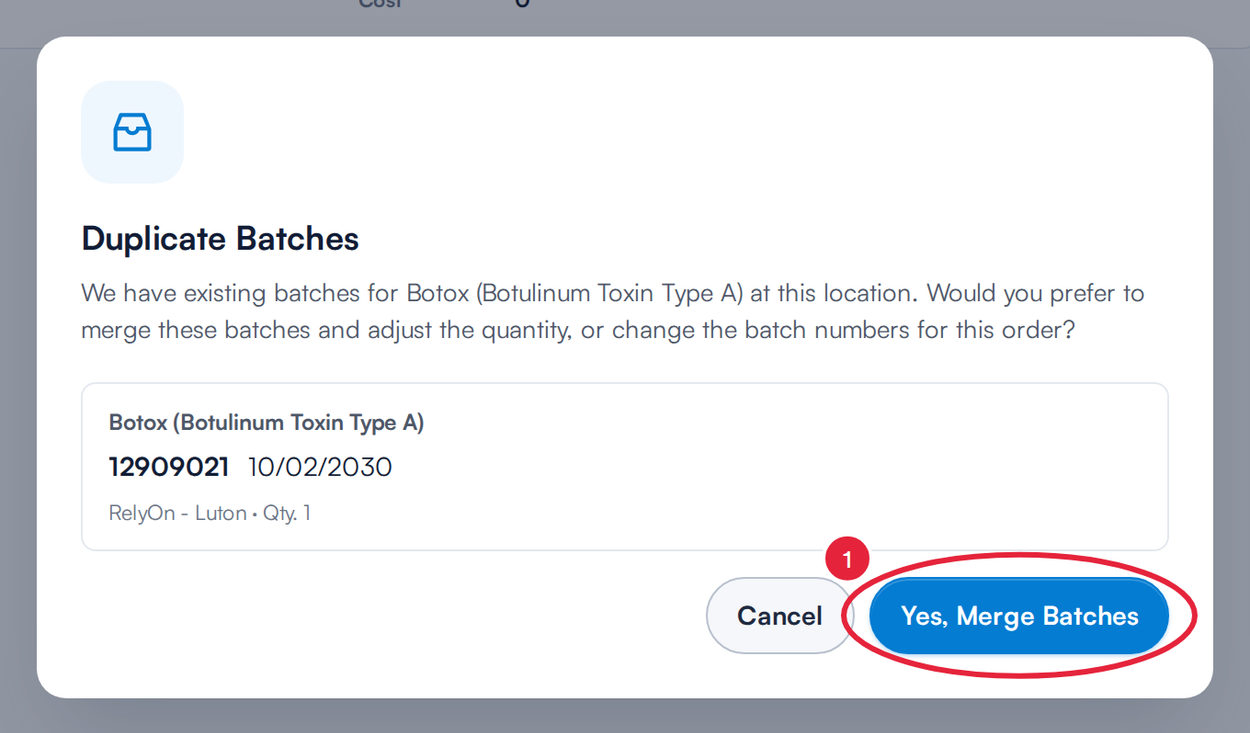
Merge into the existing batch, or go back and rename
Step 6: Check the Batches on the Order
Back on the Orders tab, the order shows how many batches were created from it.
- Click the batch count, for example 2 Batches, to see each batch number, product, quantity and expiry date.
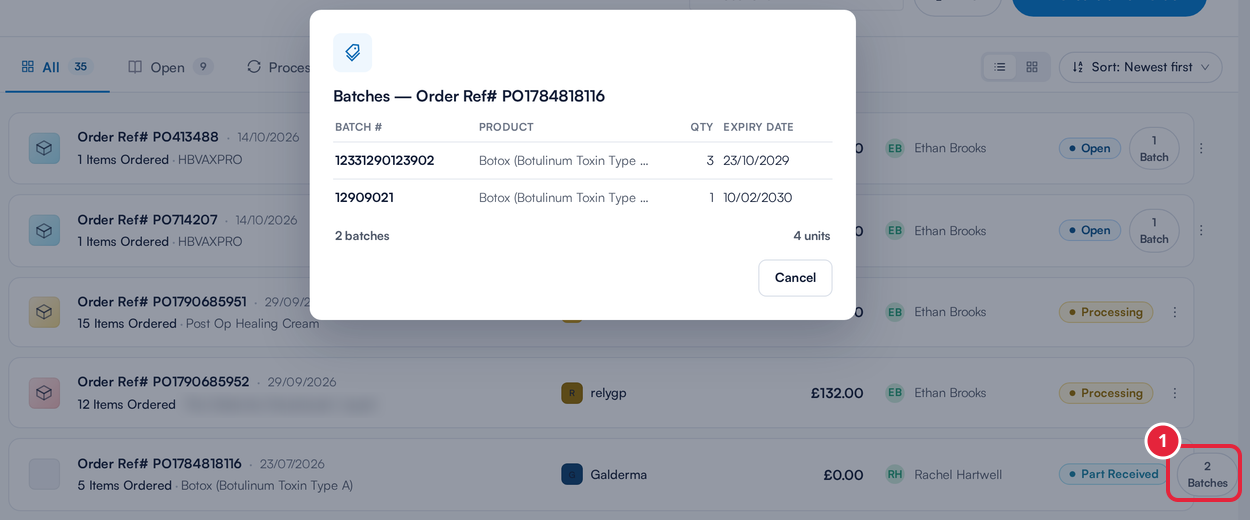
The batches created from an order
The batches also appear on the Batches tab of the Stock page, where you can follow the doses left in each one and see which batches are close to expiry.
WARNING: Deleting an order also permanently deletes the batches created from it, including their usage history. Pabau warns you before you confirm.
What's next?
Was this guide helpful? Let us know by voting below - your feedback helps us write clearer articles.
For more guides, browse the related articles below or use the search bar at the top of the page. You can also watch our video learning series, the Pabau Academy, or visit the Support page for additional help.