
Ordering a Quest test starts where you already are — on the client's record. Pabau finds the patient in your Quest organisation, opens Quest on the right patient, and then pulls the finished order back onto the client's card as a lab request.
This guide walks the whole loop: requested in Pabau, ordered in Quest, and back in Pabau against one patient record.
NOTE: Quest Diagnostics must be connected under Setup > Labs first. See How to Connect Quest Diagnostics to Pabau.
Step 1: Start a Lab Request on the Client's Record
Open the client's record, go to the Lab requests section, and start a new request. Pick the panels and tests you need, then choose Quest Diagnostics as the lab.
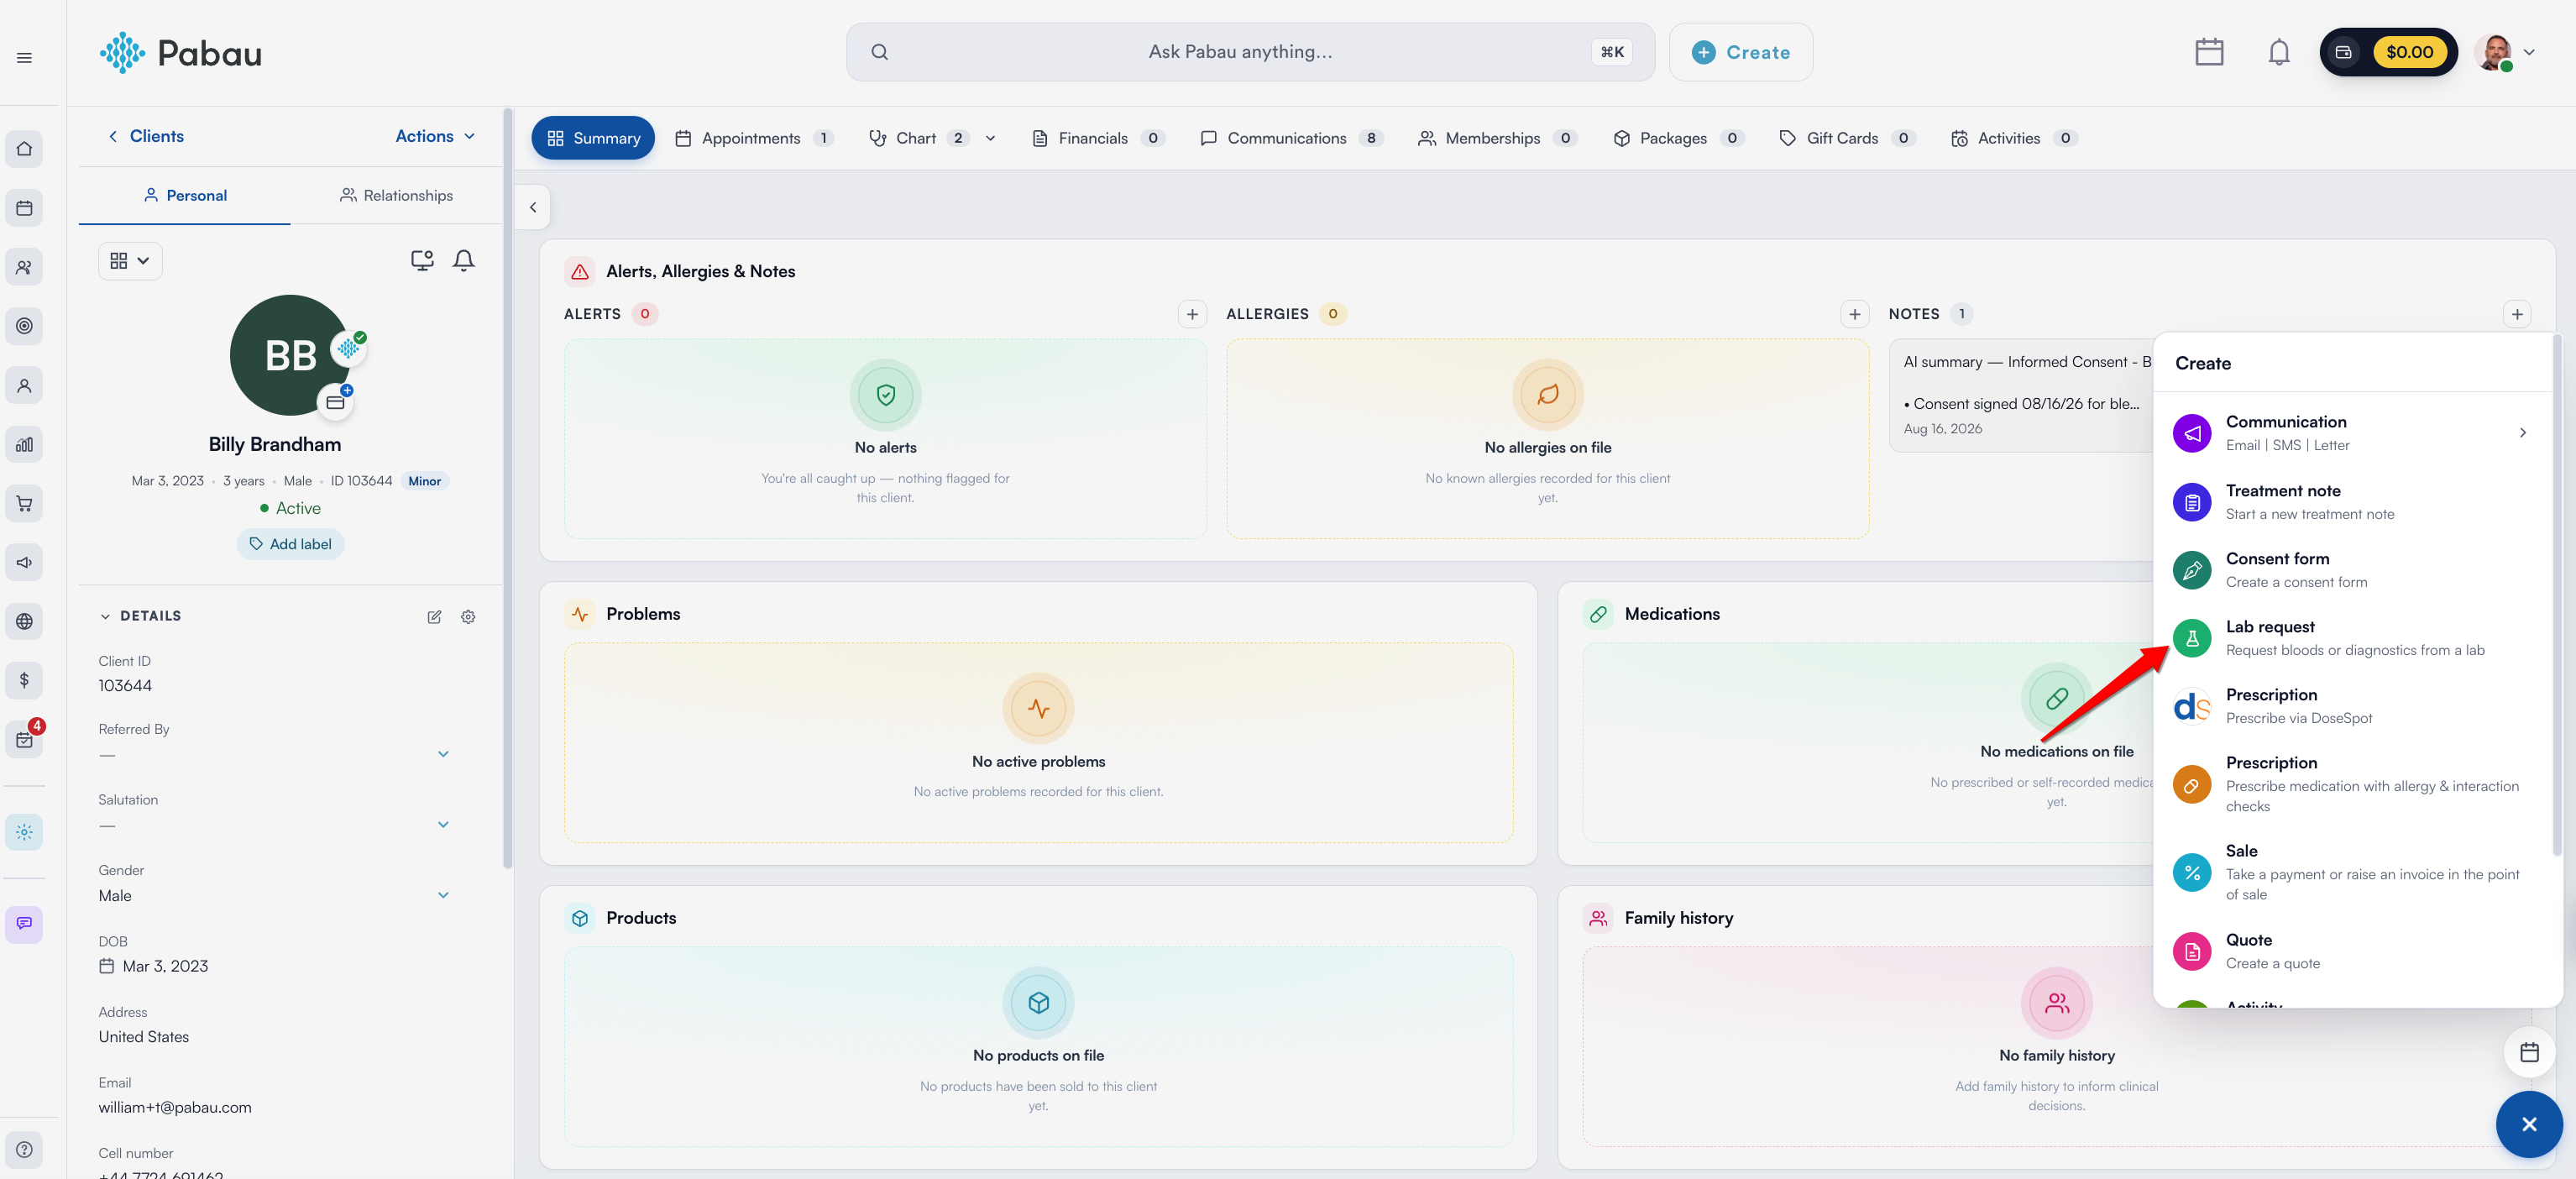
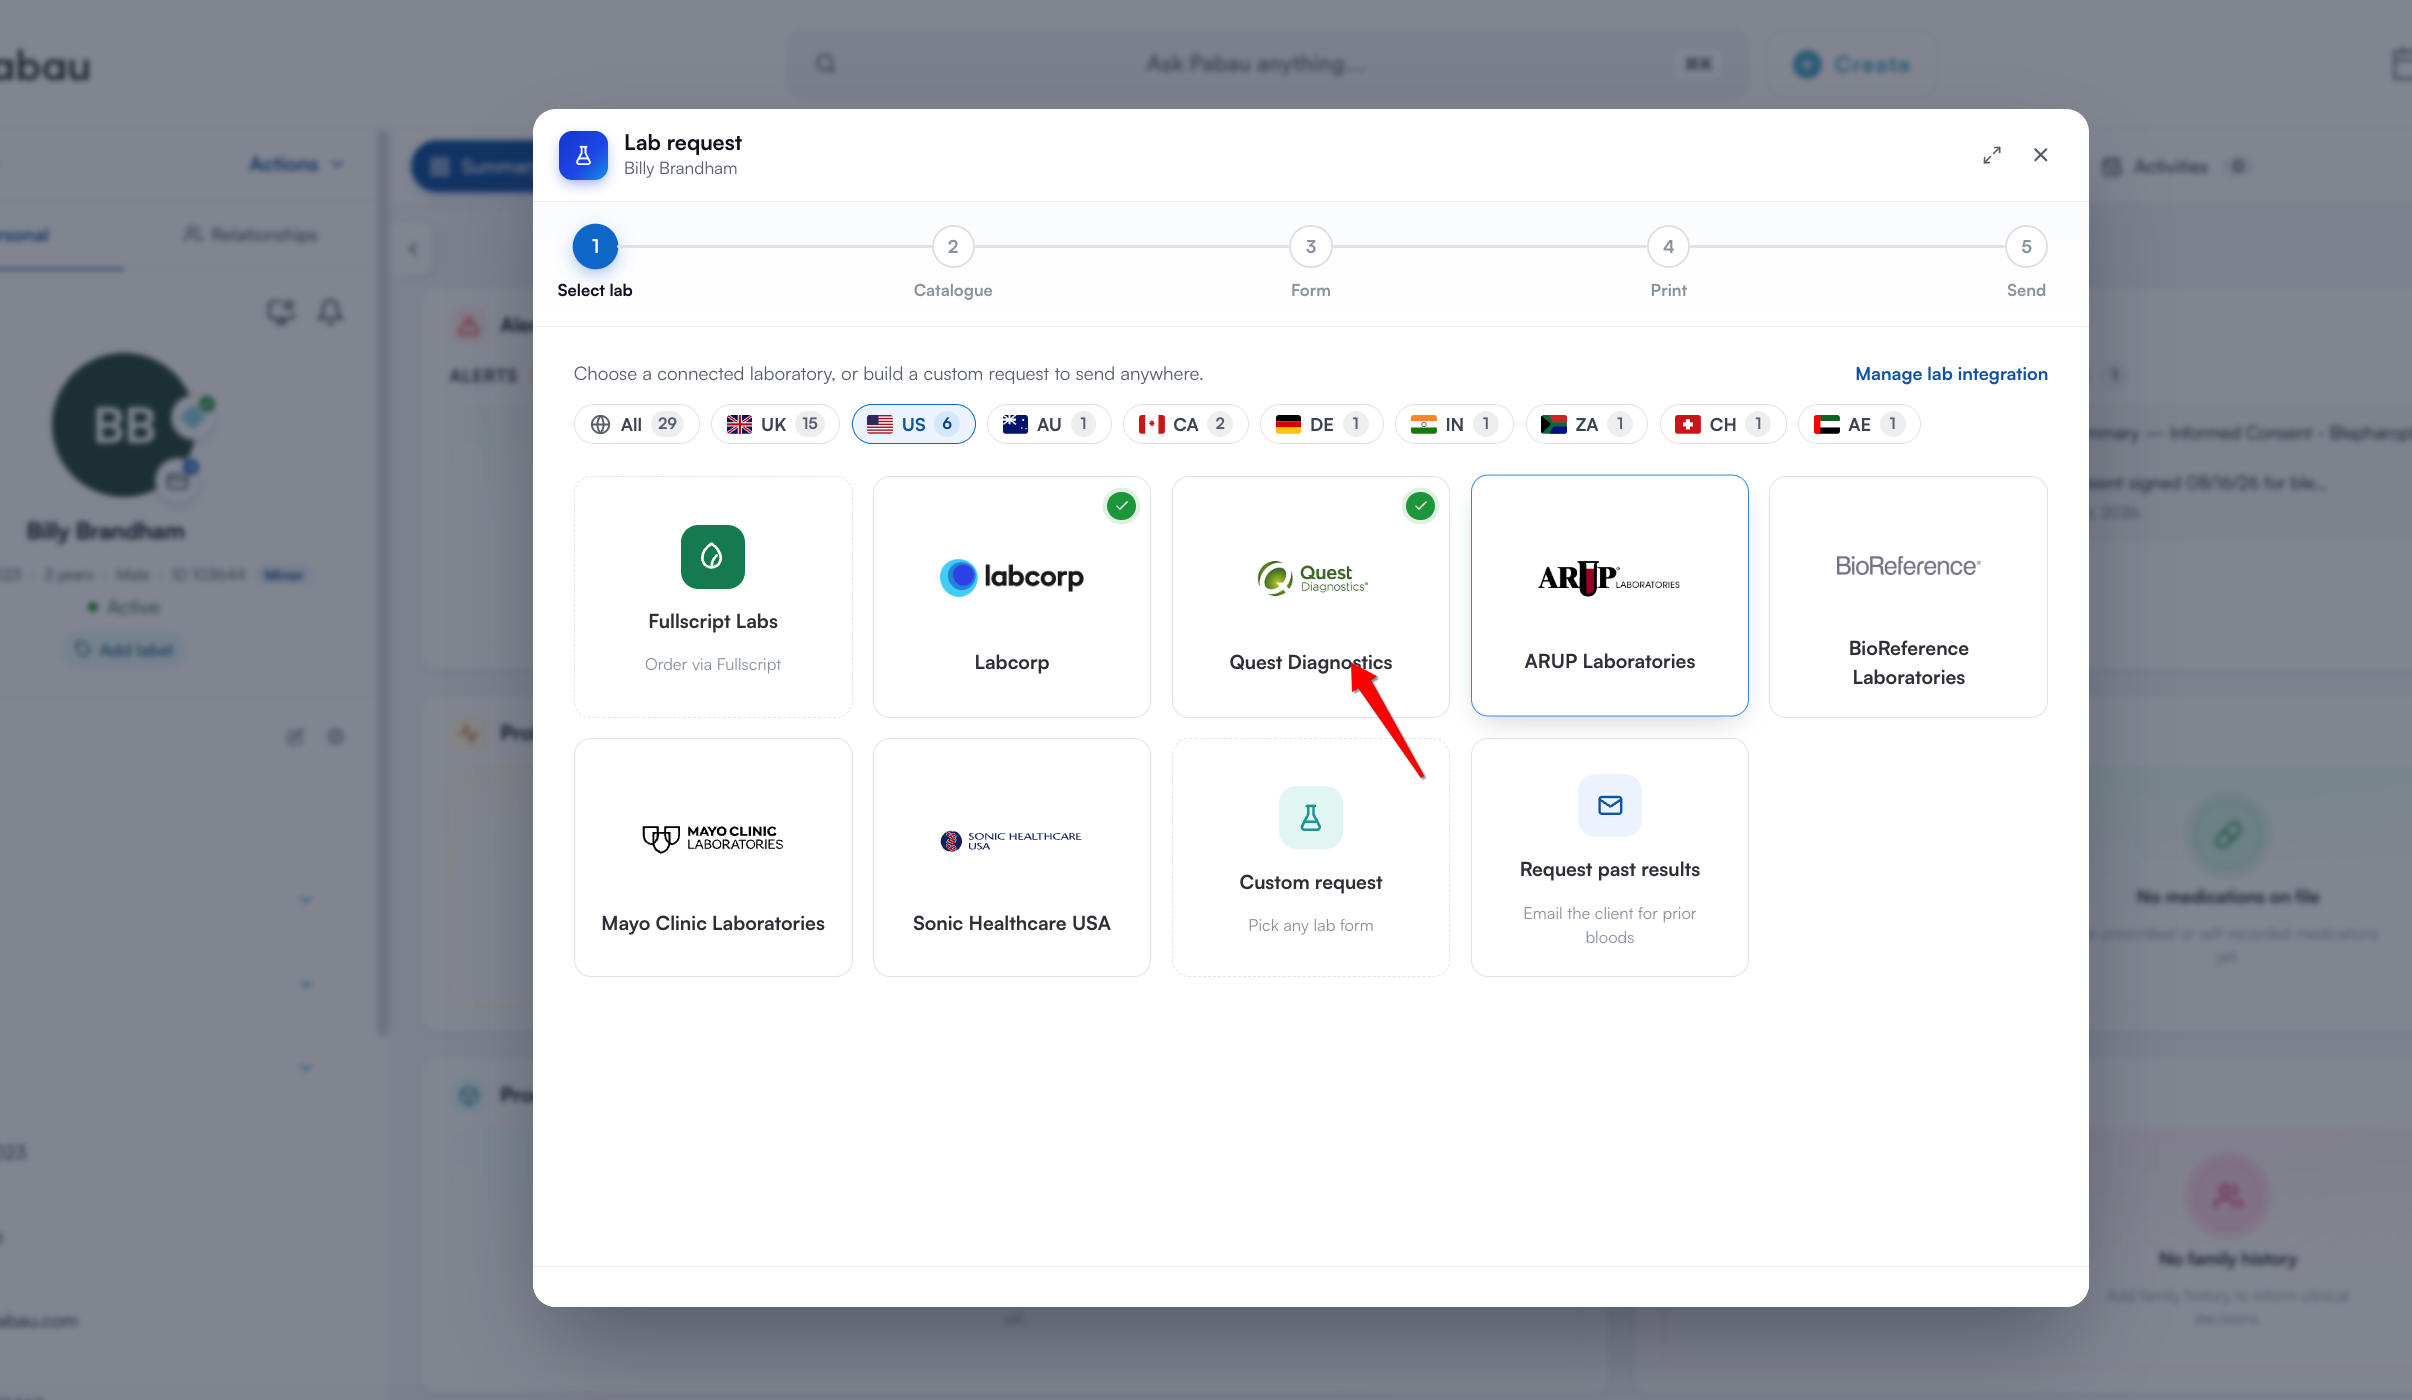
Step 2: Let Pabau Find the Patient in Quest
Before anything else, Pabau checks whether this patient already exists in your Quest organisation. It signs in securely and searches your Quest patient list, matching on exact name and date of birth — so a near miss is never treated as the same person. This takes a few seconds.
IMPORTANT: The client must have a valid date of birth in Pabau. Without one, Pabau cannot match them in Quest and will ask you to add it before continuing.
Step 3: Create the Patient in Quest If They Are New
If there is no match, Pabau tells you the patient is not in Quest yet and offers two routes:
- Create in Quest & continue — Pabau registers the patient in your Quest organisation using the name, date of birth and sex already on the client's record, then opens the order screen. Nobody retypes a date of birth, and nobody creates a duplicate by hand.
- Open Quest patients — review the list in Quest yourself and place the order from there.
NOTE: Quest requires the patient's sex (Male or Female) to create a record. If the client's gender is not set in Pabau, set it first and the create option becomes available.
NOTE: If Quest flags a possible existing patient with similar details, nothing is created — Pabau tells you so and points you to the Quest patient list to review. This is Quest's own duplicate protection working as intended.
Step 4: Build and Release the Order in Quest
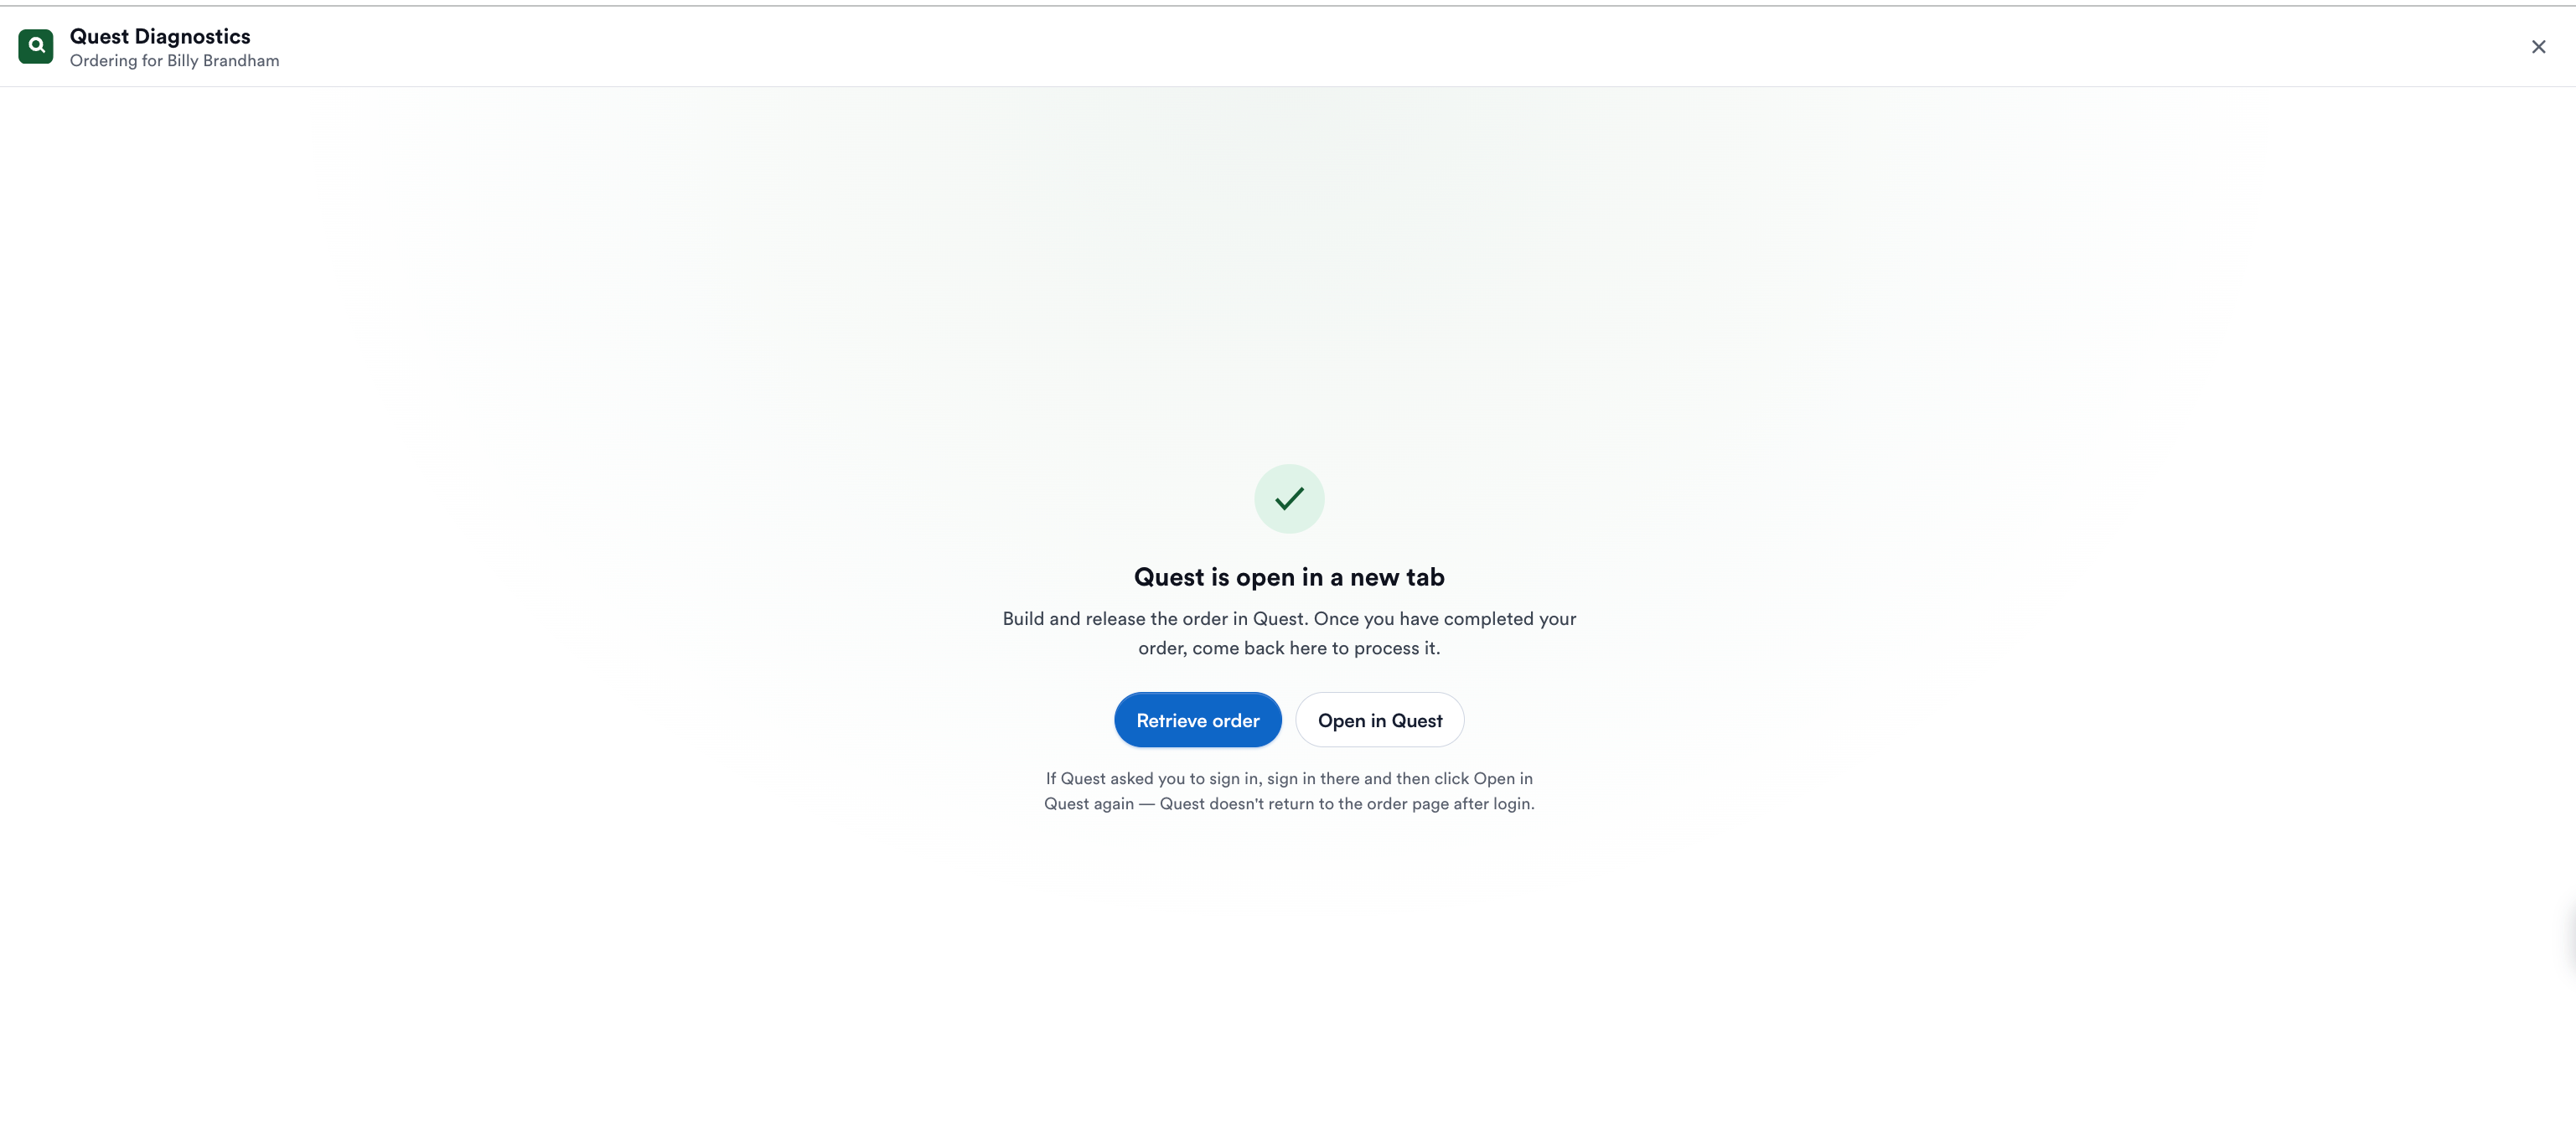
Quest opens in a new tab, already on its new lab order screen for the correct patient. From here you build the order exactly as you always have — choose the panels and tests, add the diagnosis codes, set the collection details, and submit it in Quest. None of that changes. Pabau's job was to get you here, on the correct patient, without a paper request form.
TIP: If Quest asks you to sign in when the tab opens, sign in there and then select Open in Quest again in Pabau — Quest does not return you to the order screen after a login, so the second click takes you straight there.
Step 5: Retrieve the Order Back Into Pabau
Once the order exists in Quest, come back to the Pabau tab and select Retrieve order. Choose how far back to look:
- Last hour — for the order you have just placed.
- Today.
- Last 3 days.
Pabau reads the orders straight from Quest, most recent first, and highlights the ones belonging to the client whose record you are on with a This client badge — so you can see immediately which requisition is theirs. Each row shows the requisition number, the date of birth, and the tests ordered.
NOTE: Orders can take a moment to appear after saving in Quest. If the list is empty, use Refresh, or widen the window to Today or Last 3 days.
Step 6: Import the Order
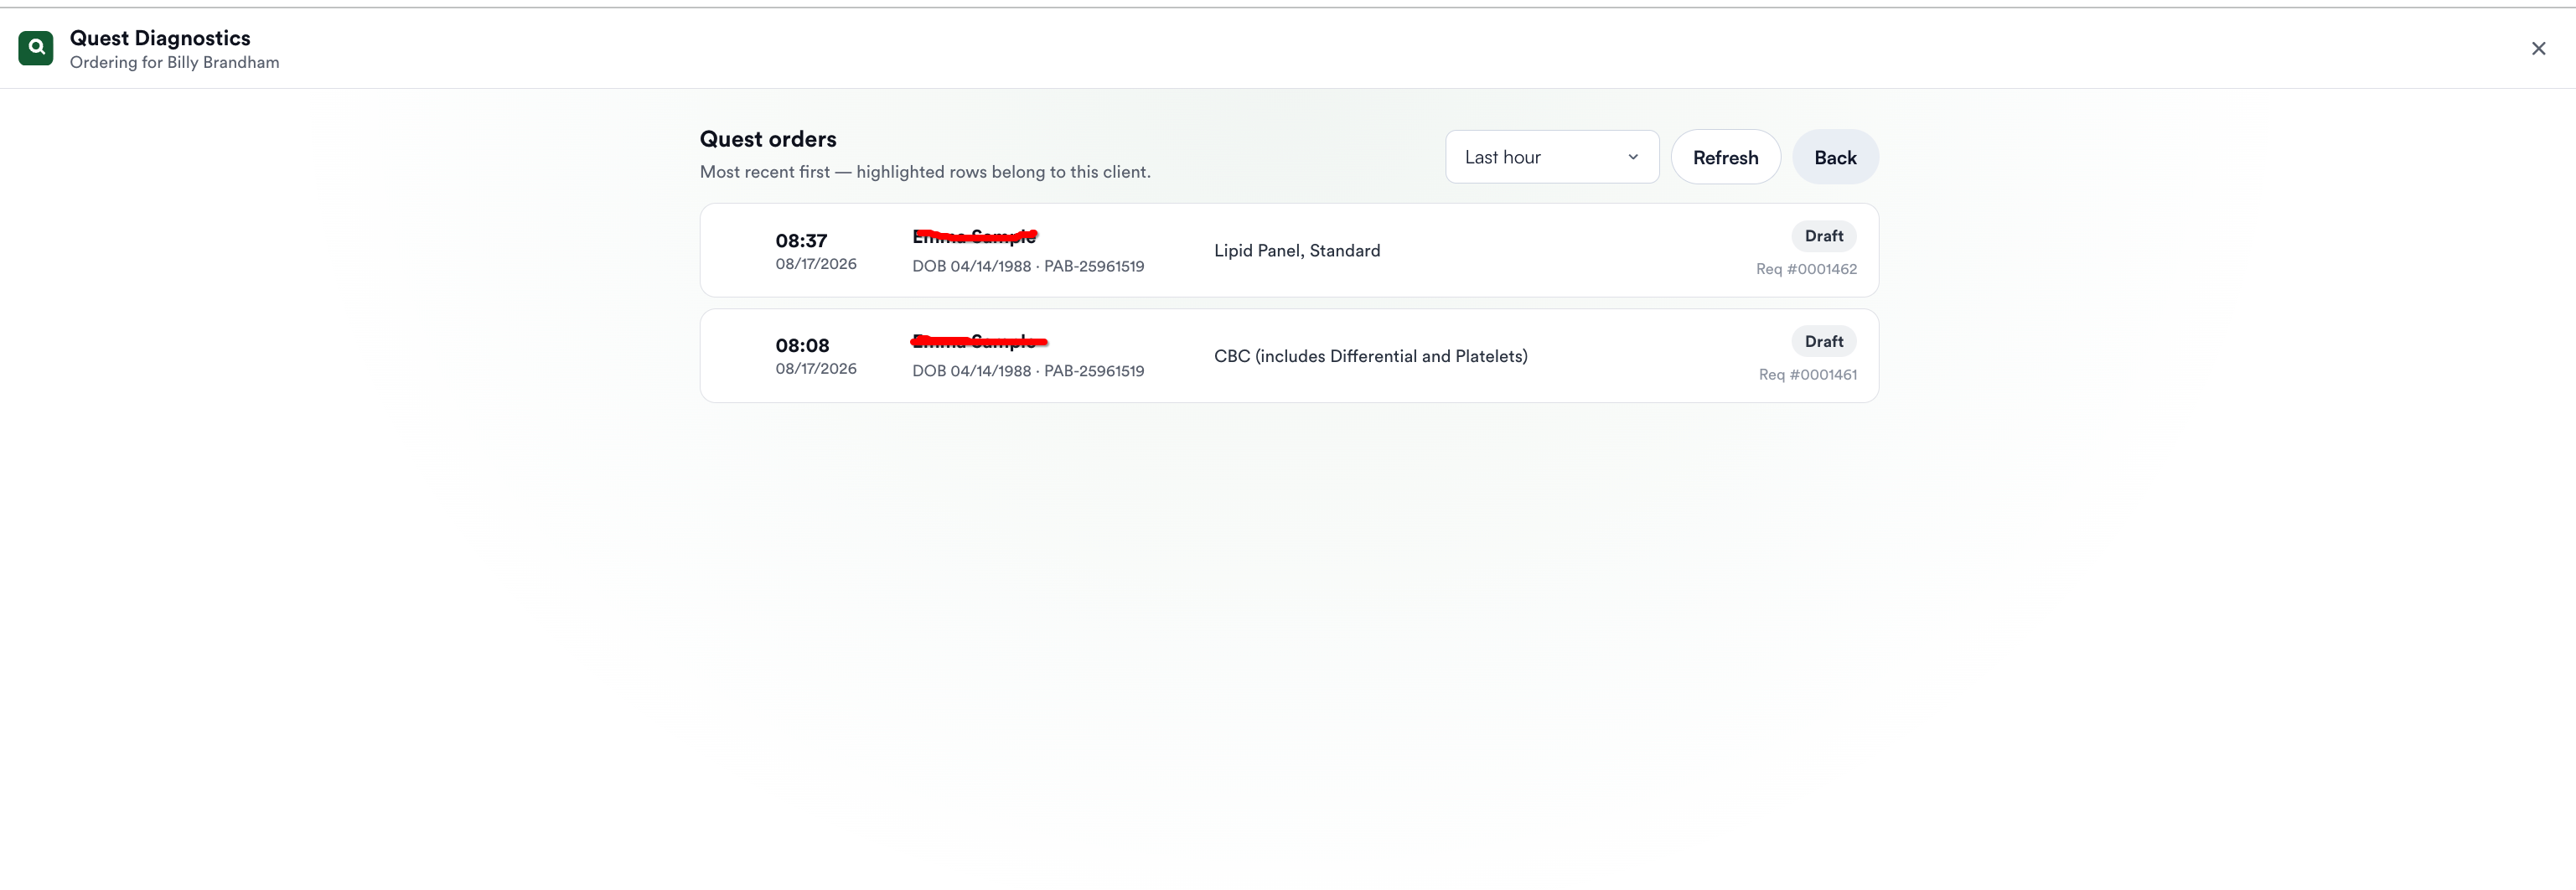
Select the requisition and choose Import to Pabau. The order is attached to the client's record as a lab request, so it sits in Pabau alongside everything else for that patient. Imported rows are marked Added to Pabau.
Rows Pabau will not import are labelled with the reason:
- Already in Pabau — a lab request already carries this requisition.
- Doesn't match this client — the order belongs to a different patient.
Step 7: Print or Email the Request Form
With the order retrieved, you can also fetch the Quest request form itself — Print request form to print it for the collection, or Email to client to send it to the patient ahead of their appointment.
What Happens Next
When the lab issues the result, the Quest sync brings it back to the very same record — no one chases a fax. Pabau sweeps your connected Quest account automatically, roughly every half hour, and a result for an order Pabau already holds fills that order rather than creating a duplicate.
TIP: To see everything Quest holds for your clinic, or to pull in historical results, see How to Sync Quest Diagnostics Results into Pabau.
By following these steps, the whole loop stays on one patient record: requested in Pabau, ordered in Quest, and back in Pabau.
Was this guide helpful? Let us know by voting below - your feedback helps us write clearer articles.
For more guides, browse the related articles below or use the search bar at the top of the page. You can also watch our video learning series, the Pabau Academy, or visit the Support page for additional help.