
When a client is booked for more than one service on the same day and each service has its own pathway, Pabau allows you to merge those pathways into one. This means the client only needs to check in once, complete their forms once, and hand the device back to the staff member once, rather than repeating the process for each service separately.
Step 1: Navigate to Pathway
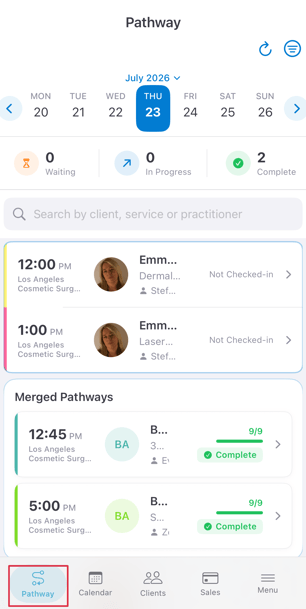
Open the Pabau iOS app and tap "Pathway" in the bottom left corner of the screen. This opens the Pathway view for the current day, showing all appointments along with their check-in status.
Step 2: Select the Client
Find the client's appointment in the list and tap on it, you will be taken to the "Select a Pathway" screen.
If the client has more than one service booked for the same day and each of those services has its own pathway set up, you'll see the Merge pathways option available.
From here, you can merge the pathways together or start an individual pathway for one service at a time.
Tap "View" on the Merged Pathway card should you wish to proceed with the merge.
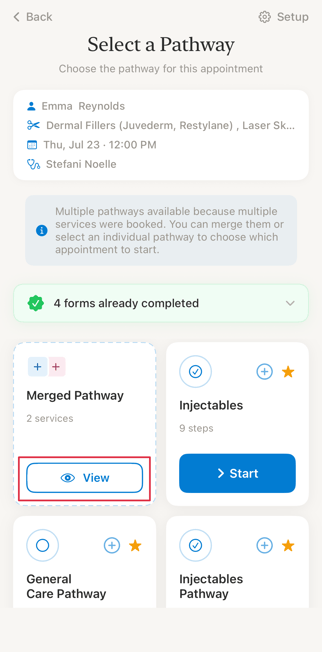
TIP: If the client has already completed some forms prior to their appointment, for example through the client portal, you'll see a banner showing how many forms have already been completed. These steps will be pre-filled or skipped automatically in the pathway.
Step 3: Review and Merge the Pathways
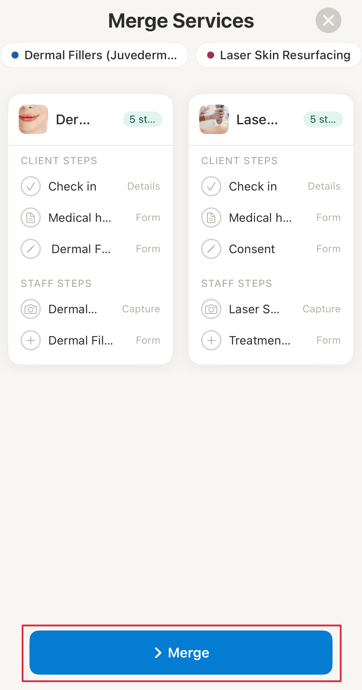
The Merge Services screen shows the two service pathways side by side, each displaying their client steps and staff steps. Review the steps included in each pathway, then tap "Merge" at the bottom of the screen.
Step 4: Start the Merged Pathway
Once merged, you'll see a single Merged Pathway card showing all combined steps in one list, split into Client Steps (check-in, medical history, consent forms) and Staff Steps (photos, treatment notes, and other clinical steps).
You can also add or remove steps from the merged pathway at this stage if needed, by tapping "Add step" or swiping a step to remove it.
When you're ready, tap "Start" at the bottom of the screen.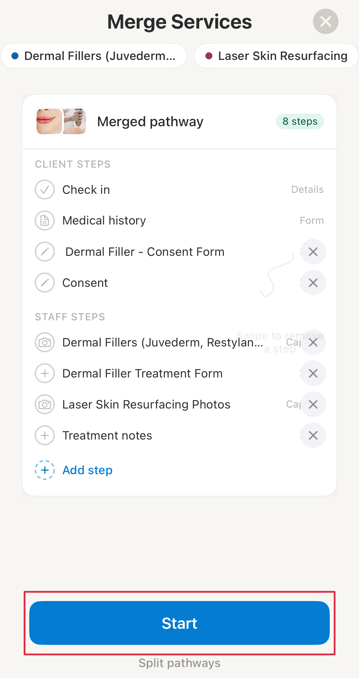
NOTE: If you change your mind, you can tap "Split pathways" below the Start button to return the services to separate individual pathways.
Step 5: Client Check-In
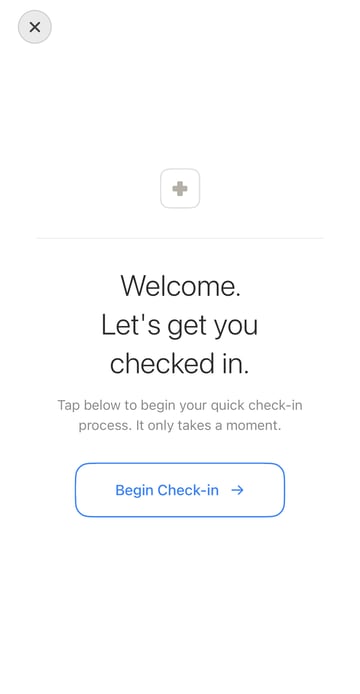
The app will display a welcome screen prompting the client to begin their check-in. Hand the device to the client and ask them to tap "Begin Check-in."
The client will then see a confirmation screen showing their appointment details, including the practitioner, services, time, and date. They tap "Continue" to proceed to the pathway steps.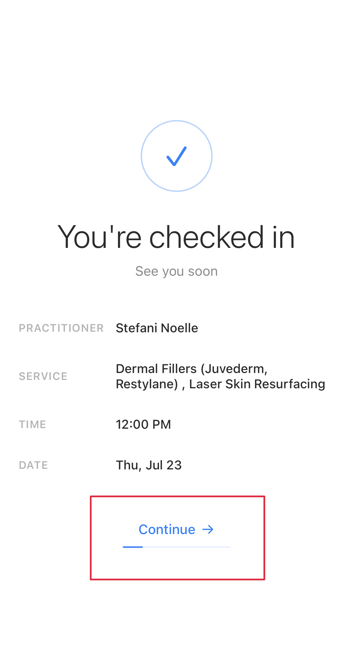
Step 6: Client Completes Their Steps
The client will be guided through the client-facing steps of the merged pathway. These typically include:
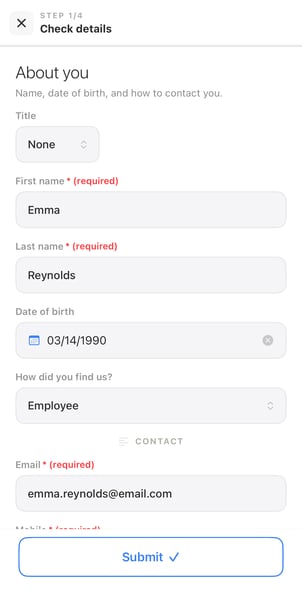
Check details (Step 1): The client reviews and confirms their personal details, including name, date of birth, and contact information, then taps "Submit."
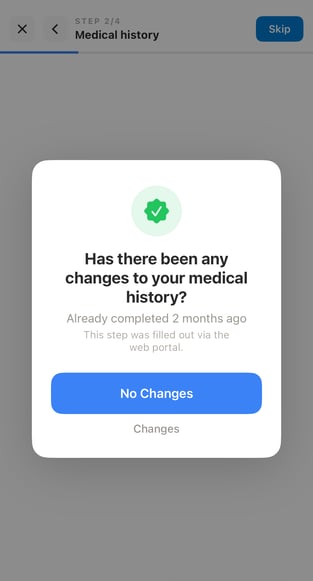
Medical history (Step 2): If the client has previously completed their medical history, they will be asked whether there have been any changes. They can tap "No Changes" to confirm, or "Changes" to update their history.
Consent forms (Step 3 onwards): The client reads and completes any consent forms included in the merged pathway, tapping "Complete" at the bottom of each form.
Step 7: Hand the Device Back to Staff
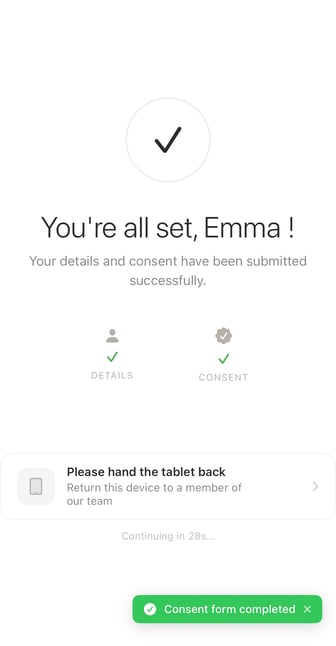
Once the client has completed all their steps, they will see a confirmation screen saying "You're all set" with a summary of what was submitted, including details and consent. A prompt will appear asking them to hand the tablet back to a member of the team.
Step 8: Staff Complete Their Steps
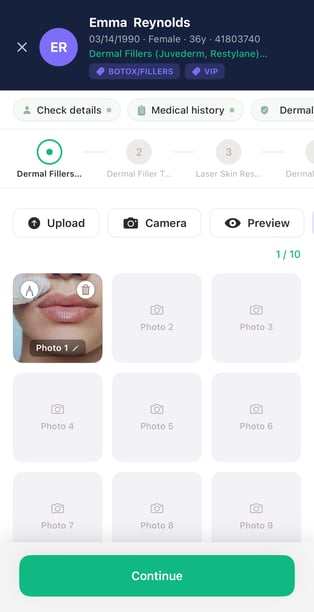
Once the device is back with the staff member, the pathway will continue to the staff-facing steps.
These may include capturing photos, completing treatment notes, and filling out any clinical forms. Tap "Continue" to move through each step.
Step 9: Complete the Pathway
Once all steps have been completed by both the client and the staff member, the app will display a "Pathway Complete!" screen confirming that the appointment is finished and all records have been saved. Tap "Close" to return to the Pathway view.
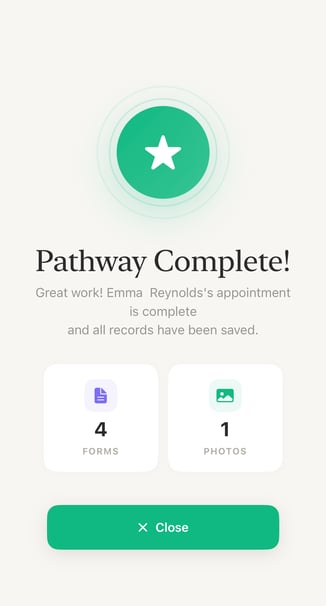
With the pathway complete, all forms, photos, and treatment notes are saved to the client's record automatically, keeping everything in one place without the need to repeat the process for each service.
Was this guide helpful? Let us know by voting below - your feedback helps us write clearer articles.
For more guides, browse the related articles below or use the search bar at the top of the page. You can also watch our video learning series, the Pabau Academy, or visit the Support page for additional help.