
Table of Contents:
1. How to Create a Lab Request
2. How to Submit and Receive Lab Requests
3. How to Review and Share Lab Results
How to Create a Lab Request
Step 1: Navigate to the Client Card
Start by logging in to your Pabau account using your login credentials. Navigate to the search bar at the top of the page and type at least three letters of the client's name for whom you wish to create a lab request.
Step 2: Create a Lab Request
Once you view the client's profile, click the Create button, represented as a blue plus sign at the bottom right corner of the page, to reveal the option to create a lab request.
Step 3: Select Lab
Choose the lab you wish to send your request to. To use Pabau for your request, click "Lab Request Form." Proceed to choose The Doctors Laboratory or a custom Lab Request Form you've created to continue.
NOTE: The Doctors Laboratory (TDL) is only available for integration with clinics in the United Kingdom. For more information on how to integrate TDL, refer to this guide.
Step 4: Select Lab Form
Select the form you want to use to create your lab request.
Step 5: Populate the Request Form
Populate all fields of the form with detailed and precise information. Some required fields include choosing the doctor requesting the lab test and selecting the specific lab test from the options you've set up. Note that you can select only from the tests mapped in the catalog.
NOTE: Ensure that the lab request is linked to an appointment.

For more information regarding Lab Integrations, please review this article.
Step 6: Request Lab
After populating all fields, click "Request Labs" to finalize the request.![]()
A pop-up window will appear, prompting you to select the lab, specify who will pay for the lab request, and choose the preferred result delivery option. Once completed, click Submit.

By following these steps, you can create a lab request that is complete and properly linked to the patient's appointment.
How to Submit and Receive Lab Requests
Before proceeding, ensure that your custom labs, lab tests, and lab request forms have been properly set up. You can follow the steps in this guide to complete the setup. To submit lab requests, the following must be in place:
- Custom lab profiles for each lab you work with, including the "Provider Number" and "Email" fields.
- Lab services and lab codes created.
- A properly configured lab request form, including the required "Lab tests", "Fasting", and "Requesting Doctor" fields.
Step 1: Create a Lab Request
Log into your Pabau account and open the client card of the patient for whom you want to create a lab request.
In the client card, click on the Create button in the bottom right corner, then select "Request Labs".

Step 2: Fill Out the Lab Request Form
Click on "Lab Request Form" and select the appropriate form for this request.
Fill out all required fields, making sure that the "Lab tests", "Fasting", and "Requesting Doctor" fields are completed, along with any other fields that are required in your form.


Step 3: Select a Lab and Submit the Request
Once the form is completed, click Request Labs. In the lab order modal that appears, select the lab you want to send the request to.

If there are errors in the request, a "Warning" label will appear in the bottom left corner of the modal. Hover over it to see what needs to be corrected.
If everything is correct, the label will show "Good". Click "Submit" to send the request.
A confirmation message will appear, indicating that an email has been sent to the lab at the email address saved in its profile.
Step 4: How the Lab Receives the Request
The lab will receive a system-generated message with a link to the electronic lab request.
The email instructs them to reply directly to the same email, which is a hard-coded address containing your Pabau account ID.

This ensures that lab results are always sent to the correct location, preventing manual errors.
Step 5: Reviewing Lab Results in the Lab Inbox
When the lab sends back the results as an email attachment, they will be delivered to your Lab Inbox.
To access the Lab Inbox, navigate to Clients in the left sidebar menu, then select "Labs" from the options.
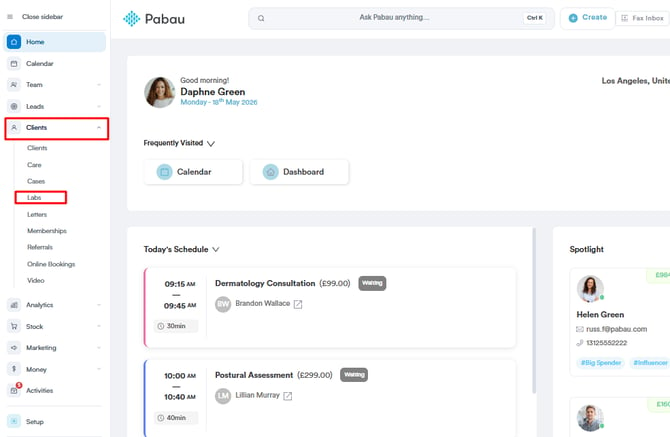
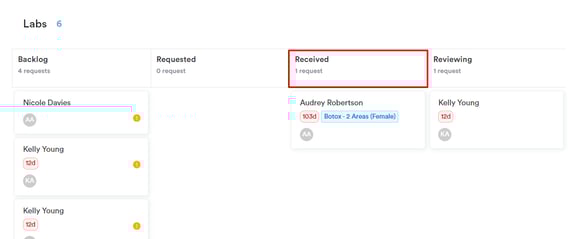
On the Labs page, you’ll see all lab requests issued by your practice, organized into four categories: Backlog, Requested, Received, and Reviewing.

Click "Lab Inbox" in the top right corner to view all received results. Here, you can see:
- When results were received
- The lab provider's name
- Email subjects and attachment names
- Whether the results have been matched to a request
Step 6: Matching Lab Results to Requests
To match lab results with a request, click "Choose Lab Request" and select the corresponding request.

Click the arrows in the Match Lab Request column to confirm the match.

Once matched, the status of the request updates to Matched, and the results attachment is automatically added to the Documents subtab in the EMR/Chart section of the patient’s client card.
To view the results from within the Lab Inbox, simply click on the attachment.
By following these steps, you can easily submit lab requests and match results to patient records.
How to Review and Share Lab Results
Step 1: Navigate to Clients
Start by logging in to your Pabau account using your login credentials. Expand the Clients tab in the left sidebar menu, where you will find the Labs sub-tab.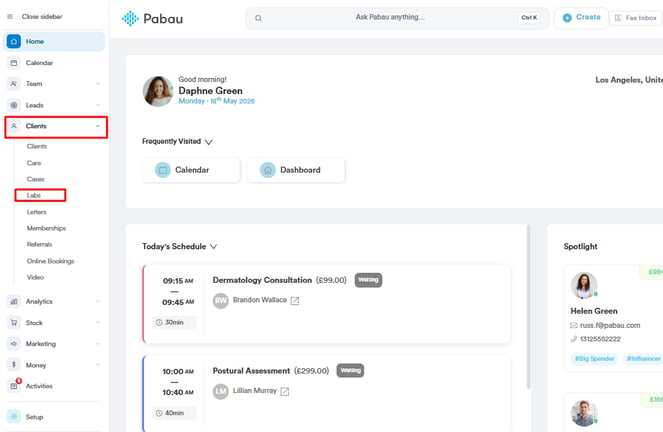
Step 2: Locate the Lab Result
You will need to check the Received stage to locate your desired lab result.
Step 3: Review the Lab Result
Once you have found the lab result that you would like, you can click on the client name to open their client card and review the details.
The client card will open on the Labs tab. The screen will focus on the results, allowing you to access and review the client's lab results quickly.
To open and move lab results to the Reviewing stage, click the expand button on the far right side of the result. This action will open the lab results for detailed review and move them to the Reviewing stage for further processing.

Click on the test group to expand it. This action will reveal additional information about the tests within that group.
Once the test group is expanded, you will see the following information for each test:
- Test Name: The name of the specific test
- Observation Range Scale: The scale used to interpret the test results (e.g., normal, high, low)
- Observation Range: The range of values considered normal for the test
- Observation Value: The actual result of the test for the patient
NOTE: If a test result is abnormal, the test name will be highlighted or colored in red to draw attention to it.
![]()
Step 4: Share Lab Results
To share a lab result, you must click on the three-dot button in the upper right corner of the results, which will reveal a menu of actions you can take, such as printing the results or sharing them with clients.
To share the lab result with the client, click on the "Share" button.

You can select your preferred method of sharing the results.

Step 5: Share via Email
Another way to share lab results with a client is by attaching the results to an email. When composing an email to the client, you can attach the lab results file to the email before sending it. This option allows you to share the results securely and conveniently with the client.
When composing an email, at the bottom of the screen, you will find "Client Problems," which contains a drop-down menu of all client card-related information. This feature allows you to access and reference client information easily.

By following these steps, you can review and share lab results.
For more guides, refer to related articles below, select additional guides, or use the search bar at the top of the page. These guides will help you get the most out of your Pabau account.
Additionally, to help you fully utilize and understand your Pabau account, we recommend exploring additional guides and resources offered at the Pabau Academy. It offers in-depth video tutorials and lessons, offering a holistic learning experience that can equip you with the essential skills for achieving success with Pabau.