In this article, we'll cover the steps to managing a wait list.
Operating a wait list can be useful if you have people waiting for an appointment but you're fully booked. If a slot opens up, you can run a report to see which clients are waiting, allowing you to contact them and fill the slot efficiently.
Step 1: Set Up Client Labels in Pabau
To begin, log into your Pabau account. From the left sidebar menu, click on Setup. Under the Business section, click on Data, then select Labels.
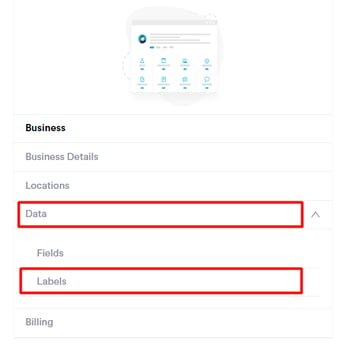
Follow the steps provided in this article to create client labels.
For better organization, it is recommended to create service-specific labels such as "Wait List - Botox" or "Wait List - Dermal Fillers". Additionally, you can create time period-specific labels, for example, "Wait List - June", to ensure that your reports are as time-relevant as possible.
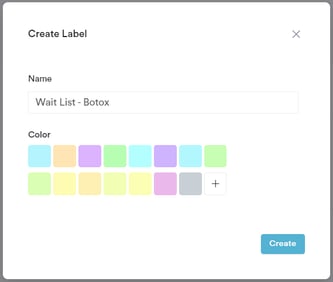
Step 2: Assign Labels to Clients
When a client calls and there are no available slots, inform them that you will contact them if an opening arises.
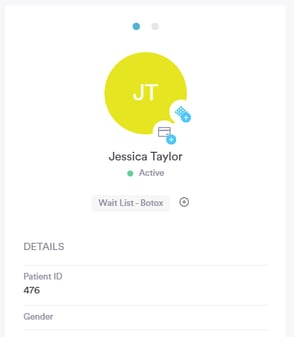
Open their client card and assign them the appropriate label that you created in the previous step. This helps in keeping track of which clients are waiting for specific services or time periods.
Step 3: Create a Custom Report for Wait List Clients
To create a custom report that shows all clients with a wait list label, navigate to Analytics in the left sidebar menu and select Reports.
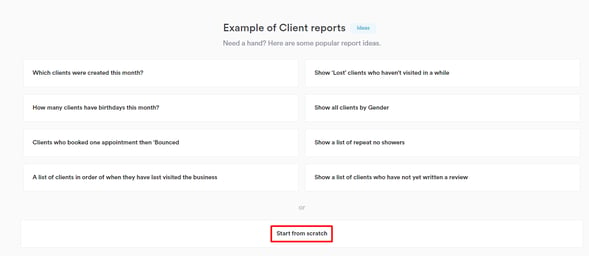
Click on Create Custom Report in the top right corner of the screen. On the Data Objects screen, select Clients, then choose to Start from scratch.
There are four elements of each filter - object, field, operator, and value.
The object defines what you're looking at, the field specifies the attribute you're interested in, the operator dictates how the field should relate to the value, and the value is the specific data point you're using for comparison.
Each of these elements can be customized by clicking on them and choosing a different option.
In the screenshot below, you can see an example of the four elements in the "Appointments by Location" report.
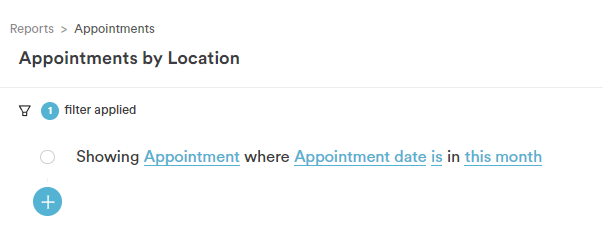
In this case, the four elements of the filter are the following:
- Appointment = Object
- Appointment date = Field
- is = Operator
- this month = Value
NOTE: All of the changes made to the filters will be automatically reflected in the report data in the lower section of the screen. If you wish to refresh the data, click on the "Run" button in the top right corner of the screen.
There are several ways to filter clients based on how you've set up your labels.
Suppose we have two labels: "Wait List - Botox" and "Wait List - Dermal Fillers."
-
Filter for a Specific Label:
To see clients with the "Wait List - Botox" label, set the field to "Labels," use the operator "is," and enter "Wait List - Botox" in the value field.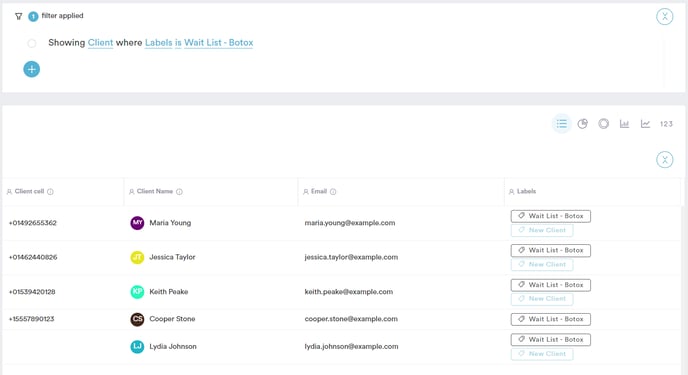
-
Filter for Multiple Labels:
To view clients with either "Wait List - Botox" or "Wait List - Dermal Fillers," use the operator "contains" and enter "Wait List" in the value field. This will include all clients with labels that contain "Wait List," even if there are additional words in the labels.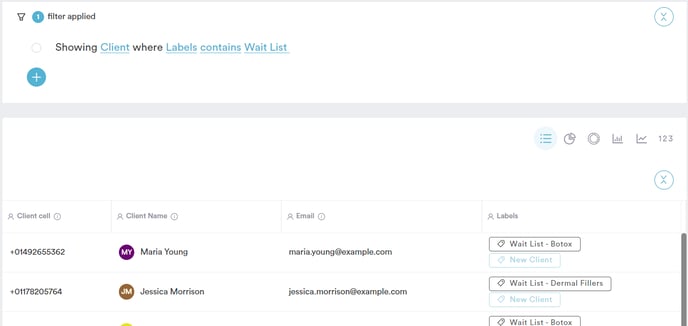
Customizing Report Columns
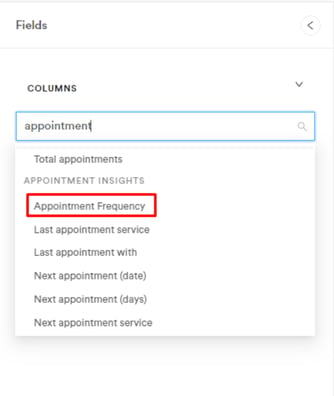
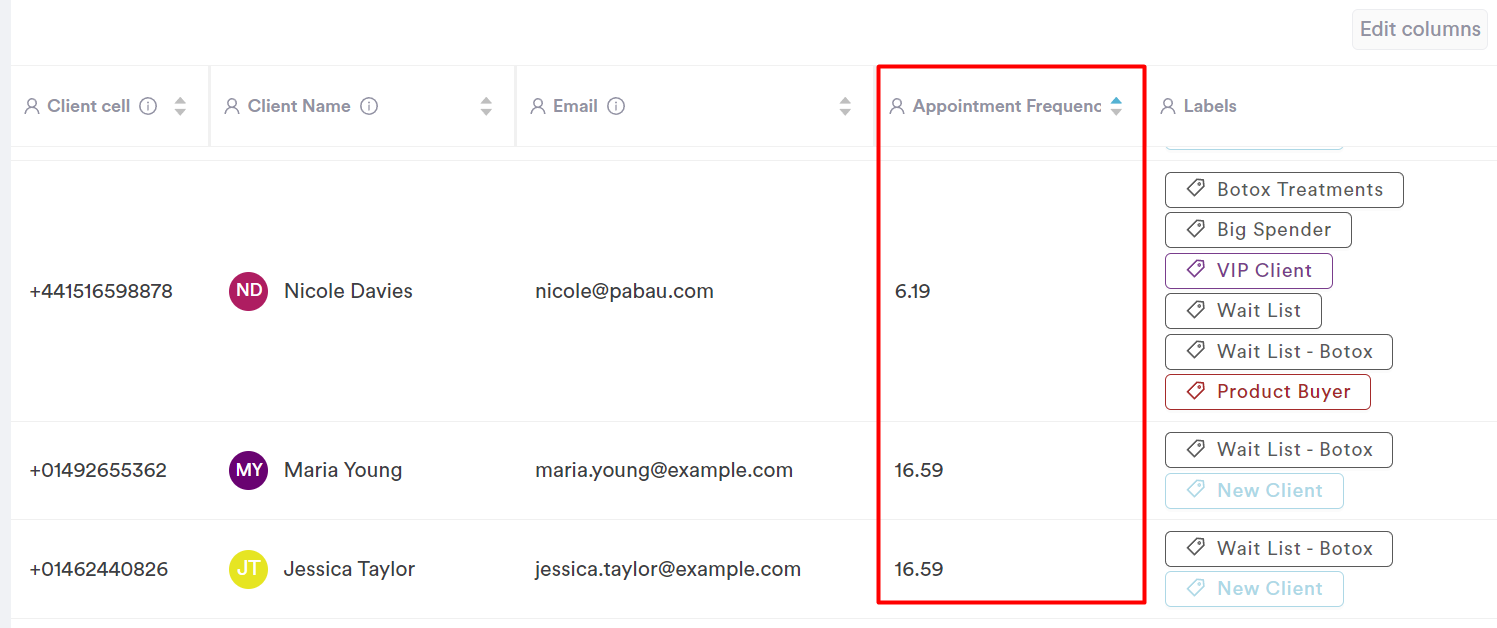
You can modify the columns displayed in the report by clicking on "Add column" on the left of the report builder. Consider adding some of the Appointment Insights columns, such as "Appointment Frequency," which indicates how often a client returns for a new appointment. This metric is based on their visits over the past 12 months.
Example: If a client's appointment frequency is 12, it means they typically return every 12 weeks.
Step 4: Save and Access Your Custom Report
After setting up the custom report, save it by clicking on Save Report in the top right corner. You will be able to access your saved reports quickly from the My Reports tab on the Analytics page.
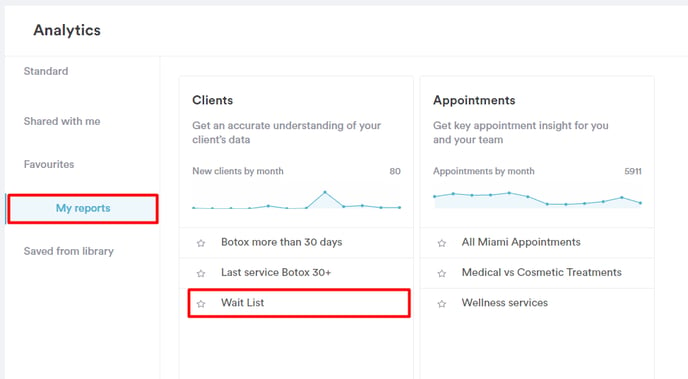
You can create different custom reports for each client label or modify a single report by changing the filter value.
Since the reports are dynamic, they will display live data each time you run them, without requiring any changes to the settings.
Keeping Your Wait List Up-to-Date
When a slot becomes available and you book a client from the wait list, make sure to remove the wait list label from their client card. This ensures that your report remains current and only shows clients who are still waiting for a slot.
By following these steps, you can efficiently manage your wait list, ensuring that no available slots go unfilled and your clients are promptly informed about openings.
For more guides, refer to related articles below, select additional guides, or use the search bar at the top of the page. These guides will help you get the most out of your Pabau account.
Additionally, to help you fully utilize and understand your Pabau account, we recommend exploring additional guides and resources offered at the Pabau Academy. It offers in-depth video tutorials and lessons, offering a holistic learning experience that can equip you with the essential skills for achieving success with Pabau.
