Step 1: Navigate to the Client Card
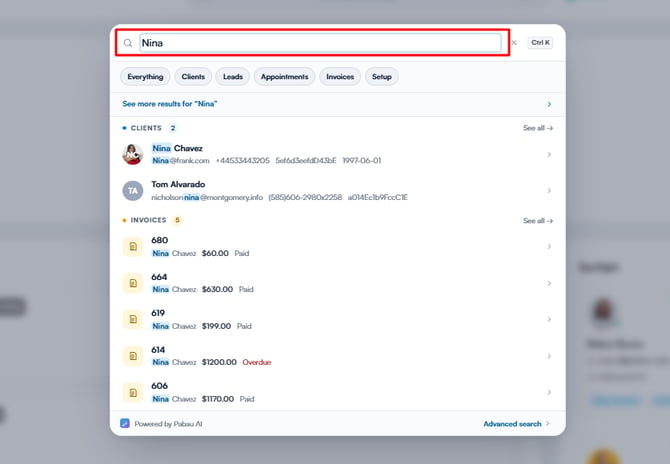
Log in to your Pabau account and navigate to the client card of the client you want to assign a label to by using the search bar at the top of the screen.
Step 2: Locate Labels Section
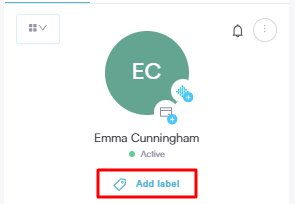
Look for the labels section right underneath the client avatar.
-
Assign a New Label: If your client doesn't have any labels assigned, click on "Add label" to get started.
-
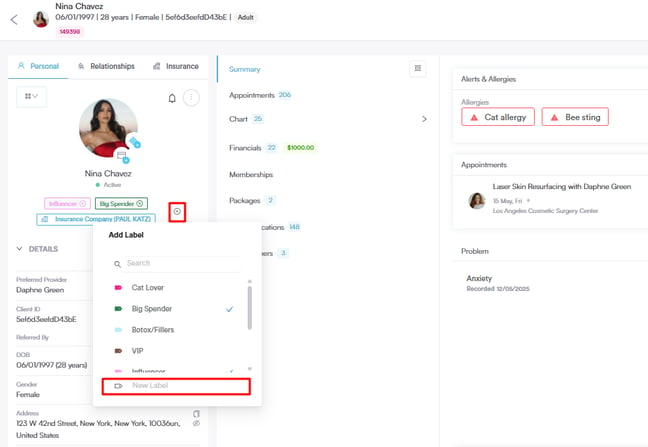
Assign Other Labels: If your client already has a label assigned, if you want to assign more simply press the plus icon and it will list all existing labels in the system. Alternatively, you can create a new label on the spot on the "New Label" field.
NOTE: Ensure to choose labels that best represent the characteristics or categories you want to associate with your clients.
How Labels Appear in Point of Sale
Labels assigned to clients are also visible in the Point of Sale (POS) search during appointments or transactions. This makes it easier for your staff to quickly identify clients based on categories, preferences, or membership types, enhancing workflow efficiency and improving client interactions.

You can also create new labels by following the steps in this article.
By following these steps, you can efficiently utilize labels to enhance your client management in Pabau, streamlining communication and marketing efforts.
NOTE: We suggest reading our Clients article for a more in-depth exploration of this topic.
For more guides, refer to related articles below, select additional guides, or use the search bar at the top of the page. These guides will help you get the most out of your Pabau account.
Additionally, to help you fully utilize and understand your Pabau account, we recommend exploring additional guides and resources offered at the Pabau Academy. It offers in-depth video tutorials and lessons, offering a holistic learning experience that can equip you with the essential skills for achieving success with Pabau.