
If your organization operates multiple businesses or legal entities, you can create separate issuing companies to ensure accurate invoicing and compliance. Each issuing company can have its own name, address, and invoice prefix.
Before issuing invoices, ensure you have created your issuing companies by following the steps in this guide.
If you need separate invoice templates for each company, create them in advance by following this guide, then link them to the issuing company during setup.
Once everything is set up, follow these steps to issue an invoice from an issuing company:
Step 1: Access the Point of Sale
Navigate to the Point of Sale by clicking the Create button at the top of the screen, selecting Checkout from the appointment context menu in the calendar, or via the Sale option in the client card.
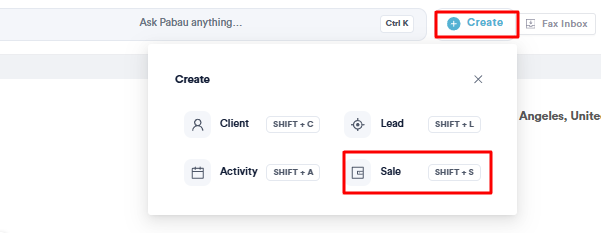
Step 2: Select the Issuing Company
In the Point of Sale, locate the invoice details section below the client’s name. Click inside the "Issuing Company" field and select the relevant issuing company from the list.
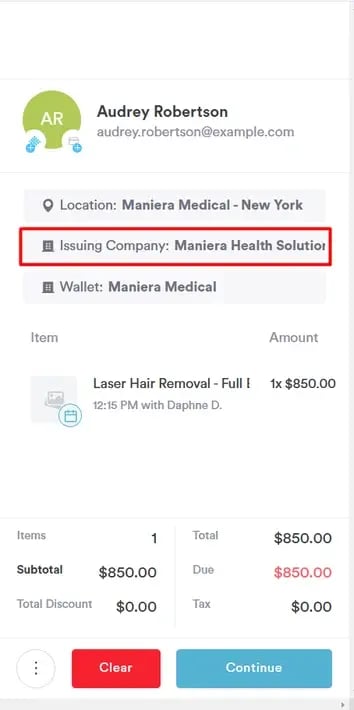
TIP: You can skip this step entirely. If you link services or locations to an issuing company when setting it up, Pabau selects the issuing company for you as soon as a matching item is added to the sale. Choosing one by hand always overrides the automatic selection for that sale.
Step 3: Split a Sale Across Multiple Issuing Companies
If a sale contains items belonging to different issuing companies, Pabau splits the bill rather than making you choose just one. The Issuer row shows "Split across 2 companies", and a breakdown underneath lists each issuing company with the number of items and the amount it will bill.
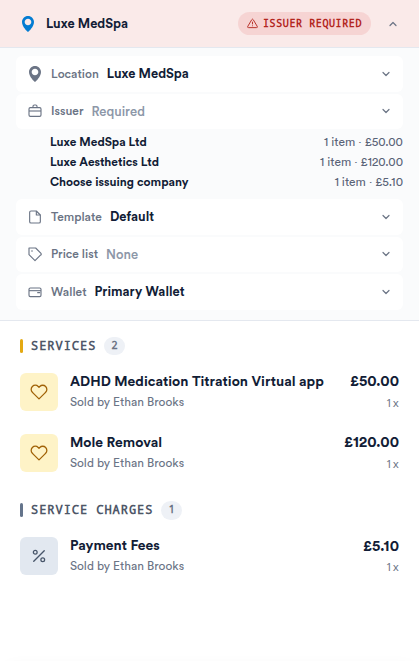
When you take the payment, Pabau creates one invoice per issuing company. Each invoice uses that company's own invoice prefix, numbering sequence, and invoice template, and the payment is divided across the invoices in proportion to their totals, so every company is credited with its own share.
NOTE: Any item not covered by a service or location link is grouped under "Choose issuing company". Select an issuing company for that group before taking payment — the Issuer row stays available until you do.
Step 4: Process the Payment
After selecting the issuing company, proceed with the payment process as usual: adjust or add items to the invoice, choose the payment method, and confirm the payment.
Step 5: Review the Generated Invoice
The issued invoice will automatically use the prefix assigned to the issuing company and apply the linked invoice template if one is associated with the issuing company. If no template is linked, the default template will be used.
If the sale was split, the confirmation screen shows "This sale created 2 invoices" along with each invoice number, its issuing company, and its total. You can print or email each invoice separately from there.
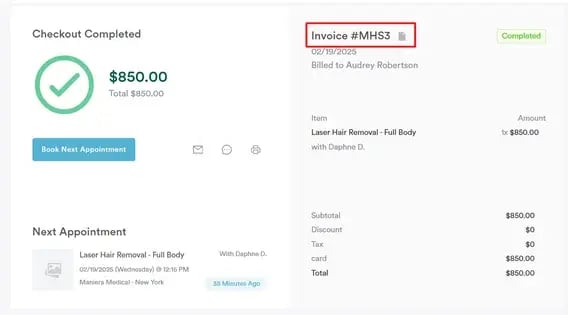
By following these steps, you can ensure invoices are issued correctly from the appropriate issuing company in Pabau.
For more guides, refer to related articles below, select additional guides, or use the search bar at the top of the page. These guides will help you get the most out of your Pabau account.
Additionally, to help you fully utilize and understand your Pabau account, we recommend exploring additional guides and resources offered at the Pabau Academy. It offers in-depth video tutorials and lessons, offering a holistic learning experience that can equip you with the essential skills for achieving success with Pabau.