
This feature is part of the new client card version and is currently available to select users only, starting August 2026. A wider rollout to all accounts is coming soon.
Instead of typing results in by hand, Pabau can read them straight from a lab’s PDF report using AI, saving you time on manual data entry.
Step 1: Navigate to the Client Card
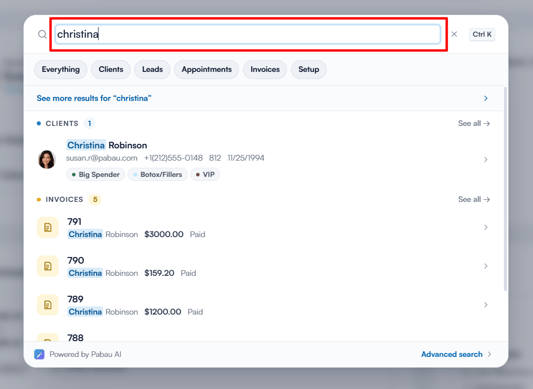
Start by logging in to your Pabau account. Then use the search bar at the top of the page and type at least three letters of the client’s name — Pabau filters the results as you type.
Step 2: Navigate to Lab Tests
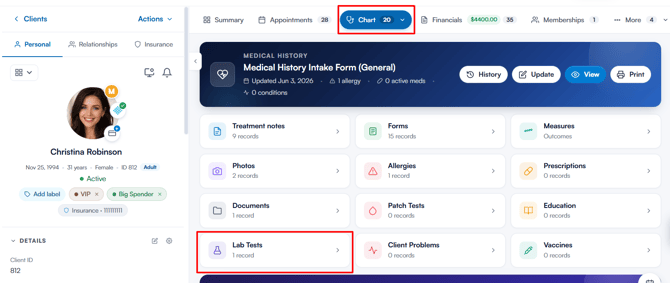
Once you’ve opened the client card, select EMR in the navigation (labelled Chart on US accounts), then open the Lab Tests card to view all of the client’s lab requests and results.
Step 3: Start the Import
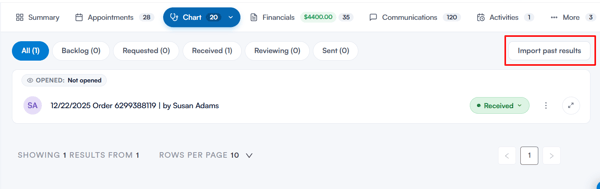
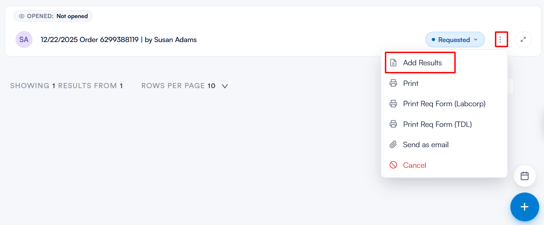
In Lab Tests, you’ll see all lab requests listed with their current status, along with an Import past results button and a three-dot menu on each request.
- If the results are from outside Pabau and don’t have an existing request, click Import past results to create a new lab record directly from the PDF.
- If you’re adding results to an existing request, click the three-dot menu next to it and select Add Results.
Step 4: Upload the Results PDF
Choose the lab from the dropdown, or leave it on None (auto detect) to let Pabau identify it automatically. Then upload the results PDF — or pick one already saved in the client’s Documents — and click Parse.
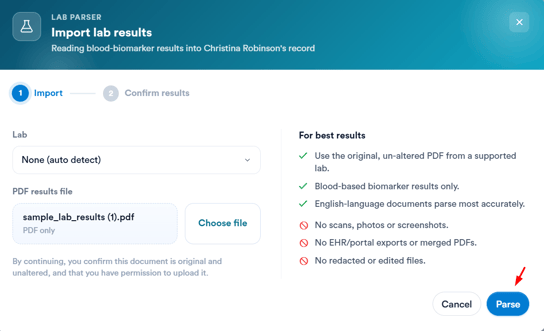
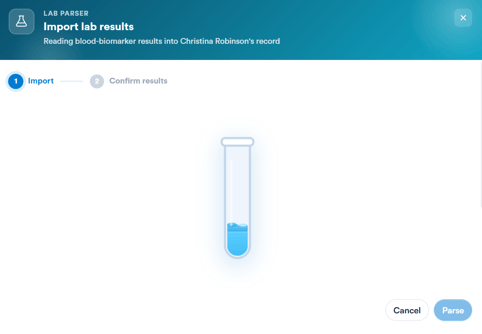
Pabau will then read through the document. This usually takes 30–60 seconds, so keep the window open until it’s finished.
Please note:
The AI can only read PDF files. Scanned images, photos, screenshots, and files in other formats (such as Word or JPEG) are not supported and will need to be entered manually.
Step 5: Review the Extracted Results
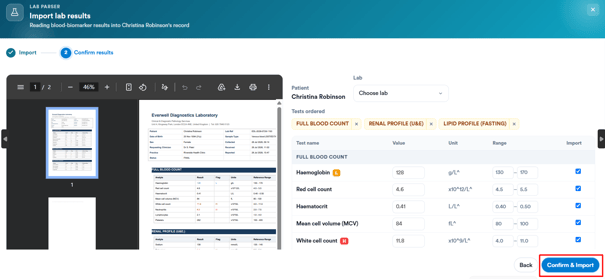
Pabau reads the PDF and extracts each result — the biomarkers, their values, and reference ranges. On the Confirm results step, review the extracted values side by side with a preview of the original PDF.
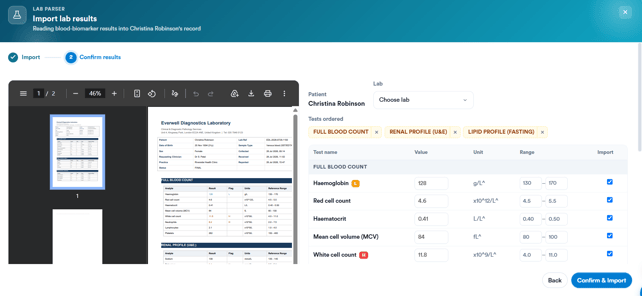
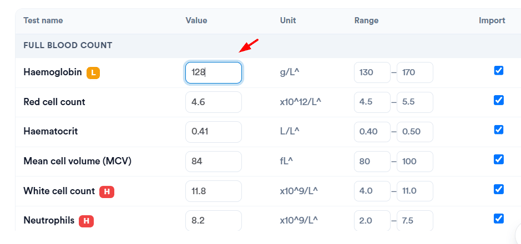
You can edit any value or range, and untick anything you don’t want to bring in. If the report appears to belong to a different patient, Pabau warns you before you import.
Step 6: Confirm and Import
Click Confirm & Import to save the results into the client’s record. The request is marked Received, and the values appear on the results chart.
Step 7: Review the Imported Results
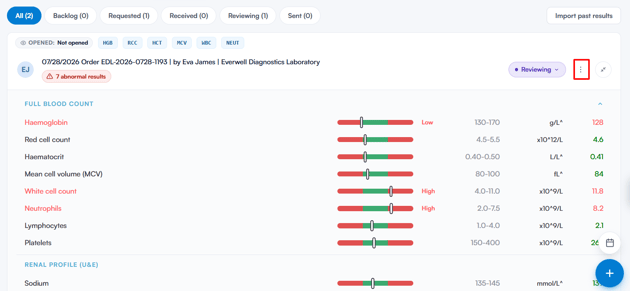
The result now appears in the Lab Tests list, tagged with the relevant biomarkers and flagged if any values are abnormal. Click the expand icon to review each value against its reference range.
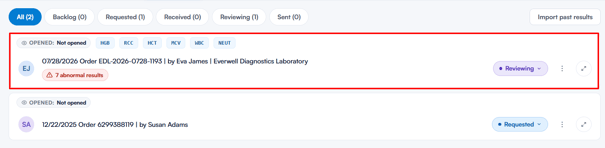
From here, you can also change the request’s status, or use the three-dot menu to print the results or send them to the client.
How the AI Reading Works
Each PDF goes through two AI passes. The first reads the report and extracts the values. The second cross-checks that reading against the original document and flags any values it’s less confident about, so you know exactly which rows to double-check before confirming.
Nothing is saved automatically — the AI only pre-fills the review screen, giving you full control over what’s actually imported into the client’s record.
By following the steps above, you can import lab results into a client’s record quickly and accurately, without typing values in by hand.
Was this guide helpful? Let us know by voting below - your feedback helps us write clearer articles.
For more guides, browse the related articles below or use the search bar at the top of the page. You can also watch our video learning series, the Pabau Academy, or visit the Support page for additional help.