
Step 1: Navigate to Analytics
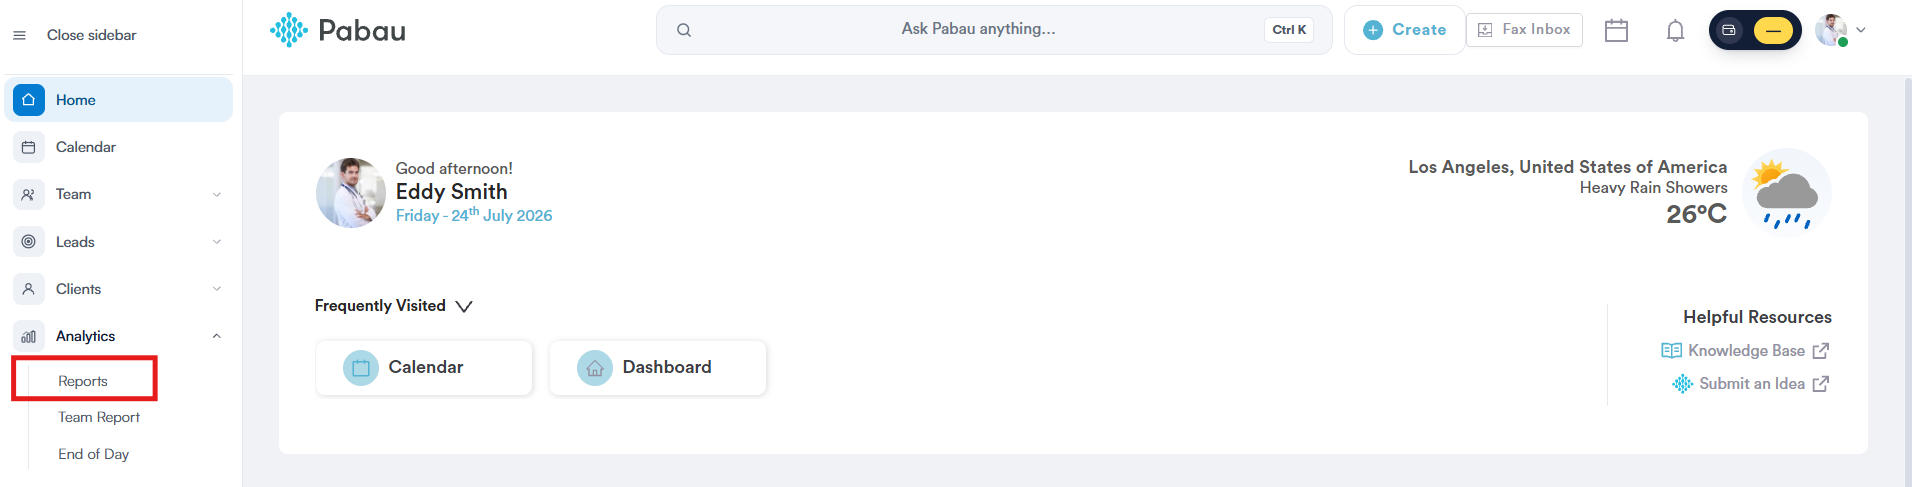
Start by logging into your Pabau account using your login credentials. Then, navigate to the left sidebar menu, where you can find the Analytics tab. Click to expand it, and it will reveal Reports.
Step 2: Open the Sales Tax Report
Under the Sales section, you will find the Sales Tax pre-created report, sitting alongside reports like Product Performance, Revenue by Closed Invoices, and Sale by Item Category.
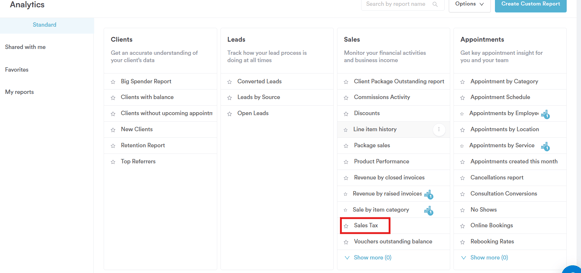
Click on the report name to continue.
Step 3: Review the Default Filter
Unlike the chart-based Sales reports, the Sales Tax report displays as a table of individual invoices. It opens with just 1 filter applied:
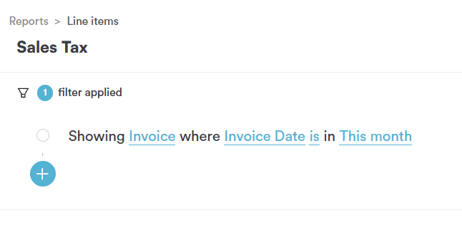
- Invoice where Invoice Date is in This month — narrows the report to invoices raised within the current calendar month
Each part of the filter — object, field, operator, and value — can be clicked and changed independently, which is what the rest of this article walks through. You can also click the + button below the filter to add further filters of your own, for example narrowing the report down to a single Location or Payment Status.
Step 4: Change the Object
Clicking on the object (e.g. "Invoice") opens a dropdown of everything you can build a filter around.
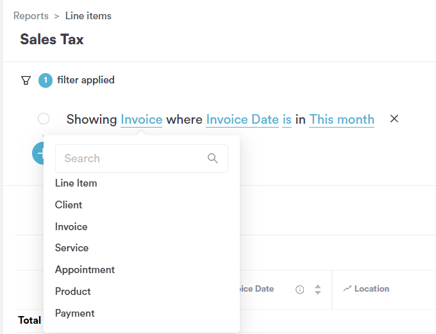
- Line Item — an individual product, service, or package sold; use this for anything relating to what was sold
- Client — the person the sale relates to
- Invoice — the invoice the sale sits on
- Service — the treatment itself
- Appointment — the booking linked to the sale
- Product — a physical stock item
- Payment — the payment taken against the invoice
Step 5: Change the Field
Clicking on the field opens a long, scrollable list, since an invoice carries a lot of detail. This is where you choose exactly what aspect of the invoice you want to filter on.
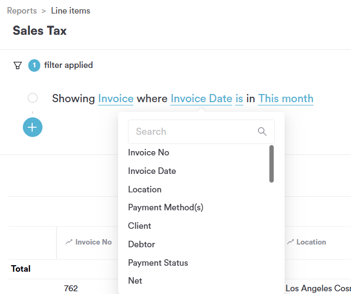
Every field available for the Invoice object is listed below:
- Invoice No — the invoice's unique reference number, and one of the default columns in this report
- Invoice Date — when the invoice was raised, which is what controls the reporting period by default
- Location — the clinic/site the invoice belongs to
- Payment Method(s) — how the invoice was or is being paid
- Client — who the invoice is billed to
- Debtor — who currently owes any outstanding balance on the invoice
- Payment Status — whether the invoice is paid, unpaid, or partially paid
- Net — the invoice value before tax
- Tax — the tax portion of the invoice, the key figure this report is built around
- Gross — the invoice value including tax
- Paid — the amount already paid against the invoice
- Balance — the amount still owed on the invoice
- Type — the kind of invoice (e.g. standard sale, credit note)
- Issued By — the team member who raised the invoice
- Issuing Company — the business entity the invoice was raised under
- Invoice Created Date — when the invoice record was first created in the system
- Price List — which price list was applied to the invoice
- Last update time — when the invoice record was last modified
- Invoice Note — any note attached to the invoice
- Healthcode — Healthcode reference, where applicable
- Tip — tip amount recorded on the invoice
- Credit Type — type of credit applied to the invoice, if any
- Inv Team — the team associated with the invoice
- Invoice Created by — which user created the invoice record
- Sync Xero — whether the invoice has synced to Xero
- Sent Date — when the invoice was emailed to the client
- Sent Status — whether the invoice has been sent
- Tax group — the tax group/rule applied to the invoice
Picking a field here decides what the operator and value in the next steps will actually test.
Step 6: Change the Operator (Date-Style Fields)
For a field like Invoice Date, which compares to a point in time rather than a fixed category, the operator list controls how the date compares to your chosen value:
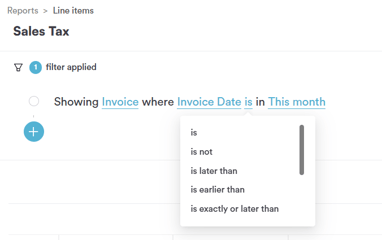
- is — only invoices raised on an exact date
- is not — excludes invoices raised on an exact date
- is later than — only invoices raised after a given date
- is earlier than — only invoices raised before a given date
- is exactly or later than — includes the date itself plus everything after it
- is exactly or earlier than — includes the date itself plus everything before it
- is now until — only invoices raised between now and a date you specify
- is empty — only invoices with no date recorded
- is not empty — only invoices that do have a date recorded, which is how the default filter isolates invoices raised this month
Step 7: Choose the Value
Clicking on the value for Invoice Date opens the Favourite Intervals list — rolling date ranges that update automatically each time the report runs:
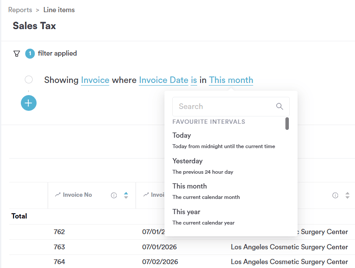
- Today — from midnight until the current time
- Yesterday — the previous 24 hour day
- This month — the current calendar month, and the default for this report, useful for monthly tax reporting
- This year — the current calendar year, useful if you need a full-year tax summary instead
Step 8: Review the Data
Once your filter is set the way you want, the report updates automatically, listing every invoice raised in the period as an individual row — showing figures such as Invoice No, Invoice Date, and Location — with a Total row at the top summarizing the tax collected across all matching invoices.
By following these steps, you can easily generate and customize the Sales Tax report.
Was this guide helpful? Let us know by voting below - your feedback helps us write clearer articles.
For more guides, browse the related articles below or use the search bar at the top of the page. You can also watch our video learning series, the Pabau Academy, or visit the Support page for additional help.