
This article covers the new Client Card, available to selected clinics from August 2026. If your Client Card looks different, see the How to Generate a Quote (Classic) guide instead.
Step 1: Navigate to Quotes
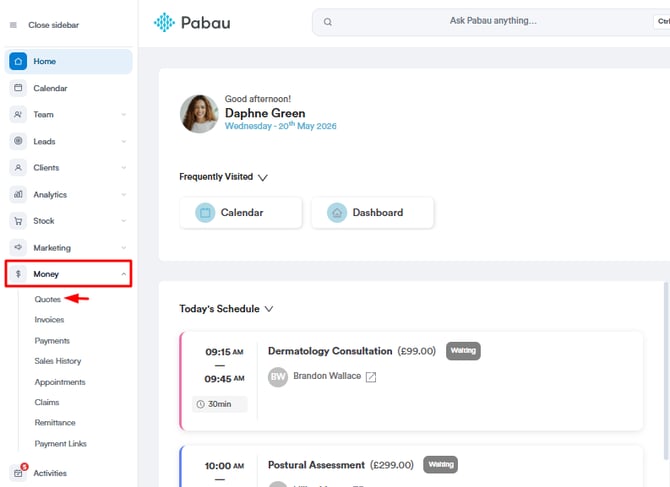
Log in to your Pabau account and in the left sidebar menu, click on Money, then select "Quotes" to access the Quotes page.
NOTE: To manage quotes, ensure you have the necessary quote-related permissions enabled in your user profile under the Team feature, within the Money permissions group.
TIP: You can also create a quote directly from the new Client Card. Open the client’s card, click the plus (+) button in the bottom-right corner, and choose Quote. The same wizard described below will open for that client.
Step 2: Create a Quote
On the Quotes page, you can view existing quotes, or create new ones by clicking on "Create Quote" in the top right corner.
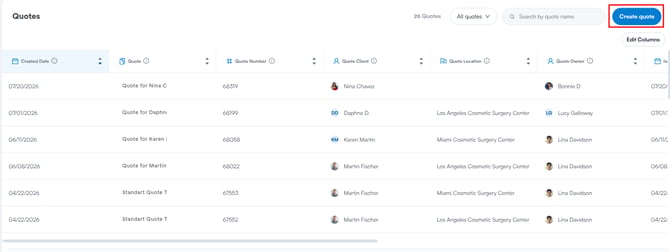
The quote creation wizard has four steps: Who, Details, Line Items, and Review & Finalize.
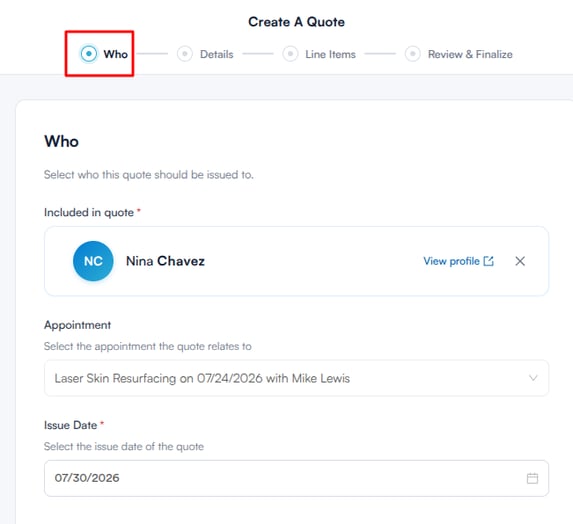
The first step is Who - select who the quote is being issued to. Fill in the following fields:
-
Included in quote: Search for and select the client or lead this quote is for.
-
Appointment (optional): If this quote is linked to a specific appointment, select it from the dropdown. Otherwise, leave it as "No Appointment."
-
Issue date: Select the date the quote should be issued. This defaults to today’s date.
Click "Next" in the top right corner to proceed.
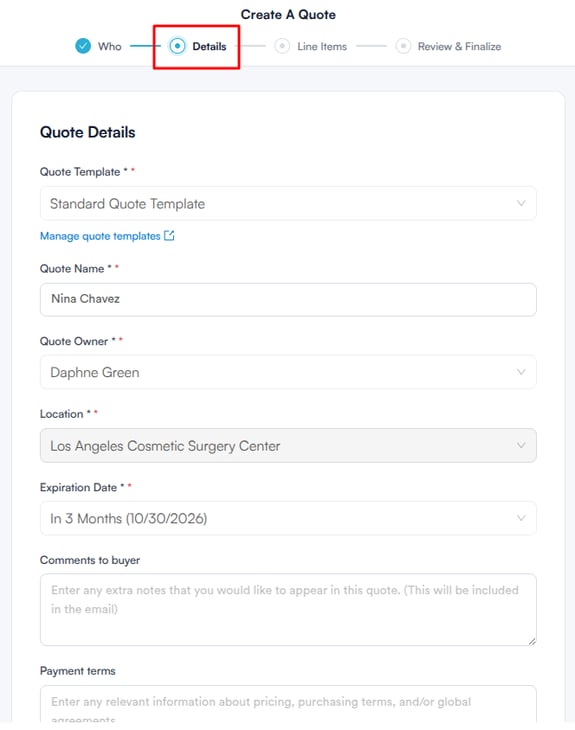
The second step is Quote Details, where you configure the quote’s settings. Complete the following fields:
-
Quote Template: Select a template for the quote’s design and layout. Click "Manage quote templates" to edit or create templates.
-
Quote Name: Enter a name for the quote, for example "Quote for Emma Thompson."
-
Quote Owner: Select the staff member responsible for this quote.
-
Location: Select the clinic location this quote is associated with. If the quote is linked to an appointment, this will be pre-filled and locked.
-
Expiration Date: Choose how long the quote is valid for, for example "In 3 Months." The expiry date is calculated automatically from the creation date.
-
Comments to buyer (optional): Add any extra notes you would like to appear in the quote and in the email sent to the client.
-
Payment terms (optional): Enter any relevant information about pricing, purchasing terms, or global agreements.
Click "Next" to proceed.
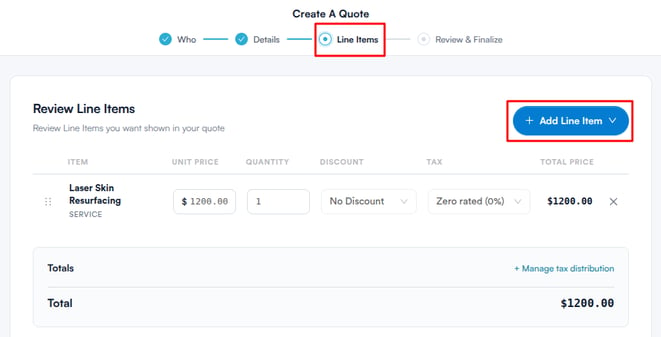
The third step is Line Items, where you add the services, products, or packages to include in the quote.
Click "Add Line Item" in the top right corner of the section. A dropdown will appear with a search bar and three categories:
- Service
- Product
- Package
Search for or browse to find the item you want to add, then select it.
Each line item shows the Item, Unit Price, Quantity, Discount, Tax, and Total Price. You can edit the unit price, quantity, discount, and tax directly in the table, remove an item using the × button on its row, and drag the handle on the left of a row to reorder items.
The Totals section at the bottom shows the overall quote total. Click "+ Manage tax distribution" if you need to adjust how tax is distributed across line items.
Click "Next" to proceed.
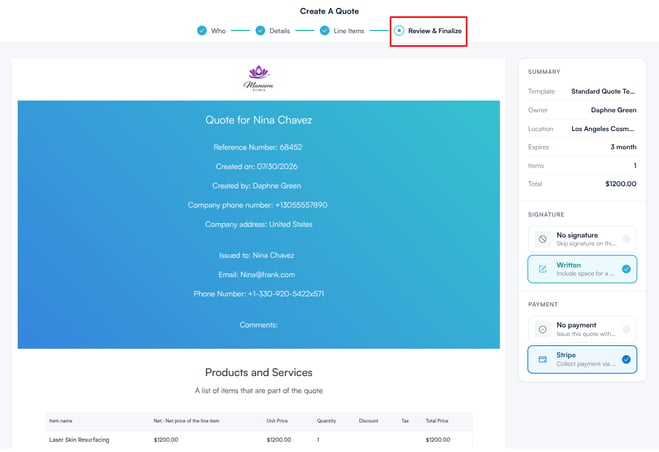
The fourth and final step is Review & Finalize, where you preview the quote and configure the signature and payment settings before creating it.
The left side of the screen shows a full preview of the quote as the client will see it, including the clinic branding, client details, and the products and services table.
On the right, a Summary panel shows an overview of the quote - template, owner, location, expiry date, number of items, and total. Below the summary, configure the following:
Signature: Choose whether to include a signature on the quote.
- No signature: Skip the signature requirement.
- Written: Include space for a written signature.
Payment: Choose how the client can pay.
- No payment: Issue the quote without a payment option.
- Stripe: Allow the client to pay online via Stripe. This option is only available once Stripe is connected to your Pabau account.
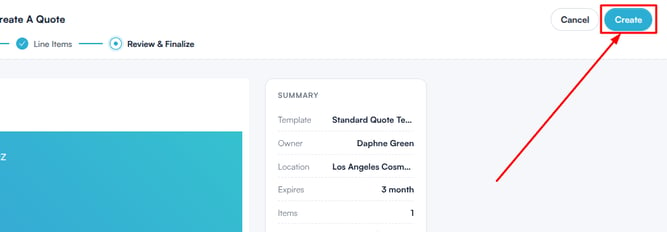
Once everything looks correct, click "Create" to finalise the quote.
Step 3: Share the Quote with the Client
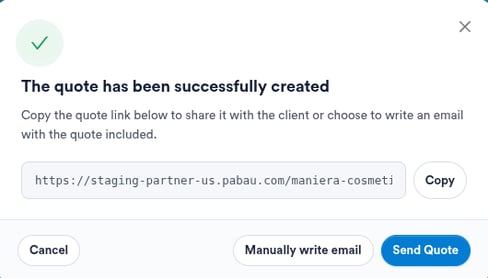
After the quote is created, a pop-up will appear with a shareable link you can copy and send to the client. You can also click "Send Quote" to send it using the default quote email template, or "Compose email manually" to write your own message.
To customise the default template for sending quotes, navigate to the Client Notifications section and make the necessary adjustments.
Step 4: Manage Quotes
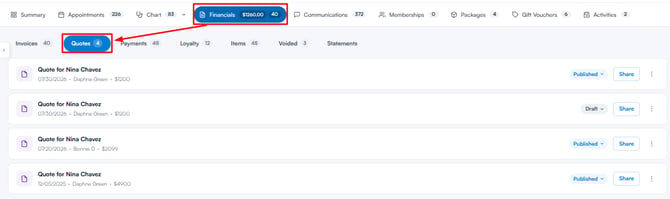
Once saved, the quote will appear on the Quotes page and on the client’s card under the Financials tab, in the Quotes sub-tab.
By following these steps, you can easily create quotes in your Pabau account. With your quote created and sent, the client can review, sign, and pay from the link you’ve shared with them, all without needing to visit the clinic.
Was this guide helpful? Let us know by voting below - your feedback helps us write clearer articles.
For more guides, browse the related articles below or use the search bar at the top of the page. You can also watch our video learning series, the Pabau Academy, or visit the Support page for additional help.