Step 1: Open the Calendar
First, log in to your Pabau account. In the left sidebar menu, click on Calendar to open your clinic’s scheduling view.

Step 2: Open the Calendar View
In the top right corner of the Calendar, click on the "Day" view icon. This will open the calendar view options.
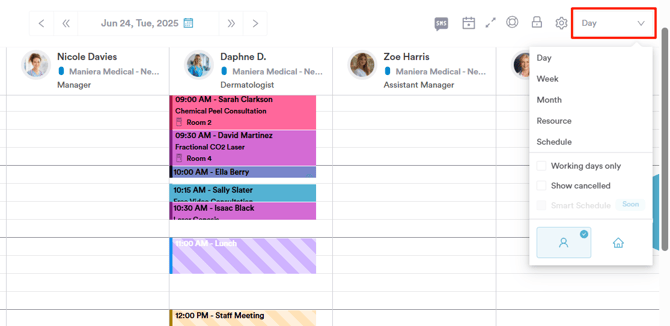
Step 3: Show Cancelled Appointments
Select the "Show Cancelled" option that is revealed in the Calendar views.

Once selected, your Calendar will update to also show appointments marked as cancelled.

By following these steps, you can view your cancelled appointments in the Calendar.
For more guides, refer to related articles below, select additional guides, or use the search bar at the top of the page. These guides will help you get the most out of your Pabau account.
Additionally, to help you fully utilize and understand your Pabau account, we recommend exploring additional guides and resources offered at the Pabau Academy. It offers in-depth video tutorials and lessons, offering a holistic learning experience that can equip you with the essential skills for achieving success with Pabau.