
The notification studio is where you change what a client message says, how it looks and how it is sent. It shows a live preview of the email or SMS next to the settings, so you see every change as you make it, and you can send yourself a test before you save.
NOTE: This feature is being rolled out to clinics gradually. If you don't see it in your account yet, message us via the in-app chat.
Step 1: Open the Message in the Studio
- Go to Setup and, under Marketing & Communication, click Client Notifications.
- Find the message you want to change and click Edit template on its card. The studio opens full screen, with Notification studio and the message name at the top.
Step 2: Choose How the Message Is Sent and Preview It
- Under Send via, switch Email and SMS on or off. To use the WhatsApp switch, your clinic needs a verified WhatsApp number in Pabau Engage (see How to Connect WhatsApp Business to Engage) and an approved WhatsApp template.
- Above the preview, switch between Email and SMS to see and edit each version.
- For emails, switch between Desktop and Mobile to check how the email looks on a computer and on a phone.
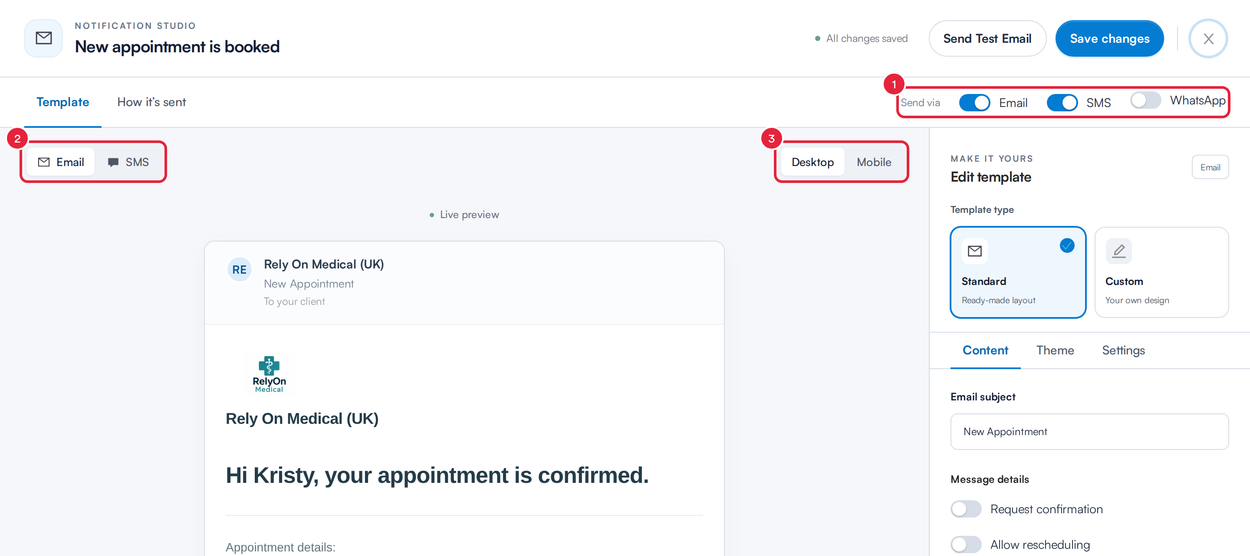
The studio: sending switches at the top, live preview on the left, settings on the right
The Live preview uses sample client details. Your client's own details are filled in when the message is sent.
On Upcoming appointment reminder, switching Email or SMS on may open Schedule for upcoming appointments. Click Scheduler to turn reminders on for appointments that are already booked.
NOTE: Messages that only go out when you send or share them, such as letters, forms and quotes, show You choose when to send this message instead of the Email and SMS switches. You pick the channel each time you send. The SMS switch stays greyed out until your clinic has an SMS sender: add one in Setup under Sender Addresses.
Step 3: Choose a Template Type
- Under Template type, keep Standard (Ready-made layout) to use Pabau's layout with your own wording, details and branding, or choose Custom (Your own design) to build the email yourself.
- With Custom selected, click Open email designer. Drag content into your email, then click Preview design to update the live preview.
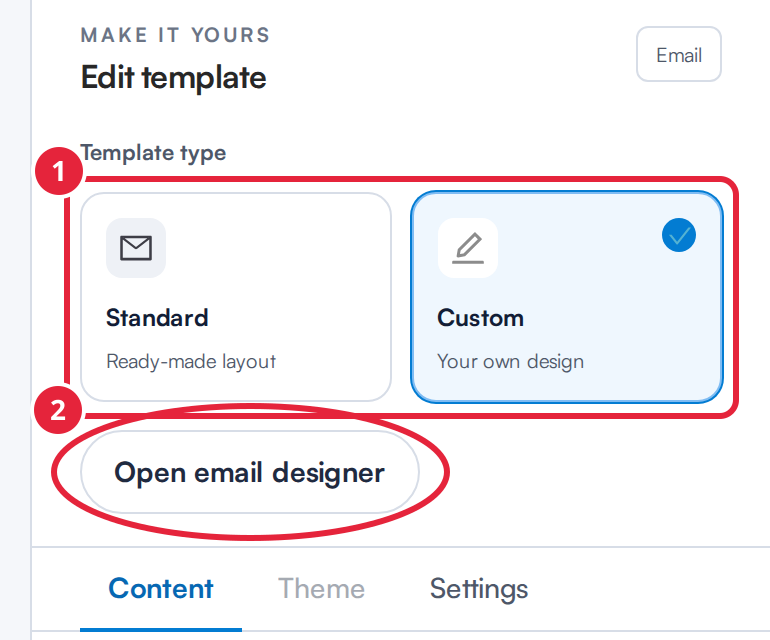
Use the ready-made layout or design your own email
NOTE: Custom is available for appointment confirmations, reminders, reschedules, cancellations, no-shows and feedback requests, the matching class messages, and invoices, forms, quotes, gift cards and account balance messages. A custom template keeps its own Send via switches, so check them after you switch. The Theme tab is only available for standard emails.
Step 4: Edit the Email Content
On the Content tab, the options depend on the message you're editing.
- Make sure the Content tab is selected.
- Change the Email subject. You can edit the subject of New appointment is booked, Upcoming appointment reminder, Reschedule appointment and Cancelled appointment. It can't be left empty and can be up to 200 characters.
- Under Message details, choose what the email includes, for example Request confirmation, Allow rescheduling, Allow cancellation, Show service, Show employee name, Show rebook button and Show phone number. Display cancellation policy is greyed out until your clinic has a cancellation policy switched on; click Manage cancellation policy ↗ to set one up.
- Under Forms (on booking confirmations, reminders and reschedule messages), switch on Add complete form button to ask clients to complete their forms, choose whether to Hide registration form if already completed, and write the Message before the form. Then add any short extra message, such as a special offer, in Footer.
- To send files with every email, click Add files under Attachments. You can attach documents, spreadsheets and images of up to 5 MB each to New appointment is booked and Upcoming appointment reminder.
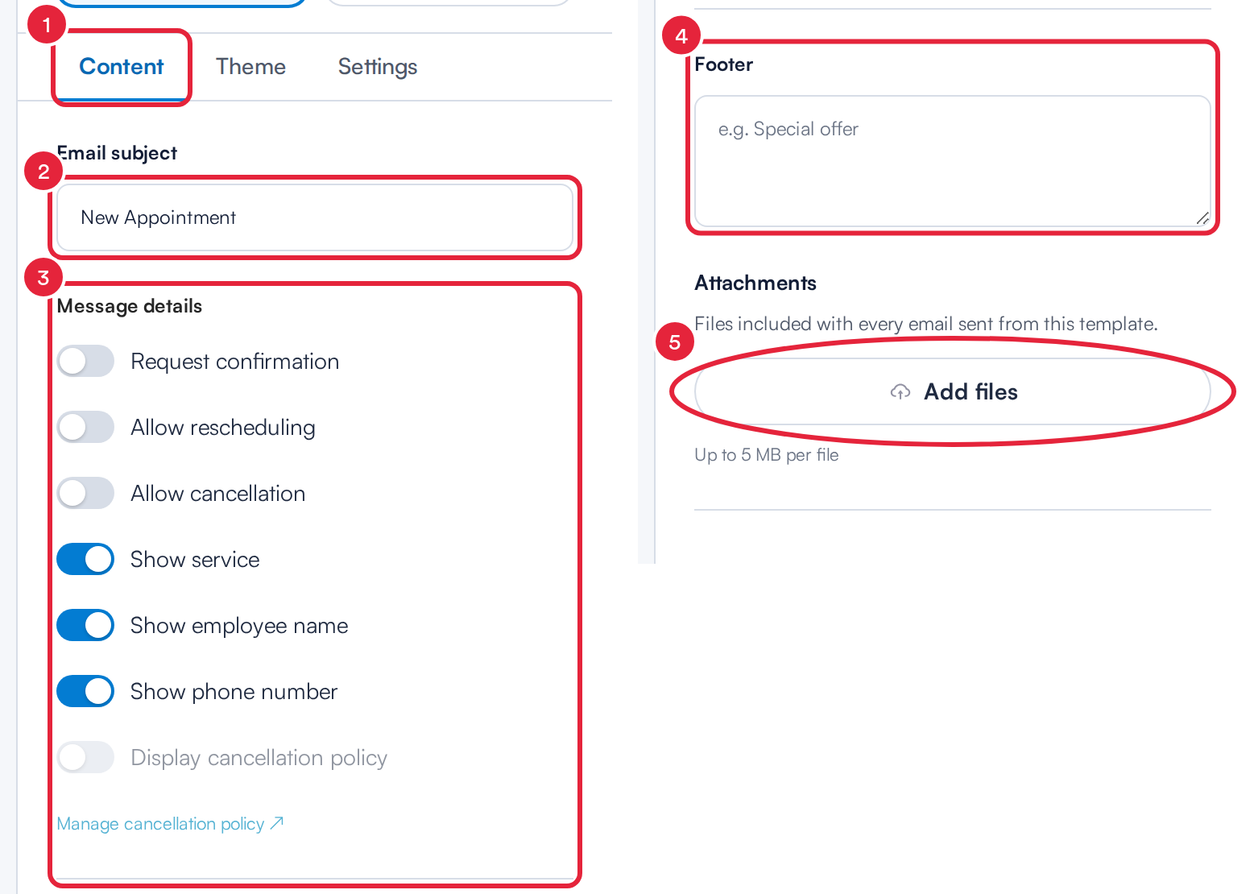
The Content tab: subject and message details (left), footer and attachments (right)
To change colours, fonts, the header and the footer style, use the Theme tab.
Step 5: Edit the SMS
- Click SMS above the preview.
- Write your text in the Message box. The counter shows how many characters you've used.
- Click + Add Merge Tag to add details that are filled in for each client, such as their name or the appointment date and time.
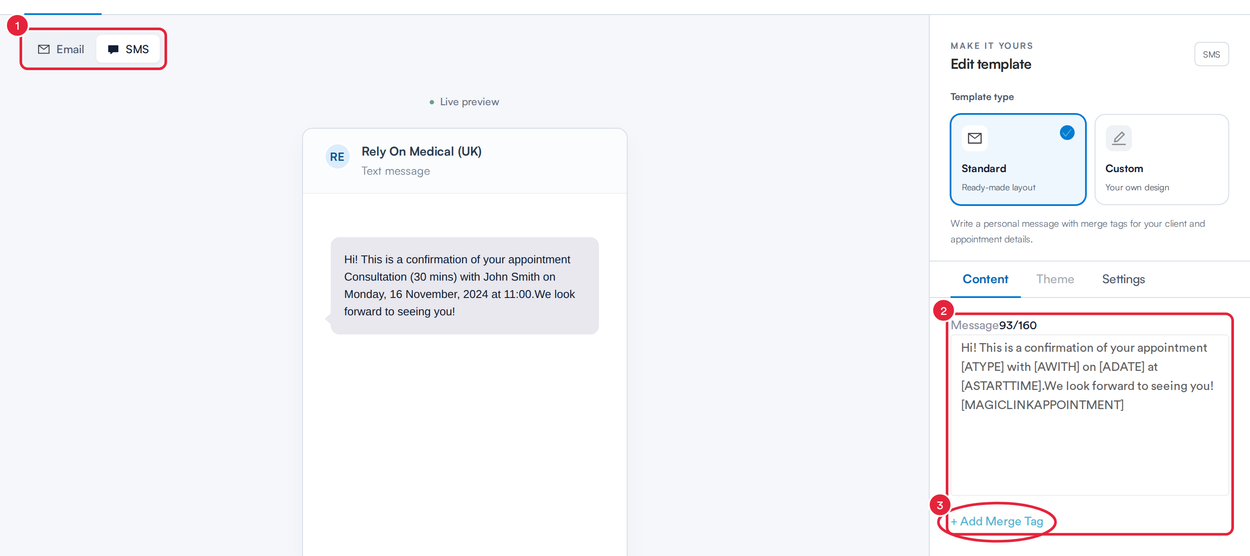
The SMS preview updates as you type
Step 6: Check the Settings Tab
- Click the Settings tab.
- Under Social media icons, keep Show social links on and choose which networks to show. A network stays greyed out until you add its link in your Business details.
- On Upcoming appointment reminder (and Class Reminder), set the Reminder timeframe: choose how many Days before the appointment the reminder goes (1 to 14 days) and the time to Send at (hour and minute).
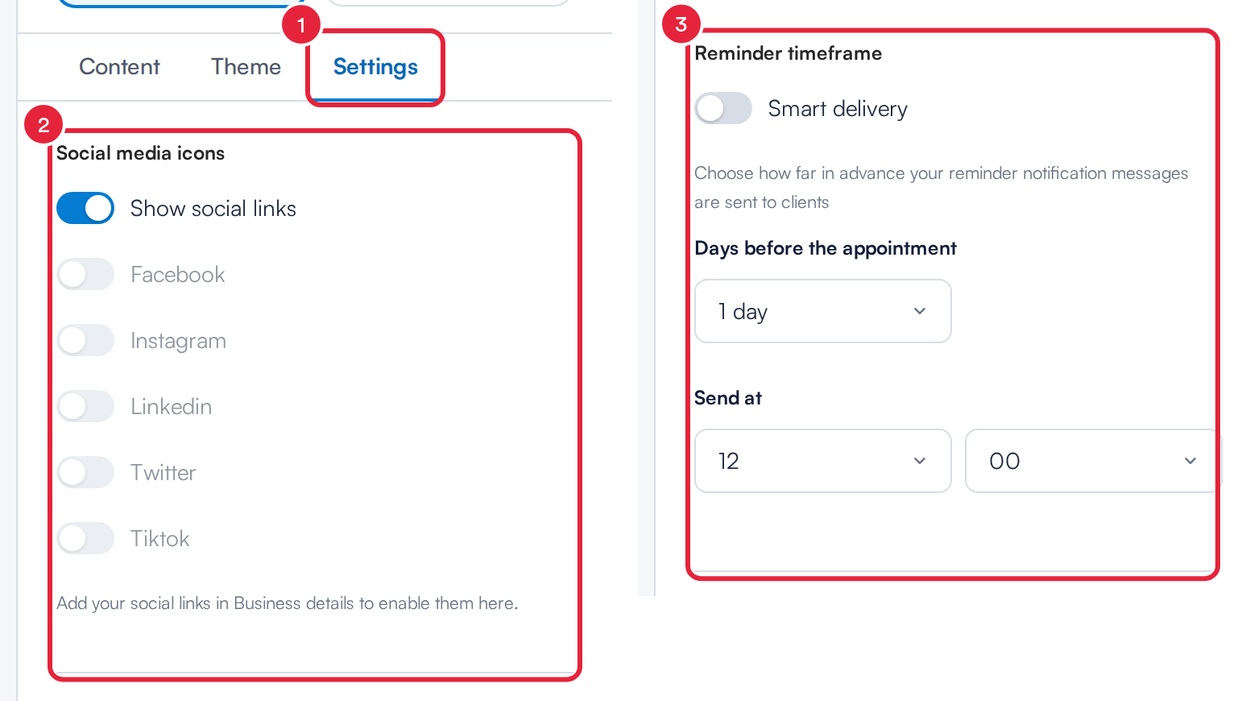
Social links and, for reminders, when the reminder is sent
Step 7: Send a Test and Save
- Click Send Test Email at the top. The window shows the email address the test goes to: the email address of your own Pabau account. Click Send Test Email to send it. With the SMS preview open, the button is Send Test SMS instead and the test goes to the mobile number in your own profile.
- Click Save changes. Until you do, the top of the studio shows Unsaved changes; afterwards it shows All changes saved.
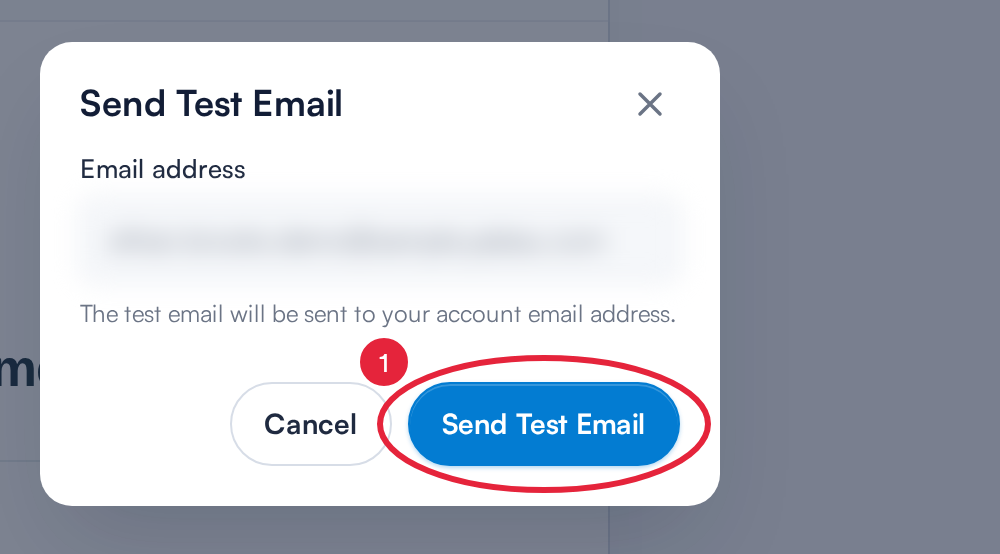
Test emails always go to your own account email address
If you close the studio with unsaved changes, Pabau asks Discard your changes?. Click Keep editing to go back, or Discard changes to close without saving.
TIP: Want to know exactly when a message goes out and what it needs? Open the How it’s sent tab at the top of the studio.
What's next?
- How to Create Custom Email Client Notifications
- Email Client Notifications Best Practices
- How to Connect WhatsApp Business to Engage
Was this guide helpful? Let us know by voting below - your feedback helps us write clearer articles.
For more guides, browse the related articles below or use the search bar at the top of the page. You can also watch our video learning series, the Pabau Academy, or visit the Support page for additional help.