
Table of Contents
1. How to Download Photos From the Client Card
1.1. How to Download Photos in Bulk
2. How to Share Photos From the Client Card
2.1. How to Share Photos in Bulk
This article covers the new Client Card, available to selected clinics from August 2026. If your Client Card looks different, see the How to Download and Share Photos From the Client Card (Classic) guide instead.
How to Download Photos From the Client Card
Step 1: Navigate to the Client Card
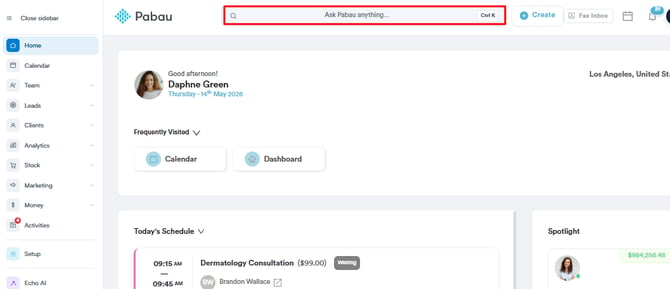
Start by logging in to your Pabau account. Then, use the search bar at the top of the screen to find the client — type at least three letters of their name and select them from the results to open their client card.
Step 2: Open the Photos Tab
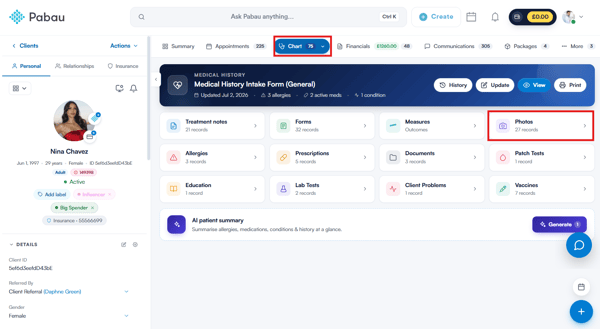
In the navigation bar of the client card, click EMR (labelled Chart on some accounts). This opens the EMR overview — select Photos to view all uploaded photos. Here’s a guide on how you can upload them.
Step 3: Select Photo
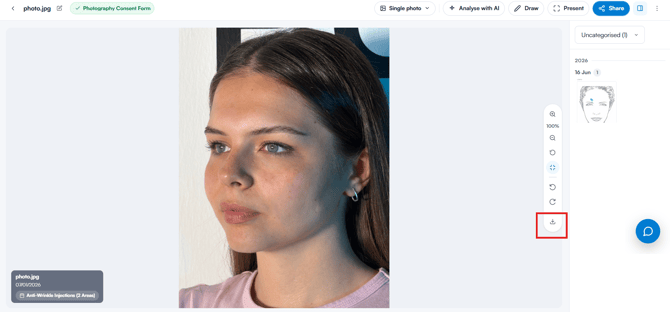
Click the photo you want to download to open it in full screen.
Step 4: Download Photo
With the photo open in full screen, you’ll see a tool rail on the right-hand edge of the screen with zoom, rotate, and download controls. Click the download icon to save the photo to your device.
TIP: You can also download a photo without opening it. Hover over it in the gallery, click the three-dot menu in its top-right corner, and choose Download — or Download (High Quality) if your account has Care Plus.
How to Download Photos in Bulk
Step 1: Access Client Photos
Once you’re in the client card, click EMR (or Chart) and select Photos to see all the uploaded client images. If you’ve created albums, switch to the Albums view and open the album containing the photos you want to download.
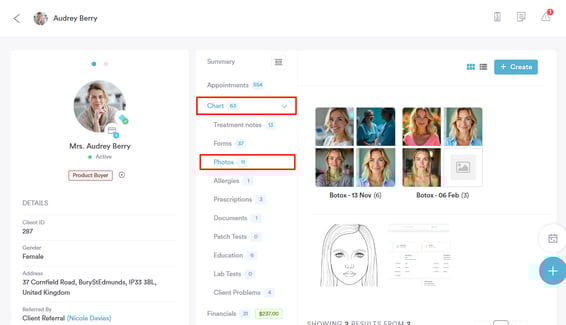
NOTE: If you haven’t created albums yourself, the Albums view automatically groups photos by the month they were taken.
Step 2: Select Photos
To download photos in bulk, hover over each photo and tick the checkbox that appears in its bottom-left corner.
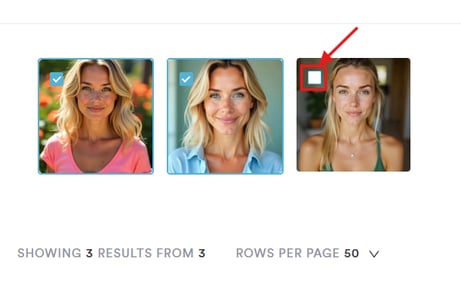
Step 3: Download Photos
Once you’ve selected the photos, a selection bar appears at the bottom of the screen showing how many photos are selected. Click Download to save them to your device — each photo downloads as a separate file.
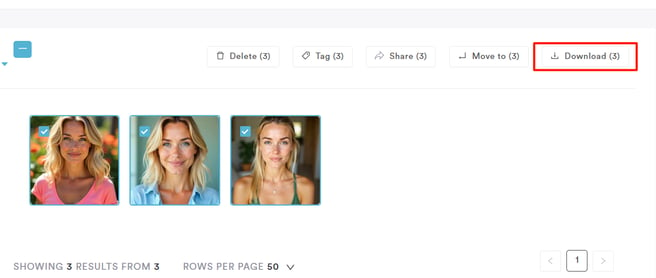
By following these steps, you can download photos from the client card in bulk.
How to Share Photos From the Client Card
Step 1: Navigate to the Client Card
Start by logging in to your Pabau account. Then, use the search bar at the top of the screen to find the client — type at least three letters of their name and select them from the results to open their client card.
Step 2: Open the Photos Tab
In the navigation bar of the client card, click EMR (labelled Chart on some accounts). This opens the EMR overview — select Photos to view all uploaded photos.
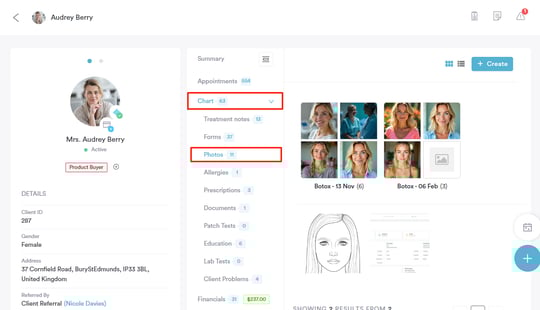
Step 3: Select Photo
Click the photo you want to share and it will open in full screen.
Step 4: Open the Share Window
With the photo open in full screen, click the Share button in the top-right corner of the screen.
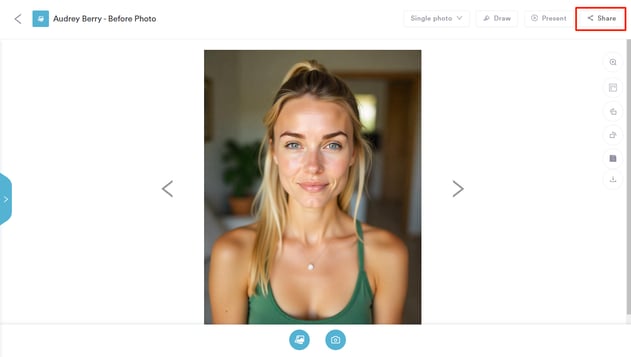
Step 5: Share the Photo
The Share photo window opens with the following options:
-
Show in Connect portal — turn this toggle on to publish the photo to the client’s Connect portal. The client will see it in their portal under Photos.
-
Create link — generates a share link for the photo. Once the link appears, use the copy button next to it to copy it to your clipboard, or click Share to Facebook to post it there.
If the Connect toggle is on when you click Create link, you’ll see the confirmation “Photo published to the client’s Connect portal”.
Clients can find the shared photo on their client portal under the Photos tab.
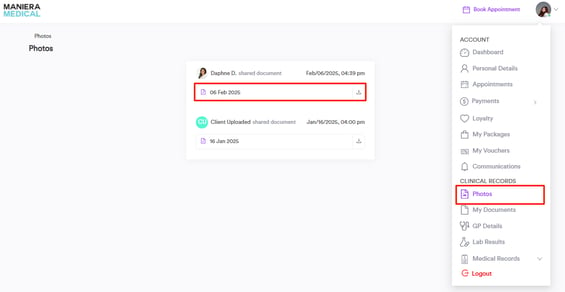
By following these steps, you can share photos with clients.
How to Share Photos in Bulk
Step 1: Access Client Photos
Once you’re in the client card, click EMR (or Chart) and select Photos to see all the uploaded client images. If you’ve created albums, switch to the Albums view and open the album containing the photos you want to share.
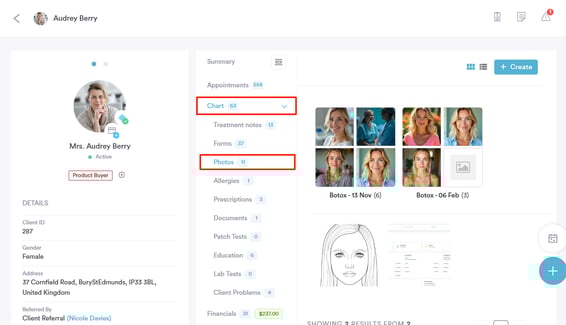
NOTE: If you haven’t created albums yourself, the Albums view automatically groups photos by the month they were taken.
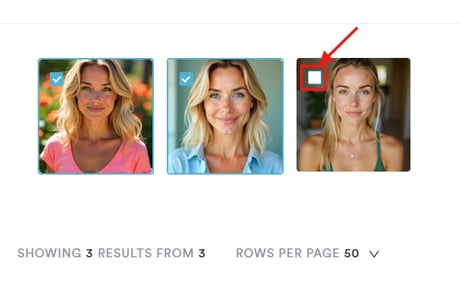
Step 2: Select Photos
To share photos in bulk, hover over each photo and tick the checkbox that appears in its bottom-left corner.
Step 3: Share Photos
Once you’ve selected the photos, a selection bar appears at the bottom of the screen. Click Share.
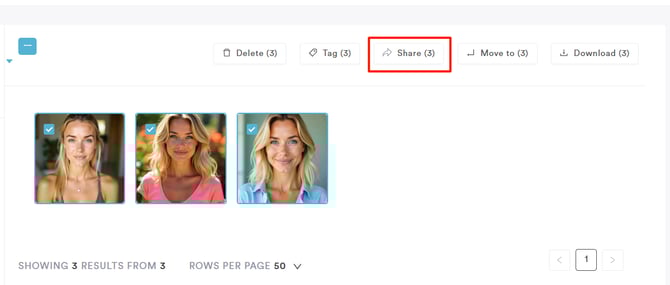
The Share photos window opens. Click Create link to create shares for the selected photos. To send one specific photo, use the share option on that photo instead., then use the copy button to copy it to your clipboard, or click Share to Facebook to post it there.
NOTE: Publishing to the client’s Connect portal is only available when sharing a single photo. Bulk selections generate a share link only.
By following these steps, you can share photos in bulk with your clients.
Was this guide helpful? Let us know by voting below - your feedback helps us write clearer articles.
For more guides, browse the related articles below or use the search bar at the top of the page. You can also watch our video learning series, the Pabau Academy, or visit the Support page for additional help.