
Step 1: Navigate to Setup
Start by logging into your Pabau account using your login credentials. Then, please navigate to the Stock tab, located in the left sidebar menu, and click to expand it. From there, select "Products" to access all your products.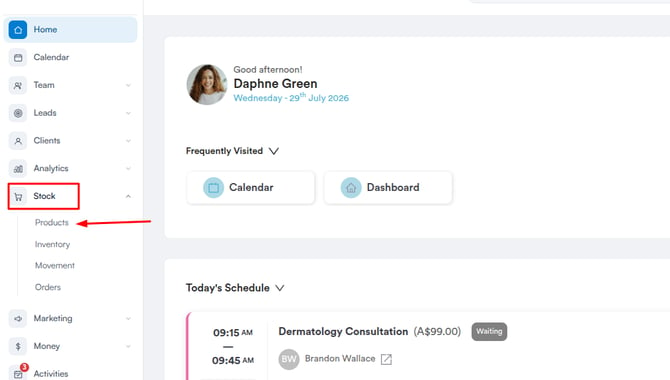
Step 2: Create a Vaccines Category
Before creating a vaccine product, create a Vaccines category to keep them organized. Switch to the "Categories" tab and click "New Category" in the top right corner.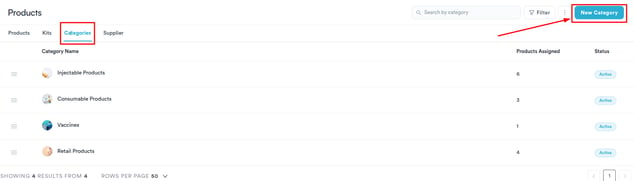
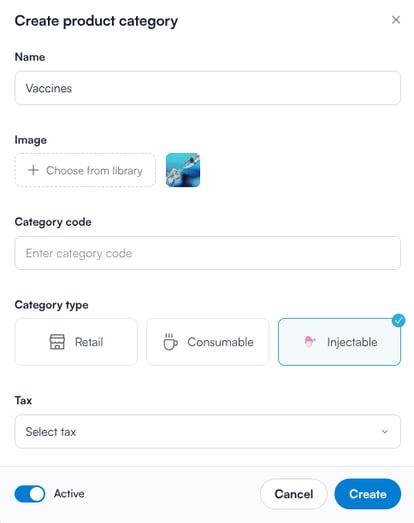
In the pop-up window, fill in the following fields:
- Name: Enter the name of the category - for example, Vaccines.
- Image (Optional): Upload an image to visually represent the category on the POS.
- Category Code (Optional): Add a custom code for internal reference if needed.
- Category Type: Choose the appropriate type. For vaccines, select Injectable.
- Tax: If applicable, select a tax rate from the dropdown menu. This will show any tax rules you’ve already created in the system.
Step 3: Create a Vaccine Product
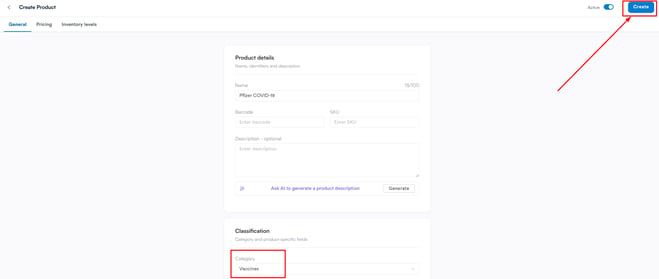
From the Products tab, click "New Product" in the top right corner and create a new product as usual, filling in all required fields.
Once you're done filling out all the required fields, ensure to select the "Save" button in the top right corner of the screen to finalize.
NOTE: Make sure to select "Vaccines" as the Category to correctly classify the product.
By following these steps, you’ll be able to quickly and accurately set up vaccines as stock products in Pabau.
Was this guide helpful? Let us know by voting below - your feedback helps us write clearer articles.
For more guides, browse the related articles below or use the search bar at the top of the page. You can also watch our video learning series, the Pabau Academy, or visit the Support page for additional help.