Table of Contents:
1. How to Create Services in the Pabau GO App
2. How to Create Products in the Pabau GO App
Please note: Pabau GO requires an iPhone or iPad running iOS 17 or later. Earlier versions aren't supported.
How to Create Services in the Pabau GO App
Step 1: Launch the Pabau GO iOS App
Start by launching the Pabau GO app on your iOS device and logging into your Pabau account using your credentials.
.png?width=472&height=719&name=IMG_0327%20(1).png)
NOTE: You’ll be asked to enter your PIN code each time you launch the app. To learn how to create or locate your PIN code, check out this guide.
Step 2: Access Menu
Tap the menu icon to open the menu. All available options will be listed there.

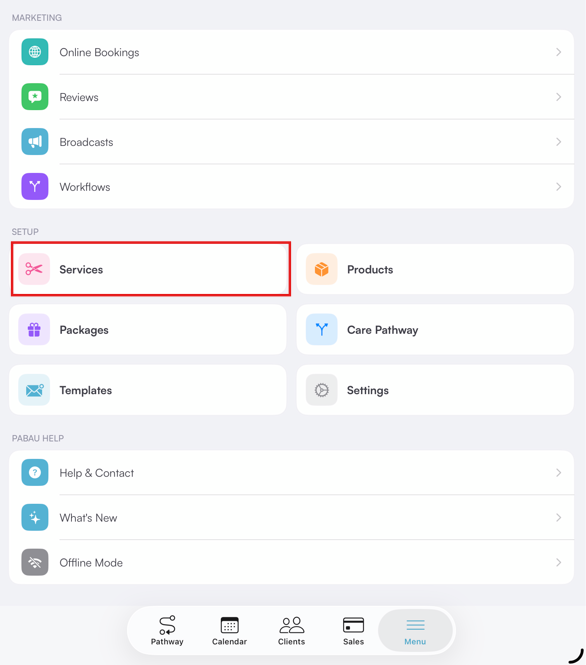
Step 3: Tap Services Option
On the menu list, you’ll spot the “Services” option — tap on it to reveal all the services you’ve created.
Step 4: Navigate to the Create Button
Go to the bottom-right corner of the screen and tap the blue plus (+) button to start creating a new service.

Step 5: Create Service
To create a new service, proceed to enter the following service details:
- Bookable Online (toggle): Enable this if you want the service to be available for online booking.
-
Service Name: Enter the name of the service you’re offering.
-
Category: Choose the appropriate category to group the service under.
-
Service Description: Add a short description explaining what the service includes.
-
Appointment Color: Select a color to represent this service on the calendar.
-
Location: Choose the location(s) where this service will be available.
-
Employees: Select the staff members who can perform this service.
-
Price: Set the price for the service.

Once you're done adding all the necessary information about the service, ensure to click the "Save" button on the bottom right corner to save the changes.
How to Create Products in the Pabau GO App
Step 1: Access Products
Tap the "Menu" icon, located either at the bottom right or top right corner of your screen, depending on your iOS device. In the menu, tap on the “Products” tab to view all your products.

Step 2: Review Products
At this stage, you’ll see a list of all the products you’ve added to the system, along with their cost price, retail price, and the total quantity in stock.
On the far right of each product, there’s a stock status indicator that shows whether the product is sufficiently stocked or running low, displayed as “Good” for enough stock and “Low” when inventory is running low.

Step 3: Create a New Product
To create a new product, tap the create button represented as a blue plus sign, located in the bottom right corner of the screen.

This will reveal two available actions:
- New Product - create a new product
- New Category - create a new product category

Step 4: Add Product Details
Once you tap "New Product," you’ll be prompted to fill in the following fields to create a new product in the system:
-
Name - Enter the product’s name as you want it to appear in your inventory list.
-
Category - Choose or create a category to help organise your products for easier searching and reporting. To find out how you can create a product category in Pabau, refer to this article.
-
Barcode - Add the product’s barcode if available. This allows for faster scanning and tracking.
-
SKU - Enter the Stock Keeping Unit (SKU), a unique identifier used for internal inventory management.
-
Measure - Define the unit of measurement (e.g., ml, g, units) to track stock accurately.
-
Supplier name - Specify the name of the supplier providing the product. To find out how you can create suppliers in Pabau, refer to this article.
-
Image - Upload a product image to make it easier to identify at a glance in your inventory.

To finalize the product creation process, scroll to the bottom right corner of the page and click the “Create” button.
By following these steps, you can successfully create a new product in the Pabau GO iOS app.
For more guides, refer to related articles below, select additional guides, or use the search bar at the top of the page. These guides will help you get the most out of your Pabau account.
Additionally, to help you fully utilize and understand your Pabau account, we recommend exploring additional guides and resources offered at the Pabau Academy. It offers in-depth video tutorials and lessons, offering a holistic learning experience that can equip you with the essential skills for achieving success with Pabau.