
In Pabau, you can create membership plans that allow you to set up recurring payments and offer paid plans to enhance client loyalty. The plans renew automatically, and your clients’ cards will be charged upon renewal—keeping things hassle-free for everyone.
Setting up memberships offers several key benefits:
Steady revenue: Enjoy predictable, recurring income each month.
Convenience: Automated renewals and easy session tracking simplify the process for clients.
Custom plans: Tailor memberships with flexible services, sessions, and pricing.
Increased sales: Encourage clients to explore more services or upgrade their plans.
Save time: Automated payments and renewals reduce admin work for your team.
Better cash flow: Predictable income helps manage business expenses more effectively.
NOTE: The membership feature will be usable only when the Stripe integration is active.
Step 1: Navigate to Setup
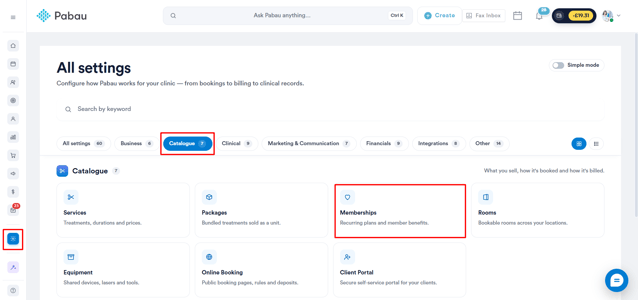
Start by logging in to your Pabau account using your login credentials. Then, navigate to the Setup page and find Memberships under the Catalogue section.
Step 2: Create a Membership
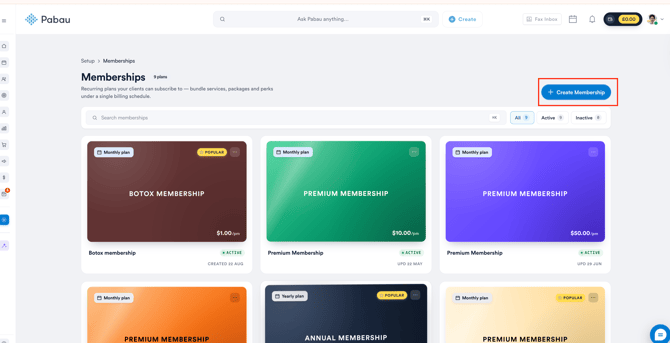
Once you're on the Memberships page, click the "Create Membership" button to get started.
Step 3: Insert Details
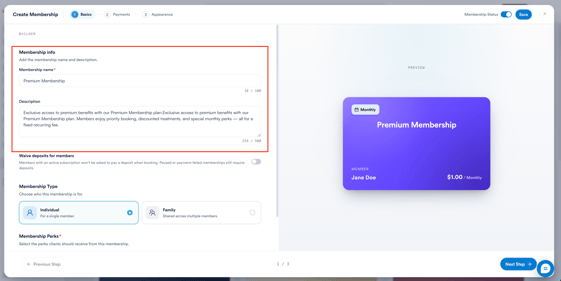
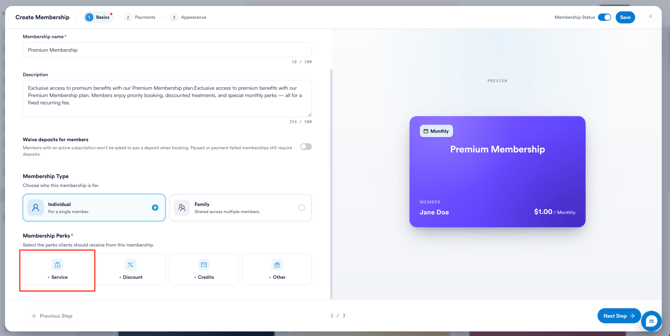
In the first step (Basics), add the membership name and description. A live preview of the membership card will appear on the right as you fill in the details.
You can also configure the following options:
Waive deposits for members: Enable this toggle if you want members with an active subscription to skip deposit payments when booking. Note that paused or payment-failed memberships will still require deposits.
Membership Type: Choose who the membership is for - Individual (a single member) or Family (shared across multiple members).
Step 4: Add Perks
Scroll down to access the Membership Perks section.
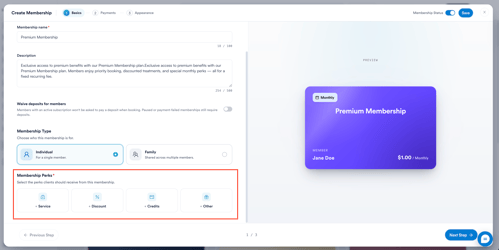
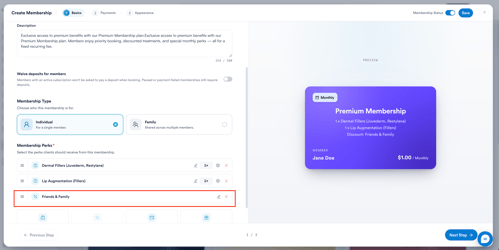
The membership perks can be in the form of services, discounts, credits, or other benefits. Click any of the perk tiles to add them to the membership.
Service: Click + Service to open the service selector.
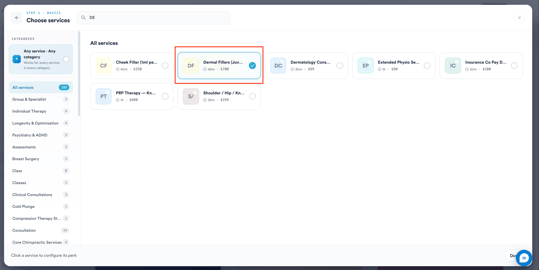
Browse all services or filter by category on the left, or use the search bar to find a specific service. Click a service to select it - you can select multiple services in the same panel.
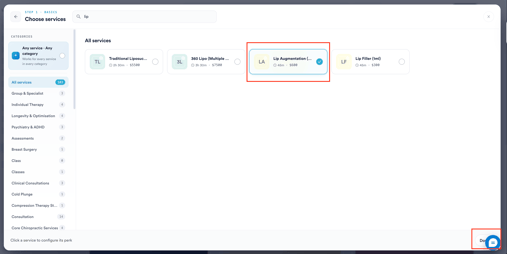
Once done, click Done to add them to the membership.
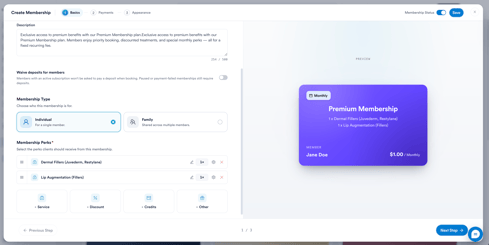
Each selected service will appear as a row in the perks list showing the service name and the number of times it's included (default 1x). Clients receive the selected services free of charge as long as the membership is active. If an appointment is booked and occurs during the membership period, it's free. If booked before the membership expires but happens after it ends, the service must be paid for.
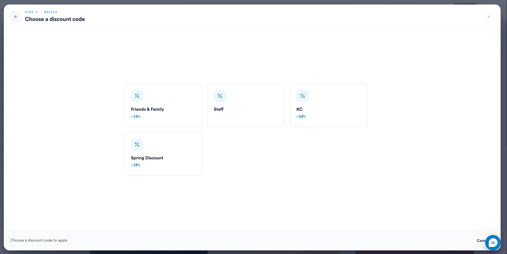
Discount: Click + Discount to set automatic discounts for members at checkout. Choose from the discounts you have created in the system. Every time the membership is active, the client will have a discount rate auto-applied in the Point of Sale or online bookings. The rules of the discount will apply, i.e. which services or products the discount can be used with.
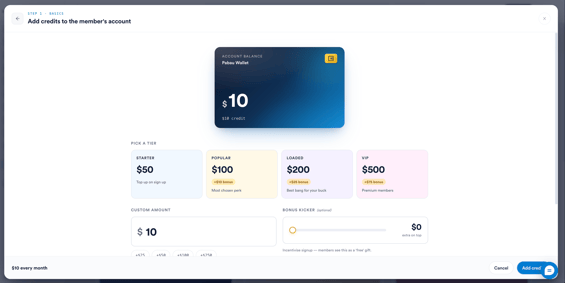
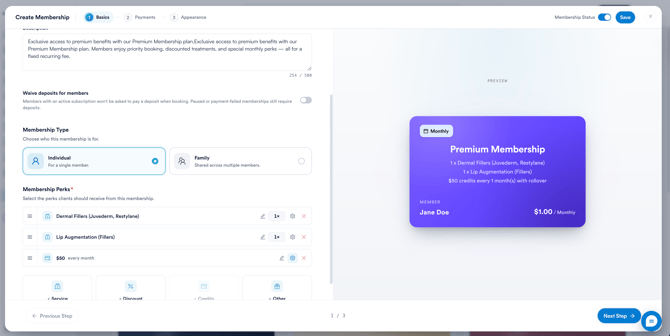
Credits: Click + Credits to open the credits panel. Select from one of the preset tiers — Starter ($50), Popular ($100 + $10 bonus), Loaded ($200 + $25 bonus), or VIP ($500 + $75 bonus) - or enter a custom amount. You can also set an optional Bonus Kicker using the slider to add extra credits on top as an incentive, which members see as a free gift. Credits are added to the member's Pabau Wallet automatically while the membership is active and can be used toward services or products at checkout.
Other: Click + Other to add a custom perk. You can choose from a library of preset perk templates organised by category (Booking perks, VIP treatment, Bonus savings, and Experience), or write your own from scratch. Note that custom perks are descriptive only - Pabau displays them to members but does not apply or enforce them automatically.
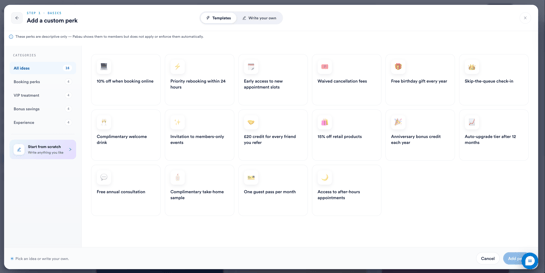
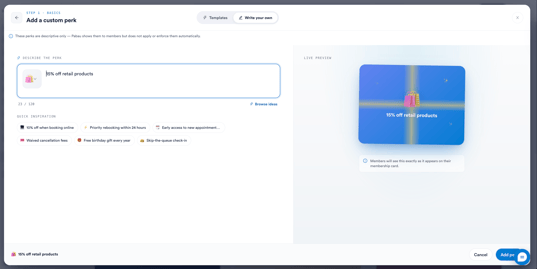
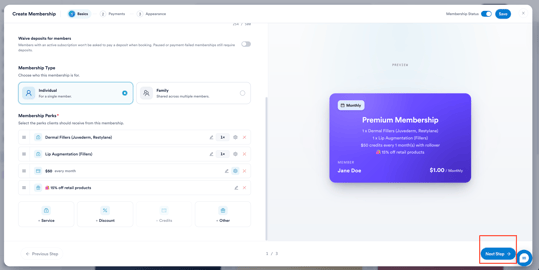
Once perks are added, they appear as rows in the perks list. Rearrange them by clicking the three-line icon next to each perk and dragging it to your preferred position.
NOTE: The perks are cumulative, meaning a membership can include multiple benefits, such as service A free of charge, service B free of charge, plus discounts on additional services. The client cannot have more services free of charge than the number of allowed services. Discounts are not restricted and can be applied for as long as the membership is active. The allowed service limits will renew every time a payment is taken for the membership.
Step 5: Set Up Pricing and Duration
Once you've set up the membership details and perks, click Next Step in the bottom right corner to move to the Payments tab.
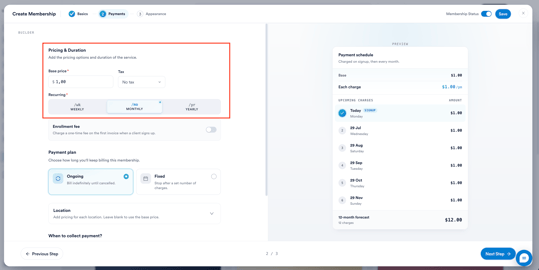
Enter the price of the membership in the Base price field, then select the applicable tax rate in the Tax field. For more details on creating and managing taxes, please refer to this article.
Under Recurring, choose how often clients will be charged - Weekly, Monthly, or Yearly.
Enter the price of the membership in the Base price field, then select the applicable tax rate in the Tax field. For more details on creating and managing taxes, please refer to this article.
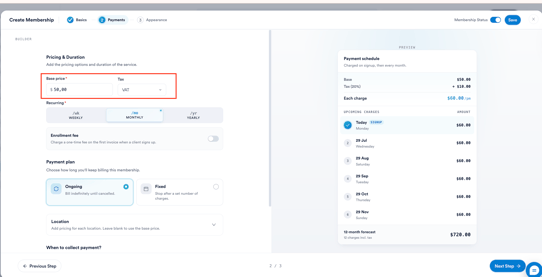
You can also enable the Enrollment fee toggle to charge a one-time fee on the first invoice when a client signs up.
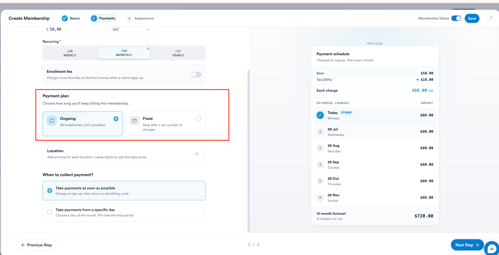
Under Payment plan, choose how long the membership will keep billing:
- Ongoing - bills indefinitely until cancelled.
- Fixed - stops after a set number of charges.
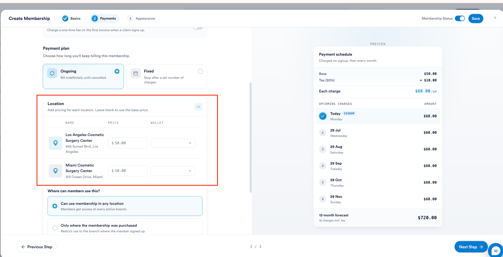
If your account has multiple locations, expand the Location section to set a different price per location. Leave blank to use the base price.
Under When to collect payment?, choose one of the following:
- Take payments as soon as possible - charge at sign up, then recur on the billing cycle.
- Take payments from a specific day - choose a day of the month and pro-rate the first period.
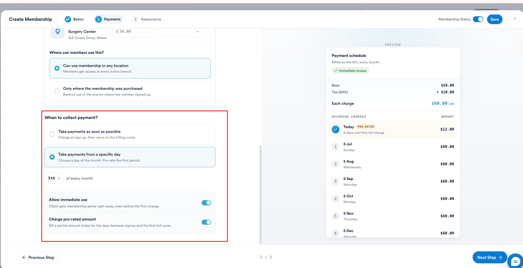
The preview panel on the right will display a live payment schedule showing upcoming charge dates and a 12-month forecast.
Step 6: Customize Appearance
Once you have set up the payment schedule, click Next Step to move to the Appearance tab. Under Membership options, you can configure the following:
Allow online purchases: Enable this toggle to make the membership available for purchase online. Popular: Enable this toggle to display a "popular" badge on the digital membership card.
Once you have set up the payment schedule, click ''Next Step'' to move to the Appearance tab.
Under Membership options, you can configure the following:
Allow online purchases: Enable this toggle to make the membership available for purchase online.
Popular: Enable this toggle to display a "popular" badge on the digital membership card.
Under Appearance, you can customize the look of your digital membership card:
- Theme Colour: Choose from a selection of preset colours or use the custom colour option.
- Button Colour: Select the button colour for the card.
- Membership photo: Upload a photo to display on the membership card.
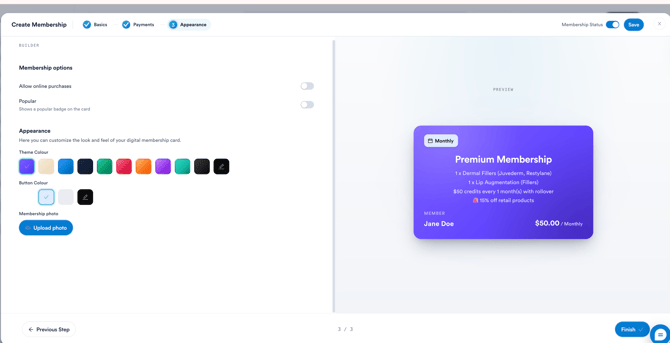
The membership will be marked as active by default. If needed, adjust the status using the Membership Status toggle in the top-right corner.
To finalize the membership setup, click Finish in the bottom-right corner of the screen.
By following these steps, you can create memberships in your Pabau account.
For more guides, refer to related articles below, select additional guides, or use the search bar at the top of the page. These guides will help you get the most out of your Pabau account.
Additionally, to help you fully utilize and understand your Pabau account, we recommend exploring additional guides and resources offered at the Pabau Academy. It offers in-depth video tutorials and lessons, offering a holistic learning experience that can equip you with the essential skills for achieving success with Pabau.