
This article covers the new Client Card, available to selected clinics from August 2026. If your Client Card looks different, see the How to Create Educational Content(Classic) guide instead.
Step 1: Access Education Settings
Log into your Pabau account, navigate to "Setup" in the left sidebar menu, and click on "Education" under Clinical.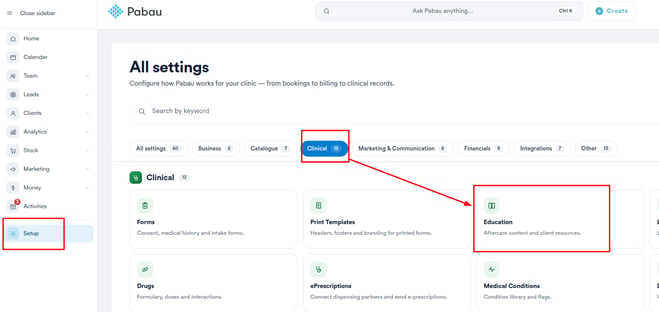
Step 2: Explore and Add Content
In the "Manage education" window, you’ll see a list of all existing educational content with its name, type, and when it is sent. Click "Add" in the bottom right corner to start creating new content.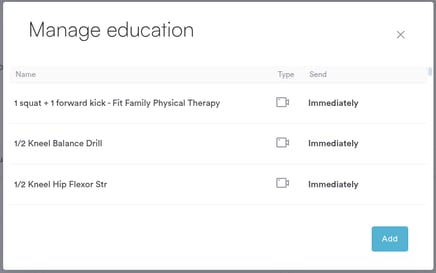
Step 3: Choose Content Type and Details
In the "Add Educational Content" window, choose between "Content" (text) or "Video".
-
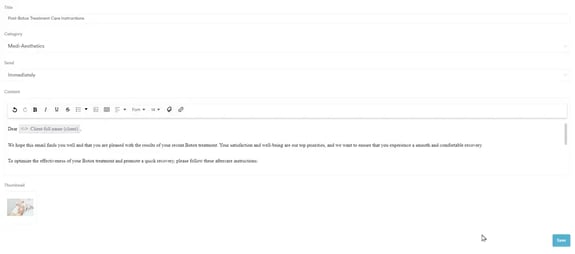
For "Content" (Text):
- Provide a title for the content.
- Choose a category.
- Select when it should be sent (currently, the only available option is "Immediately").
- Input the text content.
- Optionally, upload a thumbnail for display in the Education section of a client card.
- Click "Save" in the bottom right corner to save the content.
-
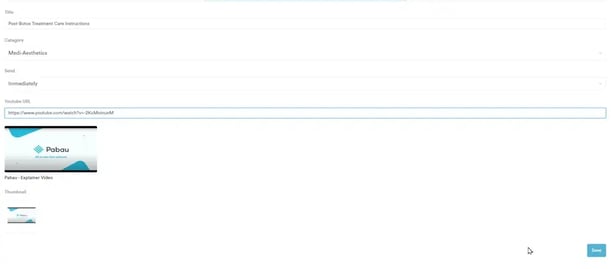
For "Video":
- Provide a title for the content.
- Choose a category.
- Select when it should be sent (currently, the only available option is "Immediately").
- Input the YouTube link URL.
- The thumbnail will be generated automatically.
- Click "Save" in the bottom right corner to save the content.
Step 4: Send Content to Clients
Once your content is created, you can send it to a client by opening their client card, clicking the "+" button in the bottom right corner, and selecting "Education".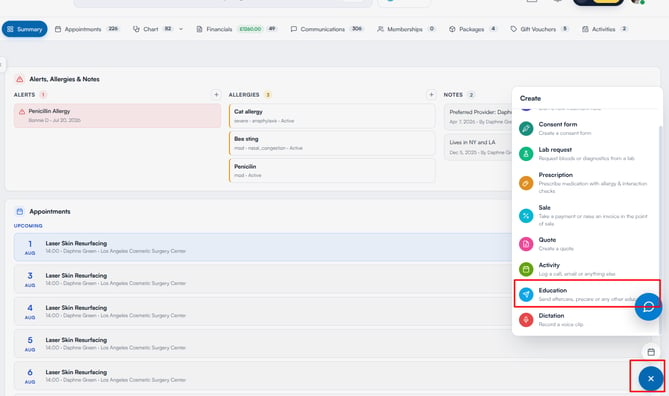
The "Send education" window opens, showing who the email will go to. Use the filters on the left to narrow the list by source (Pabau’s ready-made content, your own Library, or all sources), business type, or send timing, or search for a template by name.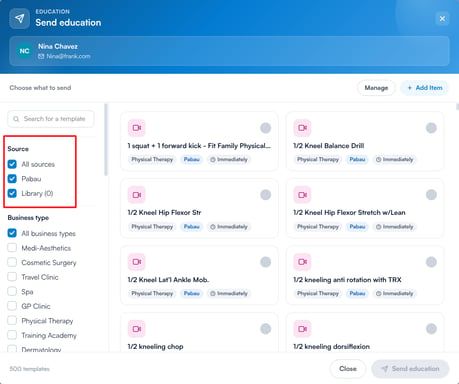
Click one or more items to select them, then click the Send button in the bottom right corner — it shows how many items you’re sending and to whom. The content is sent to the client via email, with a link to view it in the client portal.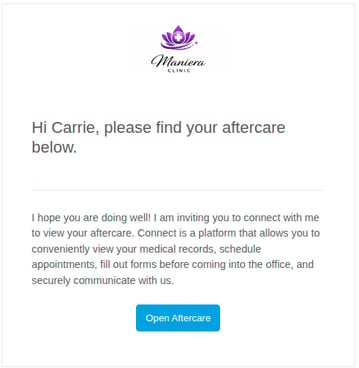
With your educational content created, you can keep clients informed with the right information at the right time, directly from their client card.
TIP: You can also create and manage content without leaving the client card — in the "Send education" window, click "Add Item" to create new content, or "Manage" to review and delete your existing templates.
NOTE: If you would like to automate the distribution of aftercare instructions, review the information provided in this article.
Was this guide helpful? Let us know by voting below - your feedback helps us write clearer articles.
For more guides, browse the related articles below or use the search bar at the top of the page. You can also watch our video learning series, the Pabau Academy, or visit the Support page for additional help.