
NOTE: Cases is part of the Care Plus plan. If you do not see Cases under Clients in the sidebar, speak to your account manager about upgrading.
NOTE: You need at least one case type before you can create a case. See How to Set Up Case Types.
Step 1: Navigate to the Clients Tab
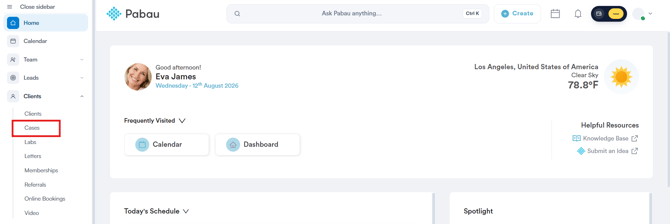
Start by logging into your Pabau account using your login credentials. Then, navigate to the left sidebar menu and click the 'Clients' tab to expand it. This will reveal the 'Cases' sub-tab.
Step 2: Create New Case
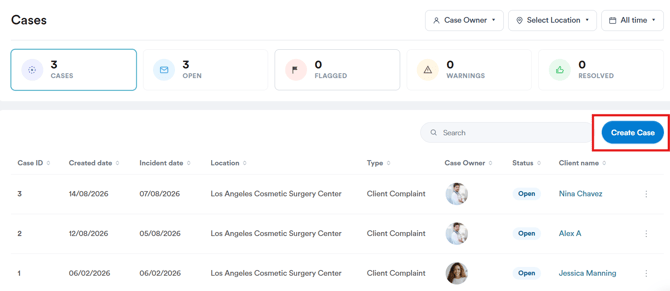
Once you access the Cases page, you’ll see any cases that have been created so far. To create a new case, go to the top-right corner of the screen and click the 'Create Case' button.
A pop-up window will appear where you can proceed to fill out the following fields:
-
Fields marked with a red asterisk are required:
- Case Type* — search and select the type. This decides the stages, categories and outcomes for the case.
- Client* — search for the client the case relates to. Type at least three characters to see results.
- Location* — the clinic location the case belongs to. This also controls which colleagues can see it.
- Case Owner* — the staff member responsible for the case.
- Case Date *— the date of the incident, in DD/MM/YYYY format.
- Reported By — optional. Who raised the issue.
- Description — optional. Up to 1,000 characters of detail.
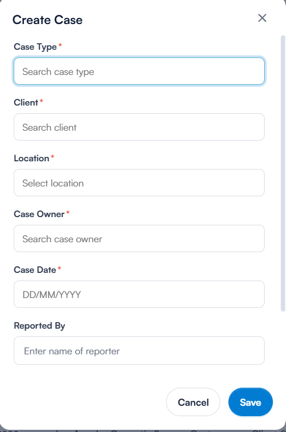
Once you've filled out all the required information, click the save button in the bottom right corner of the window.
TIP: If the case cannot be saved you will see "Couldn't save the case, please try again later." at the top of the window. Check that every required field is filled and try again.

NOTE: As soon as you choose a Case Type, two more required fields appear: Stage and Incident Category. Both are pre-filled with the first option from that case type, and you can change either before saving.
Step 3: Review Case
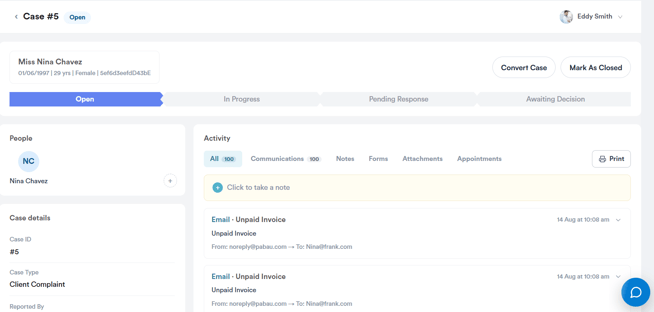
You will be redirected to the case you just created, where you can add and view more information.
By following these steps, you can easily create a new case in Pabau.
Was this guide helpful? Let us know by voting below - your feedback helps us write clearer articles.
For more guides, browse the related articles below or use the search bar at the top of the page. You can also watch our video learning series, the Pabau Academy, or visit the Support page for additional help.