
This article covers the new Client Card, available to selected clinics from August 2026. If your Client Card looks different, see the How to Create a Letter (Classic) guide instead.
Step 1: Log In and Locate the Client
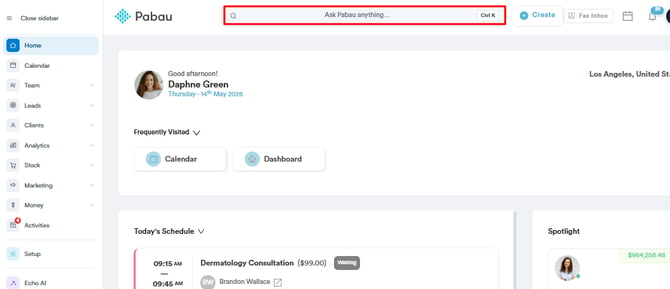
Log in to your Pabau account and use the search bar at the top of the screen to find the client you want to write to.
Step 2: Start the Letter
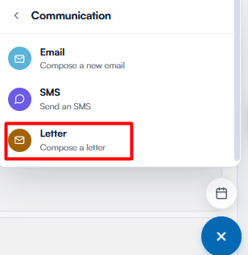
On the client card, click the blue plus button at the bottom right, choose “Communication”, then select “Letter”. The letter composer opens in full screen.
NOTE: If your clinic has letter templates saved, the “Choose Letter Template” window opens first. Pick a template, a recently used letter or a treatment note to start from — or close the window to write from scratch.
Step 3: Configure Letter Details
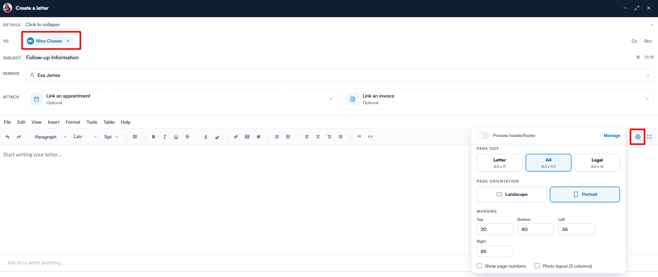
The client is pre-filled as the recipient and the sender defaults to your own user. Click the “Details” row to expand it and adjust the To, Cc/Bcc, Subject and Sender fields — the # icon next to the subject inserts merge tags such as the client’s name. You can also link an appointment or an invoice so any appointment or invoice merge tags in the letter fill in with the right details.
To adjust the page size, orientation or margins, click the “Page settings” cog on the right of the formatting toolbar. The same menu lets you show page numbers and preview your clinic’s letterhead header and footer.
Step 4: Compose the Letter
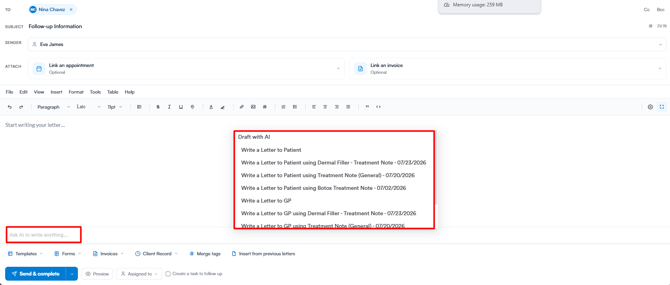
Write the letter by typing it into the text editor. You can also rely on Pabau AI — type an instruction into the “Ask AI to write anything…” bar beneath the editor, or pick one of the suggested prompts, such as writing a letter to the patient or their GP based on a treatment note.
Through the “Client Record” button below the editor, you can insert information from the client’s record — such as forms, medical history, allergies, medications and appointments — directly into the letter.
You can also add images through the “Insert image” icon in the toolbar — upload a file or paste an image URL.

Optionally, apply a letter template from the “Templates” button, or reuse content from an earlier letter with “Insert from previous letters”.
NOTE: To improve formatting and readability, you can adjust the line spacing using the “Line height” option in the toolbar. This lets you set custom spacing such as 1.2 or 1.5 for a cleaner layout when printing or emailing.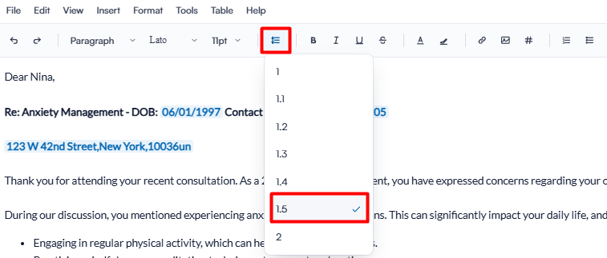
Explanation of Toolbar Icons

The “Paragraph” dropdown switches between headings, quotes and normal text, while the two dropdowns beside it change the font and the text size.

You can use the Bold, Italic, Underline and Strikethrough options to modify the text of the letter — for example, highlighting important information in bold or drawing attention to specific parts with underlining.
Also, you can use “Text colour” to change the font colour and “Highlight” to mark text with a different background shade for emphasis or visual clarity.
You can use the “Insert link” button to add hyperlinks to your text, directing clients to external pages or resources, and the “Insert image” button to upload or embed images directly into your content.
The Align left, Align centre, Align right and Justify buttons let you control the alignment of your text — positioning it to the left, centre or right of the page, or spacing it evenly across the full width for a clean, uniform look.
The “Merge tag” (#) button inserts dynamic placeholders such as the client’s name or today’s date, and the “Source code” button lets you view and edit the HTML behind your content. The “Fullscreen” button at the far right of the toolbar expands the editor to fill the screen for easier writing and editing.
Step 5: Schedule a Follow-up Task
If you’d like to be reminded to follow up on the letter, tick the “Create a task to follow up” checkbox at the bottom of the composer — this reveals a timing option (for example, in 3 business days). When you send the letter, a task window opens pre-filled with your chosen date — save the task and the letter is sent.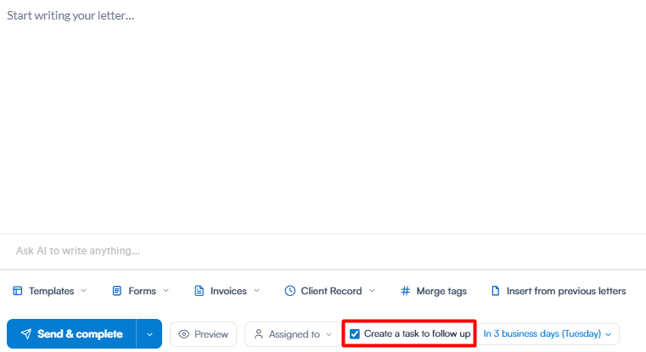
Step 6: Save and Complete
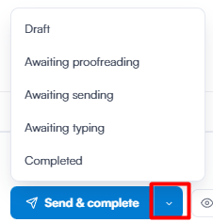
Click “Send & complete” to finish the letter — you’ll then be asked how you’d like to send it: email it to the recipient, share it securely, create a referral, or print it. Alternatively, click the arrow next to the “Send & complete” button to save the letter with a workflow status instead: Draft, Awaiting proofreading, Awaiting sending or Awaiting typing. Choosing “Completed” from the same menu sends the letter, just like “Send & complete”.
TIP: Use the “Preview” button next to “Send & complete” to see exactly how the letter will print, and the “Assigned to” dropdown to assign the letter to a team member — useful for typing and proofreading workflows.
The letter is now accessible in the Communications section of the client card.
NOTE: We suggest reading our Letters article for a more in-depth exploration of this topic.
Was this guide helpful? Let us know by voting below - your feedback helps us write clearer articles.
For more guides, browse the related articles below or use the search bar at the top of the page. You can also watch our video learning series, the Pabau Academy, or visit the Support page for additional help.