
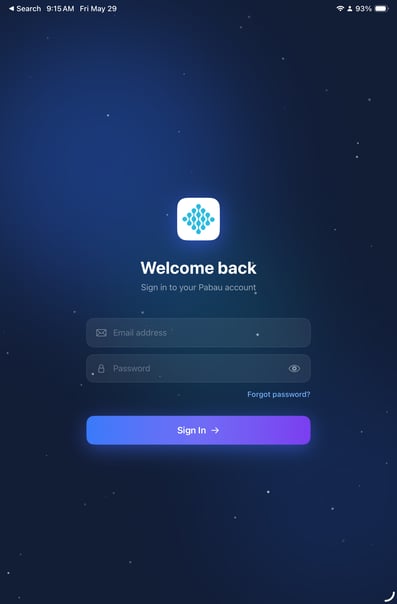
Step 1: Log in to the Pabau GO App
Open the Pabau GO app on your iPhone or iPad and sign in using your email address and password. Tap Sign In to access your account.
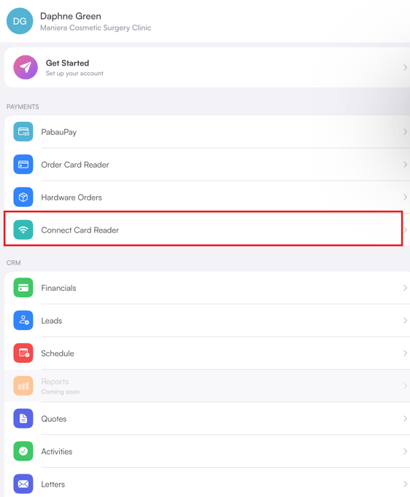
Step 2: Navigate to Connect Card Reader
Tap Menu in the bottom navigation bar. Scroll to the Payments section and tap Connect Card Reader.
Step 3: Choose Your Connection Type
On the Available Card Readers screen, select the type of card reader you want to connect:
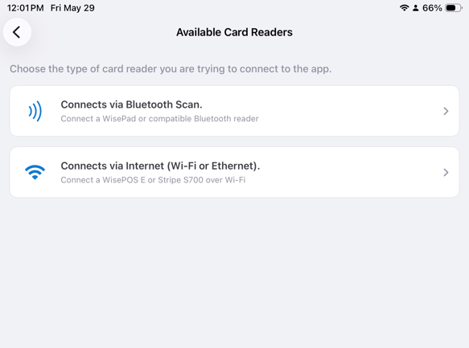
- Connects via Bluetooth Scan — For WisePad or compatible Bluetooth readers
- Connects via Internet (Wi-Fi or Ethernet) — For WisePOS E or Stripe S700 readers connected over Wi-Fi
Option A: Connecting via Bluetooth
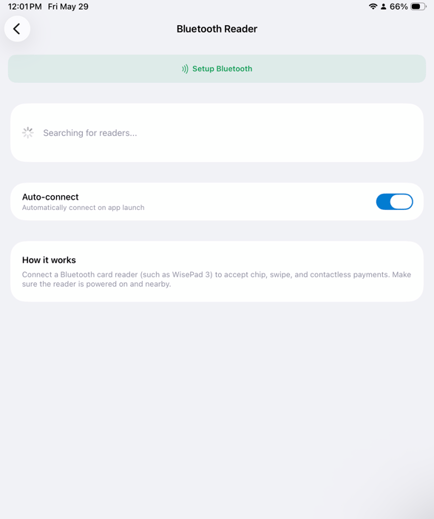
Allow Bluetooth Access
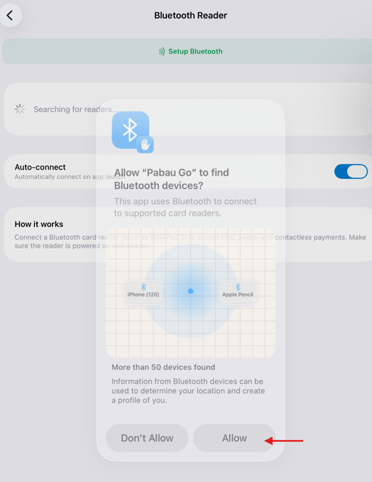
The app will ask for permission to find Bluetooth devices. Tap Allow to grant access. The app will begin scanning and display Searching for readers... while it looks for nearby devices.
Enable Auto-connect (Optional)
Toggle Auto-connect on to automatically connect to this reader every time the app launches, so you don't have to reconnect manually each time.
Connect Your Reader
Once your reader appears in the list, tap it to connect. Make sure your Bluetooth card reader is powered on and nearby.
NOTE: If no readers appear, pull down on the screen to refresh the search.
Option B: Connecting via Internet (Wi-Fi or Ethernet)
Choose Your Reader Model
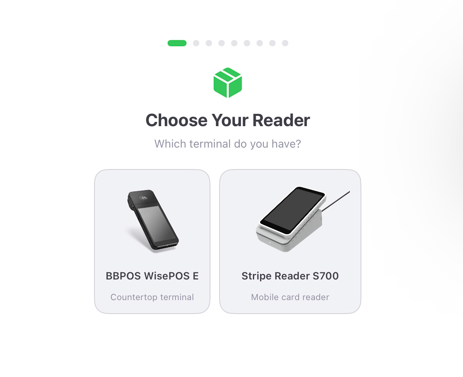
Tap Connects via Internet (Wi-Fi or Ethernet) and select your reader model:
- BBPOS WisePOS E — Countertop terminal
- Stripe Reader S700 — Mobile card reader
Tap Continue to proceed.
Check Prerequisites
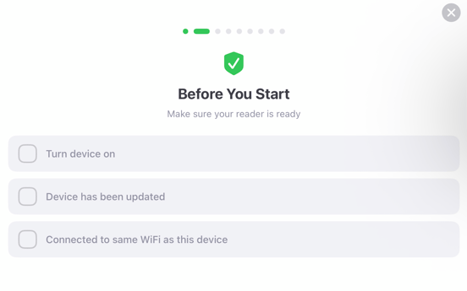
Before continuing, confirm all three items on the Before You Start checklist:
- Turn device on — Make sure your card reader is powered on
- Device has been updated — Ensure the reader has the latest firmware
- Connected to same WiFi as this device — Both your iPhone/iPad and the card reader must be on the same Wi-Fi network
Once all three are ticked, tap Continue.
Swipe Right on the Reader
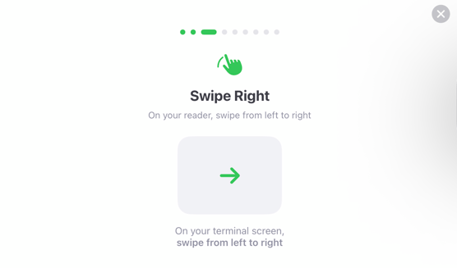
On your card reader's screen, swipe from left to right to open the settings menu. Tap Continue in the app once done.
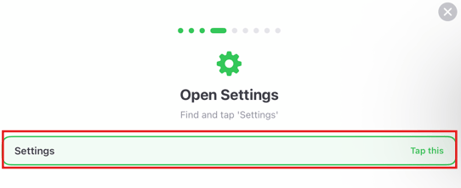
Open Settings on the Reader
On your card reader's screen, find and tap Settings. Tap Continue in the app.
Enter the Code
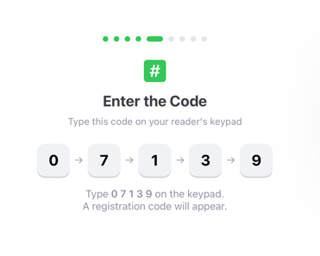
The app will display a code to enter on your reader's keypad (e.g. 0 7 1 3 9). Type this code on the reader's keypad. A registration code will appear on the reader's screen. Tap Continue in the app.
Enter the Pairing Code

Type the registration code shown on your reader's screen into the Enter pairing code field in the app. Tap Continue.
Select the Terminal Location
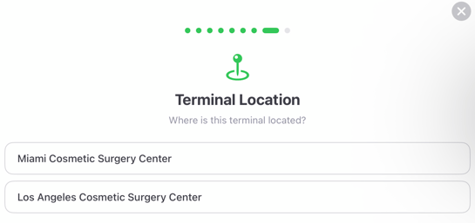
Choose which clinic location this terminal belongs to from the list. Tap Continue.
Name Your Terminal
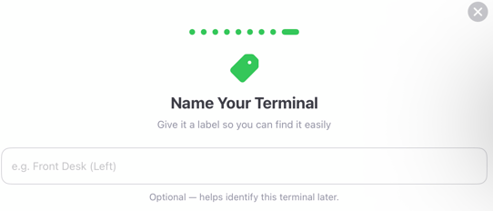
Give the terminal a label to help identify it later — for example, Front Desk (Left). This field is optional but recommended if you have multiple terminals. Tap Register Terminal to complete the setup.

Your card reader is now connected and ready to take payments in the Pabau GO app.
📱Please note: The latest version of Pabau GO requires iOS 17 / iPadOS 17 or later. Devices that can't update to iOS 17 / iPadOS 17 won't be able to run it.
Download Pabau GO on your iPhone or iPad from the App Store.
For more guides, refer to related articles below, select additional guides, or use the search bar at the top of the page. These guides will help you get the most out of your Pabau account.
Additionally, to help you fully utilize and understand your Pabau account, we recommend exploring additional guides and resources offered at the Pabau Academy. It offers in-depth video tutorials and lessons, offering a holistic learning experience that can equip you with the essential skills for achieving success with Pabau.