
NOTE: This guide covers the new Online Bookings and Client Portal, which are being rolled out to clinics in phases. If your screens look different, your account may still be on the classic version — message us via the in-app chat and we will help.
In this article, you will learn how to choose which pages and features your clients see in the Client Portal. Every feature has its own card on the Essentials tab of Setup → Client Portal.
Step 1: Switch Features On or Off
- Find the feature’s card. The cards are grouped into My Account and Clinical records, and each one shows Enabled or Disabled.
- Turn the switch on or off. The change saves straight away, and the preview of the client’s menu on the right updates.
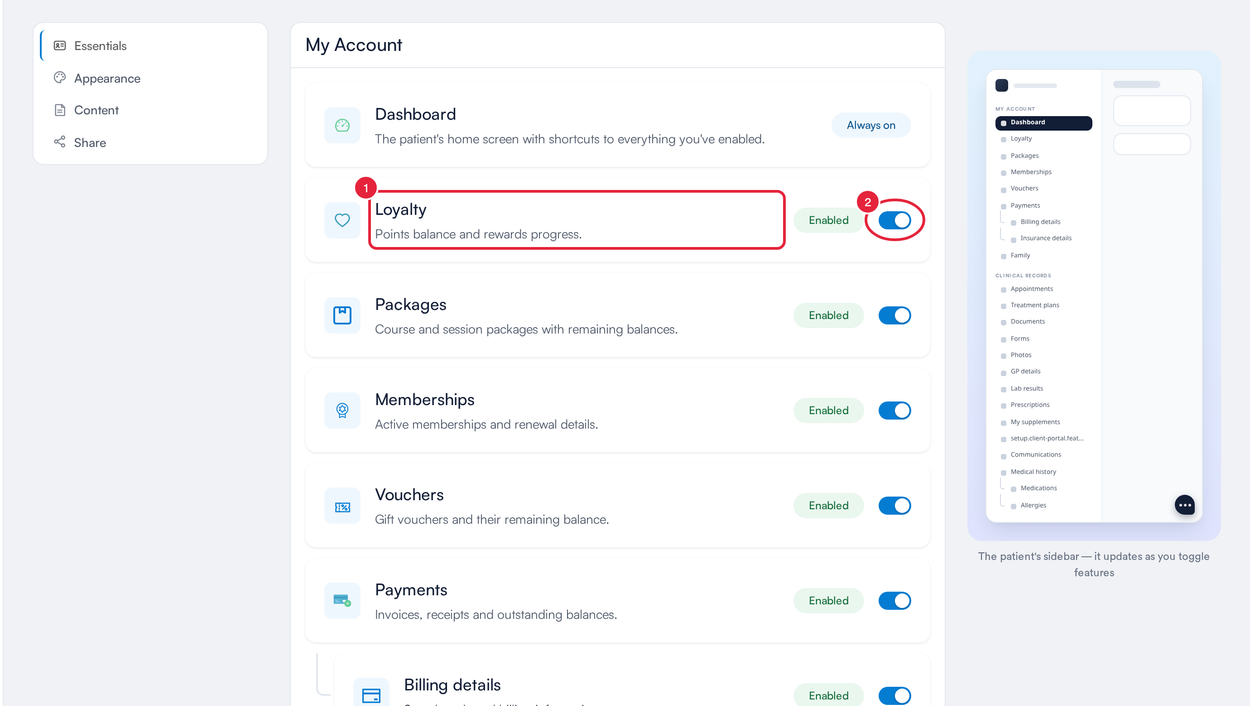
Feature cards on the Essentials tab, with the client’s menu previewed on the right
Step 2: Open a Feature for More Options
- Click the card (not the switch). A window opens with a description and What the patient sees.
- Use Status to switch the feature on or off.
- Some features have Feature settings — for example, Documents has Allow clients to upload documents.
- Under Page link, click Copy to copy a direct link to that page.
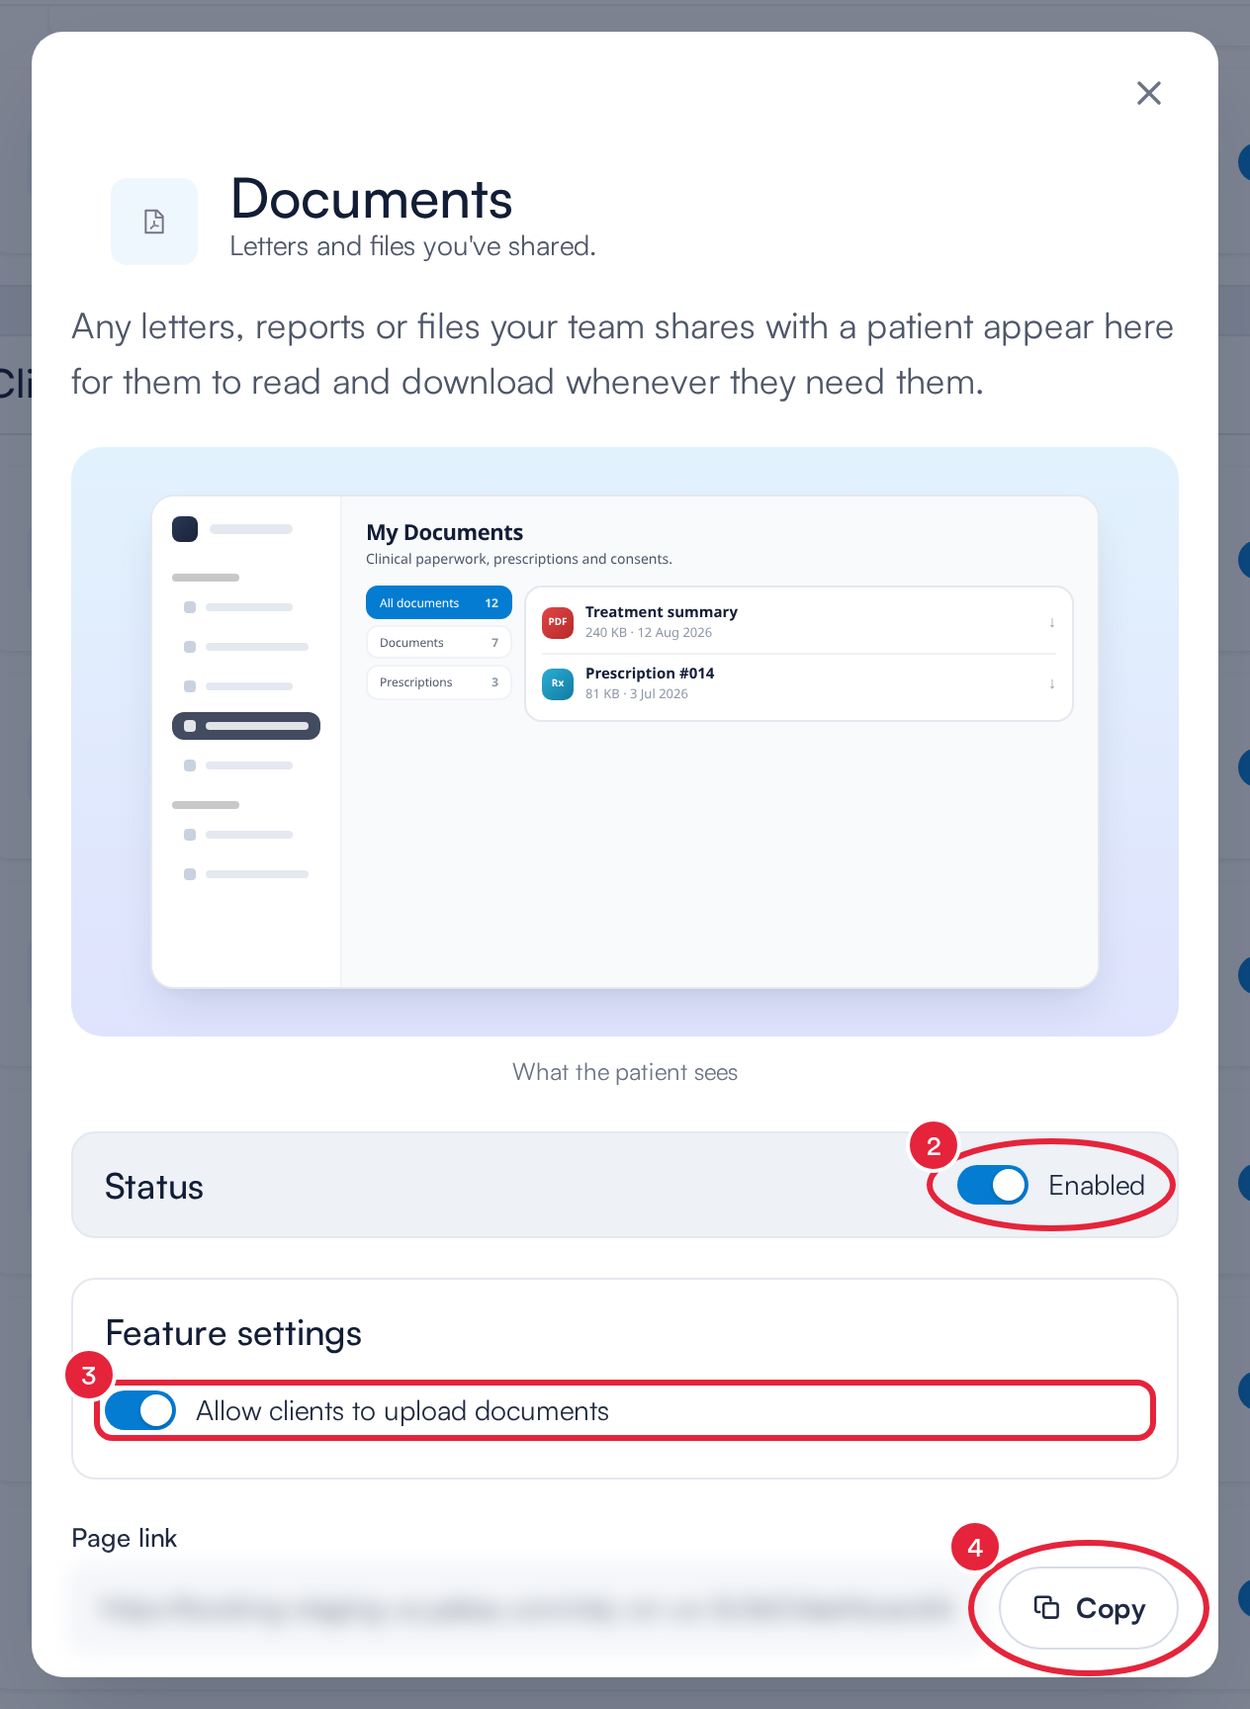
A feature window: Status, Feature settings and Page link
| Feature | Feature settings |
|---|---|
| Appointments | Allow cancellations and Allow reschedules (Follow cancellation policy or Always allow) |
| Documents | Allow clients to upload documents |
| Photos | Allow clients to upload photos (off until you turn it on) |
| Lab results | Allow clients to import their own lab results (off until you turn it on) |
| Prescriptions | Allow clients to order prescriptions |
| Allergies | Allow clients to add or edit allergies |
NOTE: Some features depend on others. Billing details and Insurance details need Payments on, and Insurance details only appears if your clinic uses insurance billing. Medications and Allergies need Medical history on. Message history needs Secure messages, which needs Pabau Engage. A few cards, such as Treatment plans or My supplements, only appear if your clinic has that feature.
TIP: My vitals, Message history, photo uploads and lab result imports stay off until you turn them on, so nothing new appears to clients without your say-so.
Step 3: Set the Hold Time at Checkout
- Scroll to the bottom of the Essentials tab.
- Under Hold time at checkout, choose how many minutes a slot is kept for a client while they pay. When the time runs out, the client is warned and the slot goes back on sale.
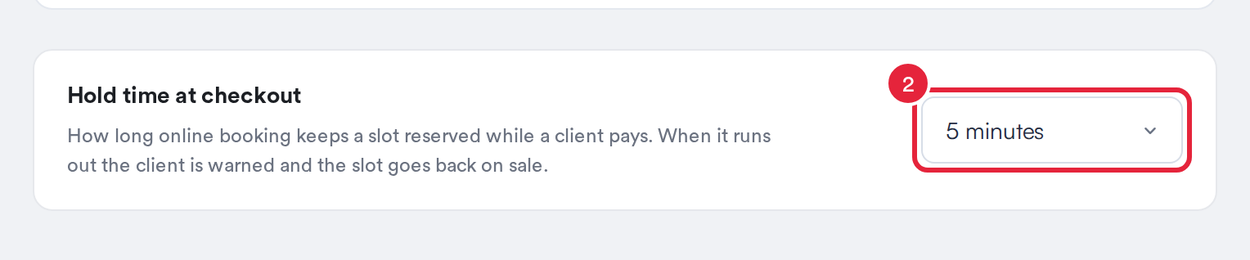
Hold time at checkout
Do documents on the client card appear in the Client Portal automatically?
No. Uploading a file to a client's card does not publish it. A document only appears on the client's Documents page in the portal once someone on your team releases it to that client, for example by sharing it with Share Securely. That sharing window has a Share on client portal switch, which is on by default ("The client can also open this from the Portal, alongside the secure link.").
The Documents feature must also be switched on in Step 1 for the page to appear at all.
IMPORTANT: If a document was uploaded to the wrong client's card and never shared, that client cannot see it in the portal. If it was shared, check Share History on the document to see who it went to, then move or delete the file. If you need to know whether the client actually opened it, message us via the in-app chat.
What's next?
For cancellations and reschedules, see How to Control Appointments in the Client Portal. For colours and your announcement, see How to Customise Your Client Portal’s Look and Content.
Where do prescription requests from the portal arrive?
When Allow clients to order prescriptions is on, signed-in patients can order a prescription from the portal's Prescriptions page. Each request arrives in your Engage inbox as a new conversation from that patient, shown as a Prescription request card. It also appears in the Communications section of the client's card, so anyone reviewing the client can see it.
Reply, assign or action the request from the inbox as you would any other conversation. The patient can read your replies on the portal's Secure messages page if you have it switched on.
NOTE: A request isn't a prescription. A prescriber still needs to create and issue it in Pabau.
Questions? Reach us any time via the in-app chat — we’re happy to help.
Was this guide helpful? Let us know by voting below - your feedback helps us write clearer articles.
For more guides, browse the related articles below or use the search bar at the top of the page. You can also watch our video learning series, the Pabau Academy, or visit the Support page for additional help.