
Some treatments run over more than one day. In the booking panel you can give a service a duration in days: Pabau books it as one appointment per day, lets you set the times and room for each day, and moves all the days together when you reschedule.
NOTE: This feature is being rolled out to clinics gradually. If you don't see it in your account yet, message us via the in-app chat.
Step 1: Choose a Duration in Days
- In the Calendar, click the team member's first day at the time the appointment starts, choose the client and add the service.
- Hover over the service card and click the pencil to edit it.
- Open Duration and choose a number of days. They are at the bottom of the list, from 2 days to 6 days.
- Pabau lists each day, for example Day 1 · Mon 26 Oct and Day 2 · Tue 27 Oct, with a Start time and End time. Day 1 runs from your start time to the end of the team member's working hours, and each following day covers their working hours. Change any day's times if you need to, for example to start Day 2 later.
- Under Resource, each day has its own room and equipment, so one day can use a different room from the others.
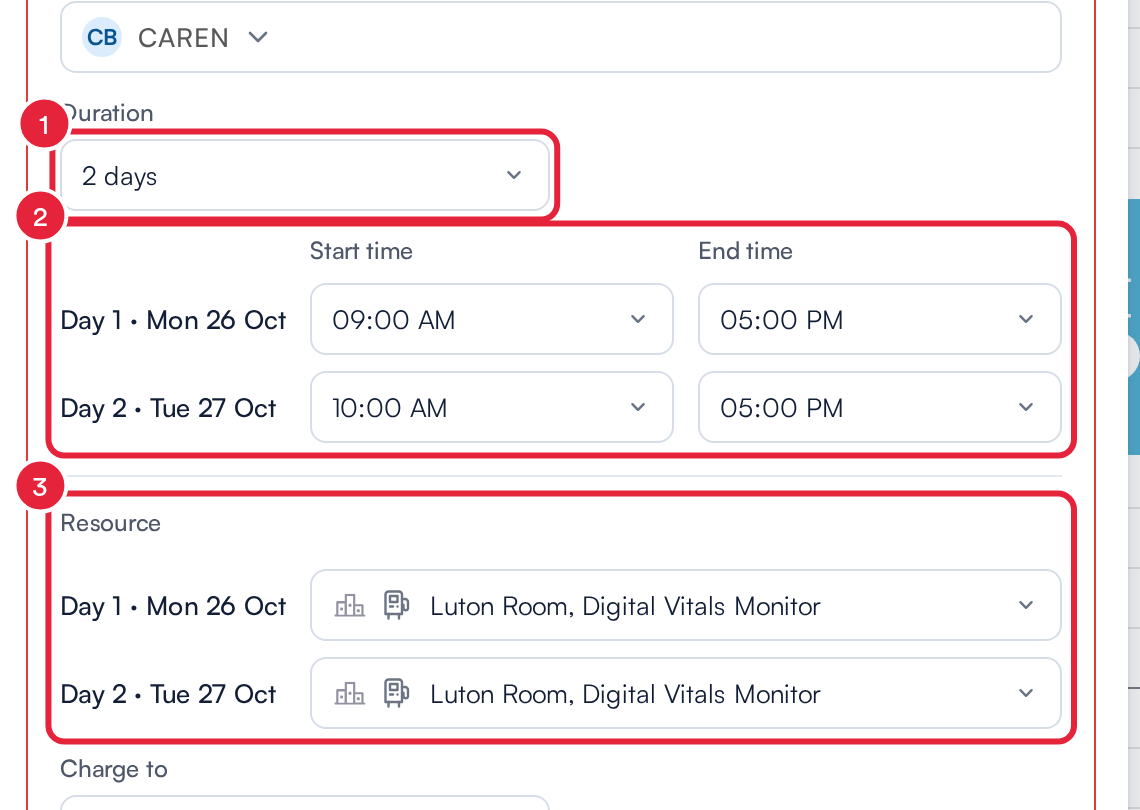
Set the times and room for each day
NOTE: Each day's Start time and End time lists cover the whole day, not just the team member's working hours. If you move a day's start time past its end time, Pabau moves the end time along so the day keeps its length.
Step 2: Check the Days on the Calendar
- While you book, the calendar shows the days side by side, headed Day 1, Day 2 and so on.
- A Draft card on each day shows where the appointment will go, so you can spot anything already booked.
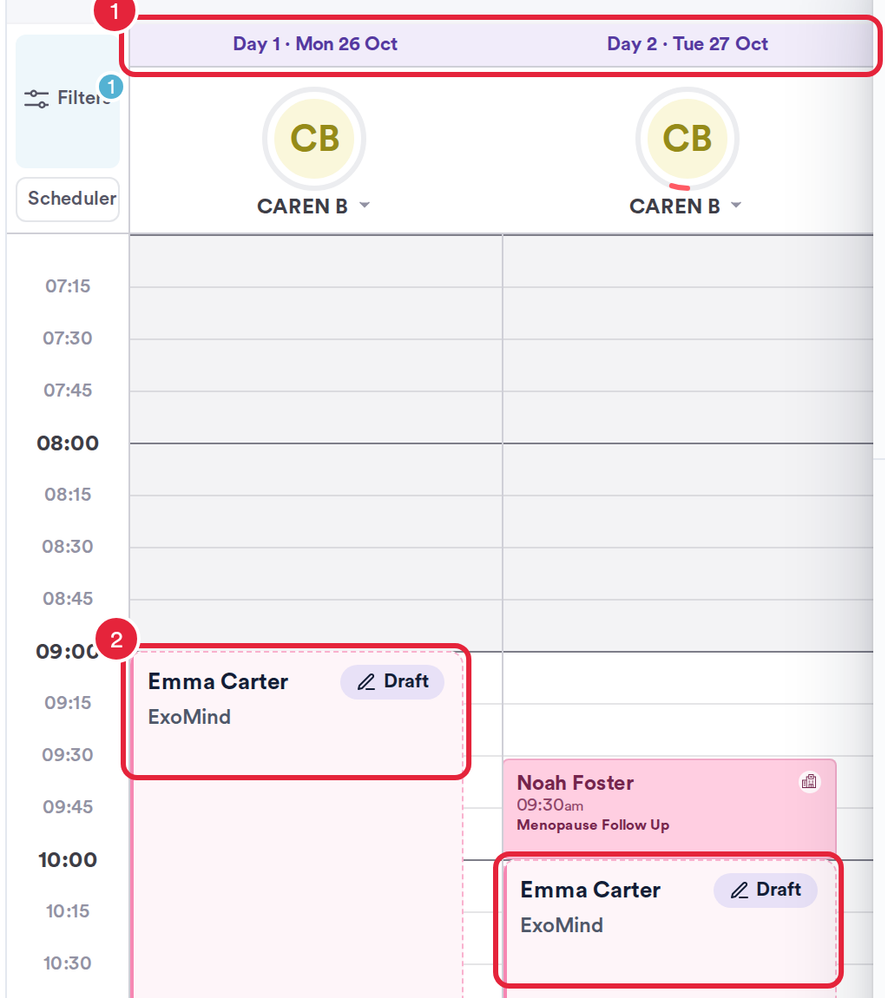
Each day shows a Draft card where the appointment will go
Step 3: Book the Appointment
Click Book appointment. Each day appears on the calendar as its own appointment, linked to the others.
Viewing or Changing the Days
- Click any day of the appointment to open its booking panel. Under Services, the days are listed in order under Day 1, Day 2 and so on. Any other appointments the client has on the day you opened are listed too.
- The other days have their own cards, so you can check the whole appointment from whichever day you open.
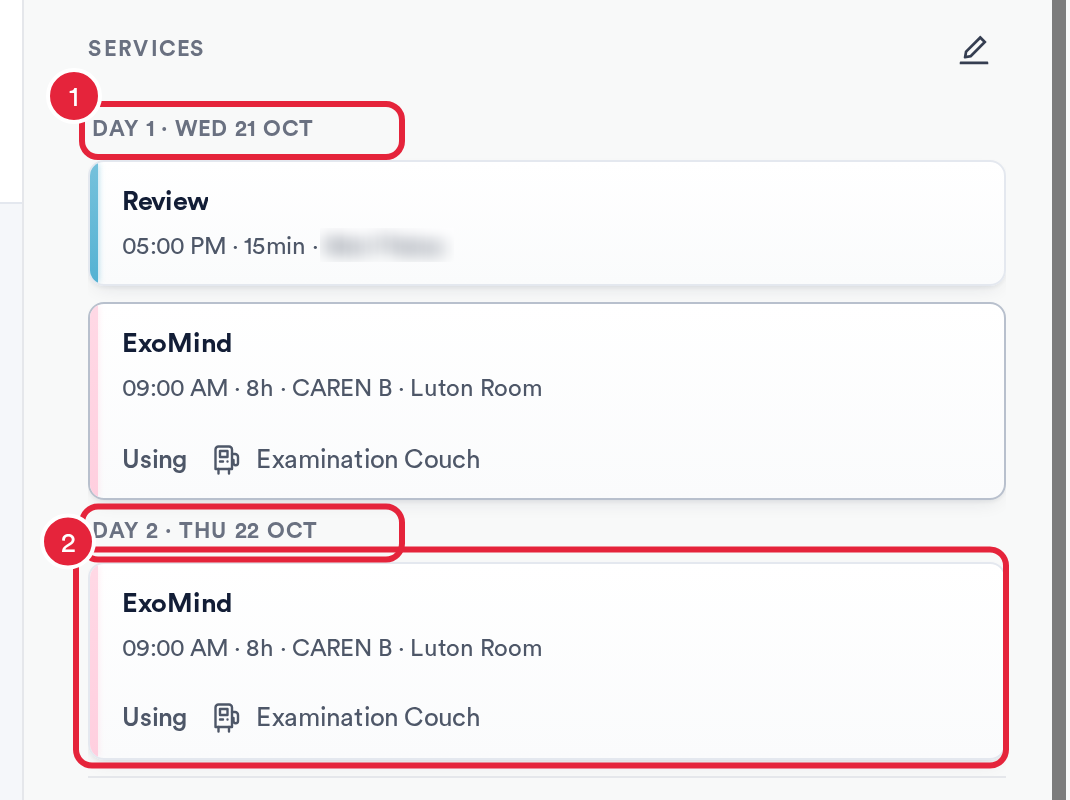
The booking panel lists every day of the appointment
To change the times or room for any day, click the pencil next to Services. Under Edit services, the service shows a Start time, End time and Resource for each day. Make your changes and click Save changes.
Step 4: Reschedule Every Day Together
In the booking panel, click Actions, then Reschedule. The calendar switches to month view so you can see the whole appointment.
- Multi-day only is on to start with, so the month shows only other multi-day appointments and the team members working on them. Switch it off to see everything.
- In the week strip, the days the appointment covers are highlighted, and the days after the first are labelled Day 2 and so on.
- Under Pending Appointments, the appointment shows how many days it covers (for example Day 1–2) and its dates. If the client has other appointments that day, they're listed and ticked too; untick any you want to leave where they are.
- Each time under Available times shows when the last day ends (for example → Thu 05:00 PM) and how many days it covers.
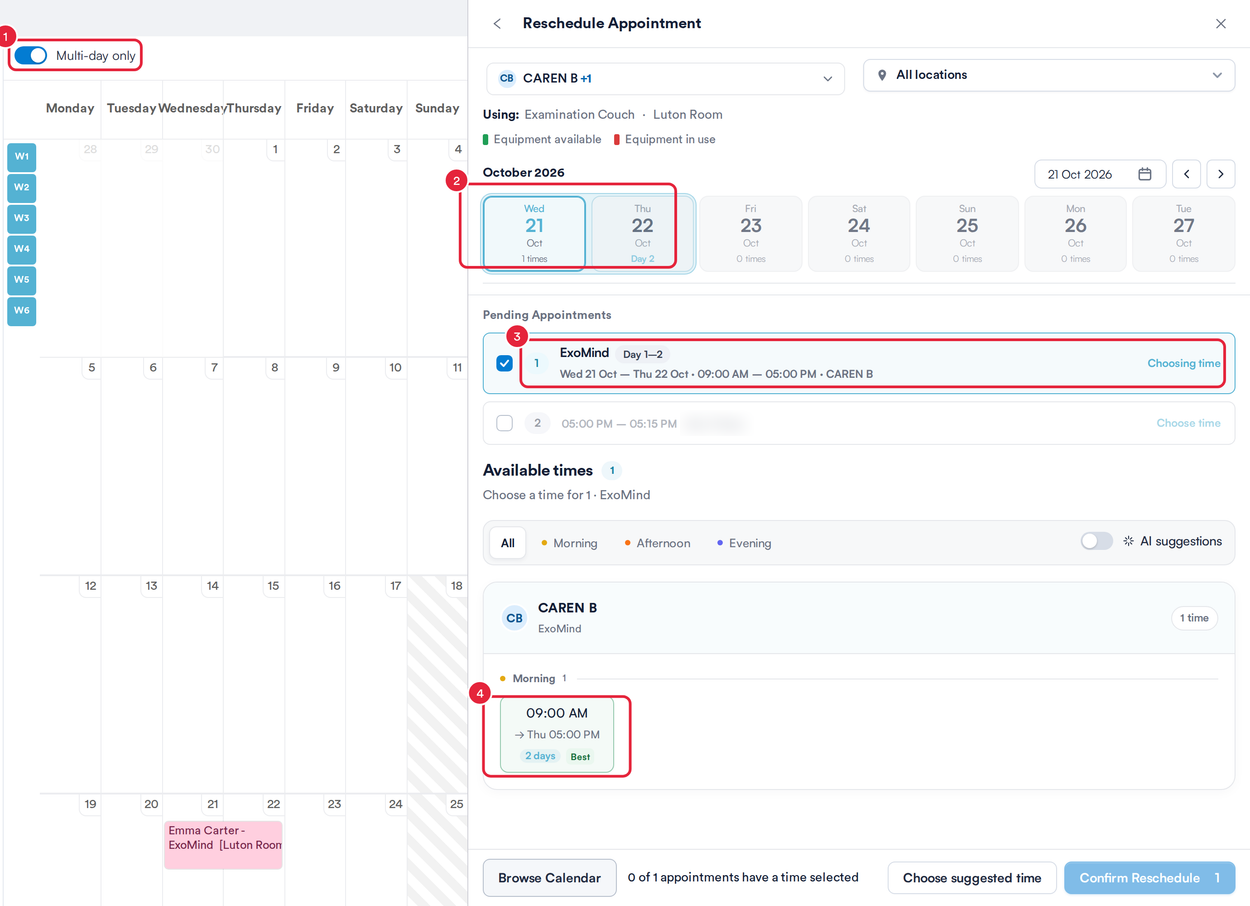
Pick a new start and every day moves with it
Click a time, then click Confirm Reschedule. All the days move together, even if you opened the panel from a later day. Each day keeps its length, and the days stay in the same pattern, so if Day 2 started an hour later than Day 1, it still does.
TIP: To find a new time on the calendar yourself, click Browse Calendar in the Reschedule Appointment panel.
What's next?
- How to Reschedule an Appointment
- Rooms and Equipment
- How to Enable Appointment Reschedule Notifications
Was this guide helpful? Let us know by voting below - your feedback helps us write clearer articles.
For more guides, browse the related articles below or use the search bar at the top of the page. You can also watch our video learning series, the Pabau Academy, or visit the Support page for additional help.