
Table of Contents:
1. How to Use Money on Account When Raising an Invoice
2. How to Add Money to a Client's Account
3. How to Purchase Account Payment via Online Bookings
How to Use Money on Account When Raising an Invoice
Step 1: Access the Point of Sale
Start by logging into your Pabau account using your login credentials. You can access the point of sale in Pabau in three ways: by raising the invoice from the Create button, the Calendar, or the Client Card.
Step 2: Enter Details
After selecting the client and service/product when raising the invoice, click on the Continue button at the bottom right corner to proceed to the payment page.

Step 3: Process Payment
After selecting the service or product, click "Continue" to proceed to the payment page. Here, you'll find a list of all available payment methods, including "Account."
NOTE: The option to use "Money on Account" to pay for a service is only available for clients who have added money to their accounts.
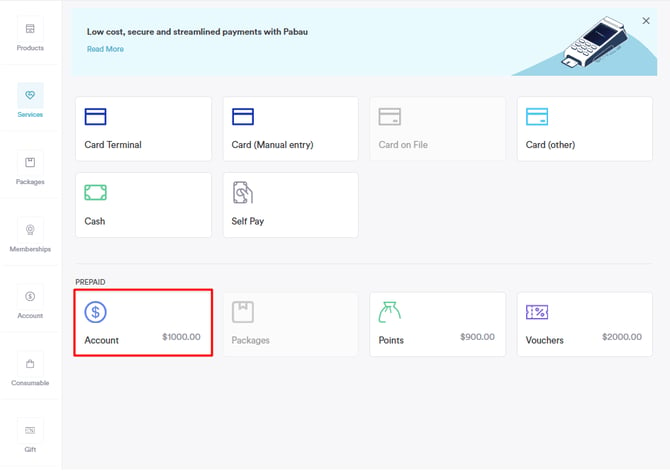
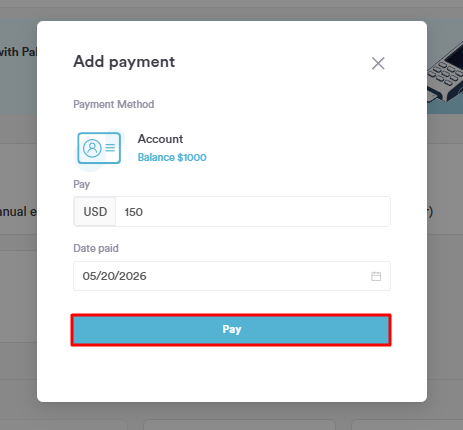
Upon clicking "Account," you will be prompted to enter the amount you want to pay. After adding the amount select "Pay."
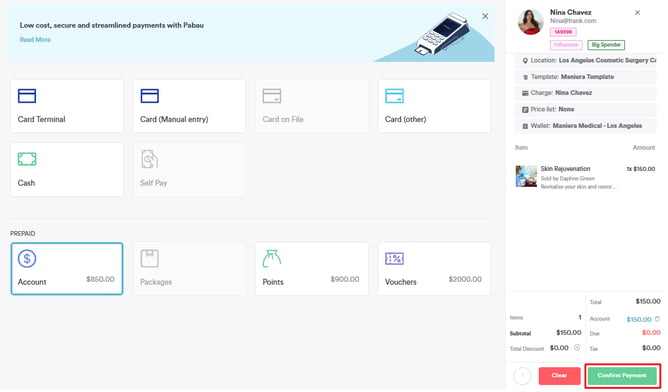
The payment details and amount you've added will be visible in the bottom right corner of the screen. If everything looks correct, click "Confirm Payment" to finalize the transaction.
This action will direct you to the checkout page, where you can choose to email the invoice to the client, send it as an SMS, or print it. Additionally, you can review the invoice on the client card. A short cut to the client card from the checkout page is by clicking on the client's name.
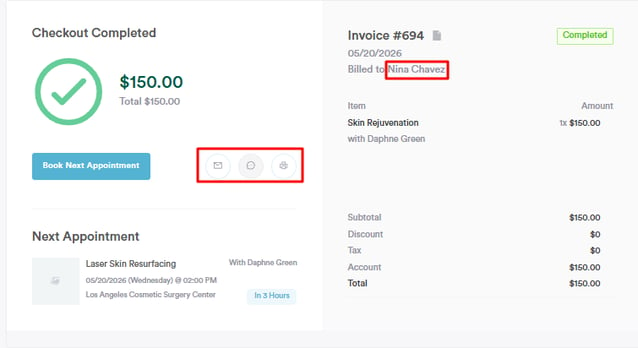
The invoice has been successfully paid, and it will appear on the client card under the Financials tab.
How to Add Money to a Client's Account
If your clients wish to make upfront payments for future appointments and have the flexibility to use these funds against their treatment payments, Pabau provides a convenient way to add money to their client cards.
Step 1: Accessing Point of Sale
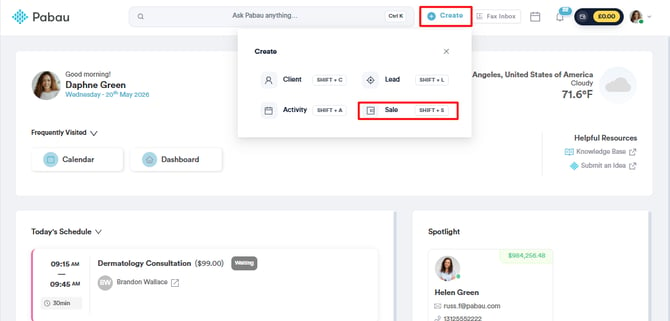
Begin by logging into your Pabau account. Click on the "Create" button at the top of the screen and select "Sale" to open the Point of Sale.
Step 2: Selecting the Client
In the Point of Sale, use the search bar in the top right corner to find the client. Click on the client's name once located.

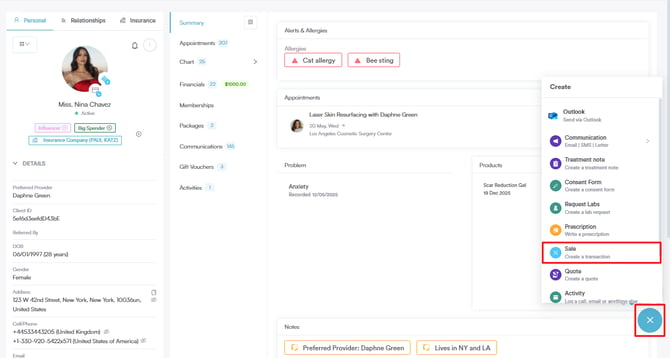
Alternatively, if the client card is already open, simply click on the plus sign button located in the bottom right corner. Then, choose "Sale." This action will open the Point of Sale, with the client's name automatically pre-populated in the client field.
Step 3: Navigating to Account and Adding Funds
On the left side of the Point of Sale, click on the "Account" button. In the "Add funds" menu, enter the desired amount and provide a reason if necessary. Next, click on "Add funds."

Step 4: Managing Transaction Details
Click on "Continue" in the bottom right corner of the screen, then choose a payment method for the added funds.
The full amount will be prepopulated in the "Amount" field, but you can modify it if needed.
You can choose to reduce the amount allocated to the current payment method and choose a different payment method for the remainder.

Click on "Collect" or "Charge" based on the selected payment method.
Step 5: Confirming the Payment
To finalize the process, click on "Confirm Payment."
NOTE: To successfully add money to an account, the full payment must be made during this transaction. Saving the payment as partly paid is not possible in this context.
Once the money is added to the client's account, you'll see a green mark next to the "Financials" tab on their client card. The payment details will also appear in the "Payments" tab under Financials, and the invoice will have a "#ACC" prefix.

By following these steps, you can efficiently add funds to a client's account, offering them the flexibility to utilize the prepaid amount for future appointments.
How to Purchase Account Payment via Online Bookings
Money on account works by allowing clients to add funds to their account, creating a liability for your business. This money can be used for future purchases, such as booking appointments.
To enable the option to add money on account when booking online, make sure to integrate Stripe into your Pabau account. You will also need to ensure the feature is not hidden when customizing the online booking portal.
Step 1: Navigate to your Online Booking Portal
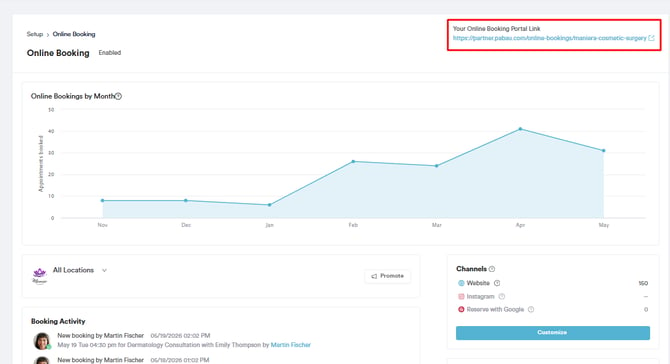
Access your online booking portal to get started with the process. You can either access it by clicking on the Book Now button from your website, or you will be able to locate the portal link in your Pabau account in the Online Booking tab.
Step 2: Add Money to the Account
When you access the online booking portal, you'll see the header message you've set, a list of categories, any created packages/courses, gift vouchers, and the option for clients to add money to their accounts. More details regarding your online booking portal customization are included in this article. You'll find "Account Payments" listed at the bottom of the page.

After selecting Account Payments, you will be able to add an amount and a reason for the amount. Click Add Funds and the "Next" button at the bottom right corner to proceed.

Step 3: Process Payment
When a client already has an account, they will be directed to the payment page. To enter their card details, they need to tick the "Pay with card" method and the fields to enter their card details will show. If they have a card saved already, it shows at the top of the page as a first option.
NOTE: To use payment processing in Pabau, you need to integrate with Stripe and enable online bookings in your account.

After the payment has been processed, the clients will be able to use the money on account for a future purchase.

Step 4: Locate Money on Account
To be able to view the funds clients have added to their account, navigate to their client card under the Financials section in the Payments tab. The balance in the account is displayed as #ACC, indicating the money on account. This notation appears at the beginning of every invoice.
By following these steps, clients can add funds to their account.
For more guides, refer to related articles below, select additional guides, or use the search bar at the top of the page. These guides will help you get the most out of your Pabau account.
Additionally, to help you fully utilize and understand your Pabau account, we recommend exploring additional guides and resources offered at the Pabau Academy. It offers in-depth video tutorials and lessons, offering a holistic learning experience that can equip you with the essential skills for achieving success with Pabau.