
NOTE: Your clinic decides which options you see, so some of the steps below may look slightly different or be skipped.
If your clinic bills your health insurer for you, you can keep your insurance details up to date yourself in your client portal. In this article, you will learn how to add a policy, change it and remove one you no longer use.
Step 1: Open Insurance Details
Sign in to your client portal (see How to Use Your Client Portal). On a phone, tap the menu icon at the top first.
- Click Insurance Details under My Account. Each policy you have on file shows the insurer, your policy number and any pre-authorisation code.
- Click Add insurer to add a new policy.
- Click Edit to change a policy.
- Click Remove to delete a policy you no longer use.
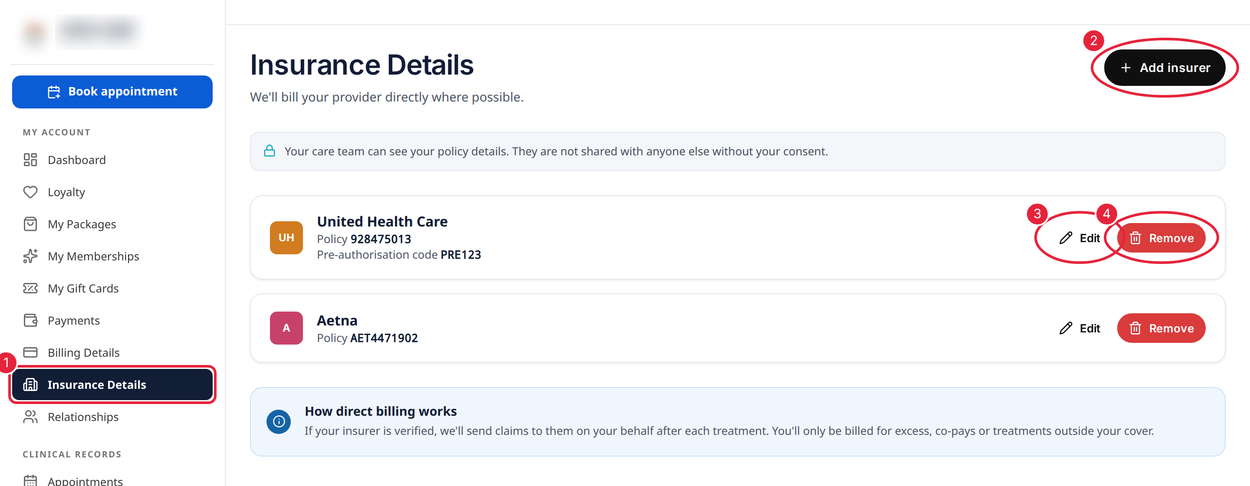
Your policies on the Insurance Details page
If you don’t see Insurance Details, your clinic doesn’t take insurance details through the portal. Please contact them instead.
Step 2: Add Your Insurer
- Under Select your insurer, choose your insurer from the clinic’s list. Insurers you already have a policy with show (already added) and can’t be chosen again.
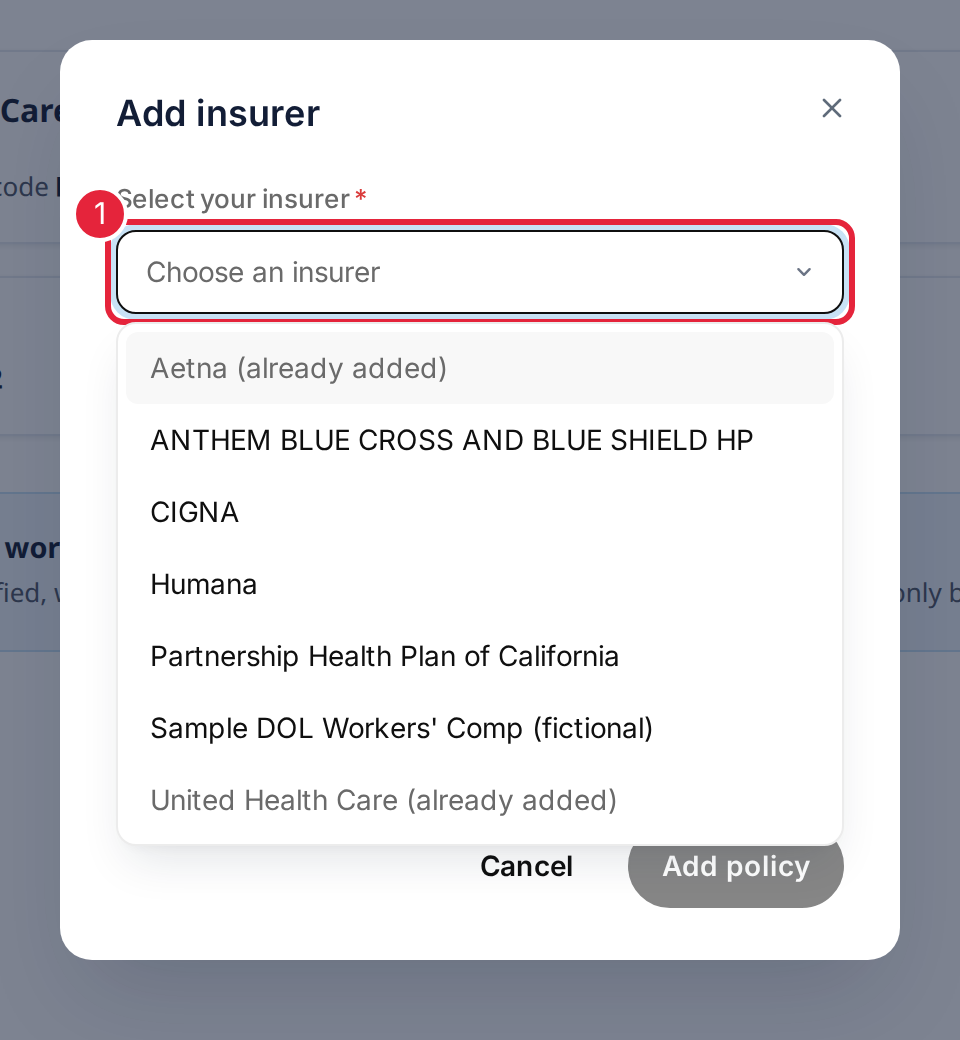
Choose your insurer
- Enter your policy or member number under Member ID.
- If your insurer gave you a Pre-authorisation code for your treatment, enter it. This is optional.
- Click More options if you want to add more details from your insurance card (see Step 3).
- Click Add policy. You see Policy added and the policy appears on the page.
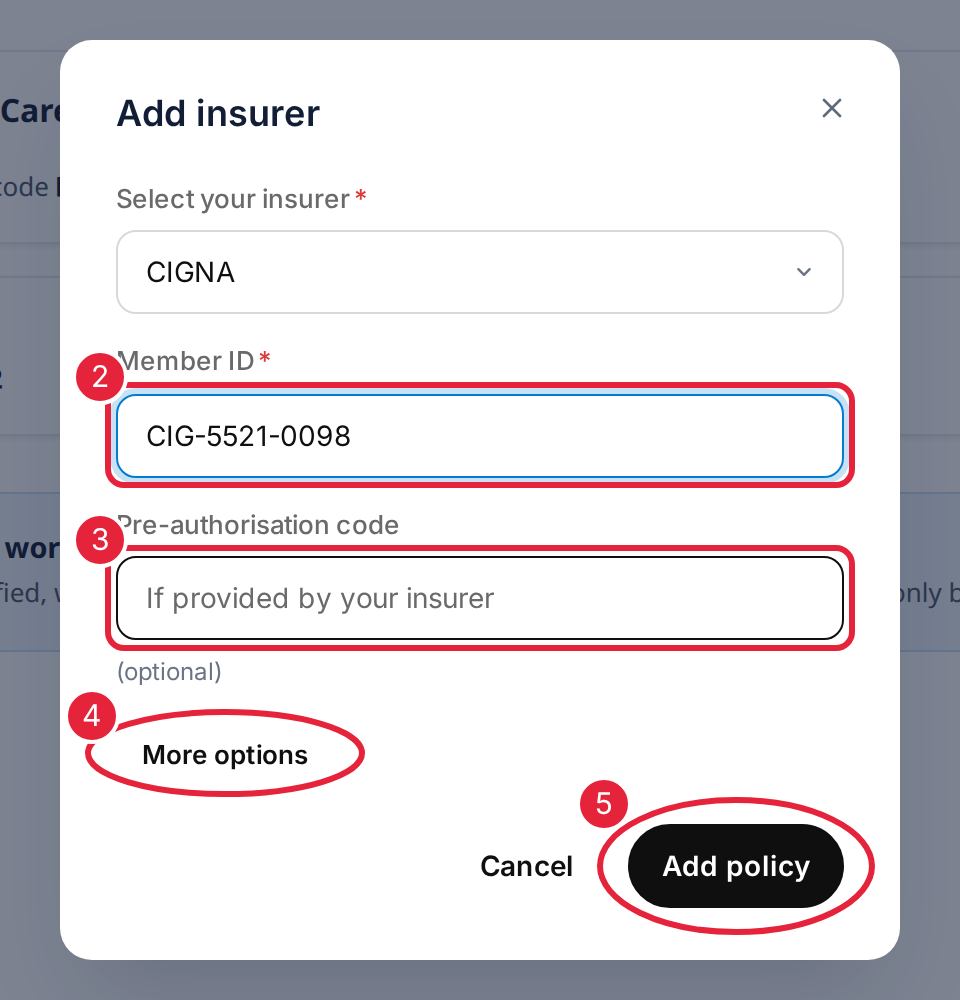
Enter your member ID, then click Add policy
NOTE: In Australia, Medicare asks for your Medicare number (the 10 digits on your card) and your Reference number (IRN), the number beside your name on the card. For DVA, enter your DVA file number.
Step 3: Add More Policy Details (Optional)
Under More options you can add the other details on your insurance card, if you have them: Insurance type, Policy status, Group ID, Plan ID, Policy start and Policy end, Co-pay or co-insurance (as an amount or a percentage), Deductible, Cover level and Plan type. Leave anything you don’t know as Not set or empty.
- Signature on file tells the clinic that it holds your signed permission to bill your insurer. In the United States it starts switched on for a new policy. Switch it off if you haven’t given that permission.
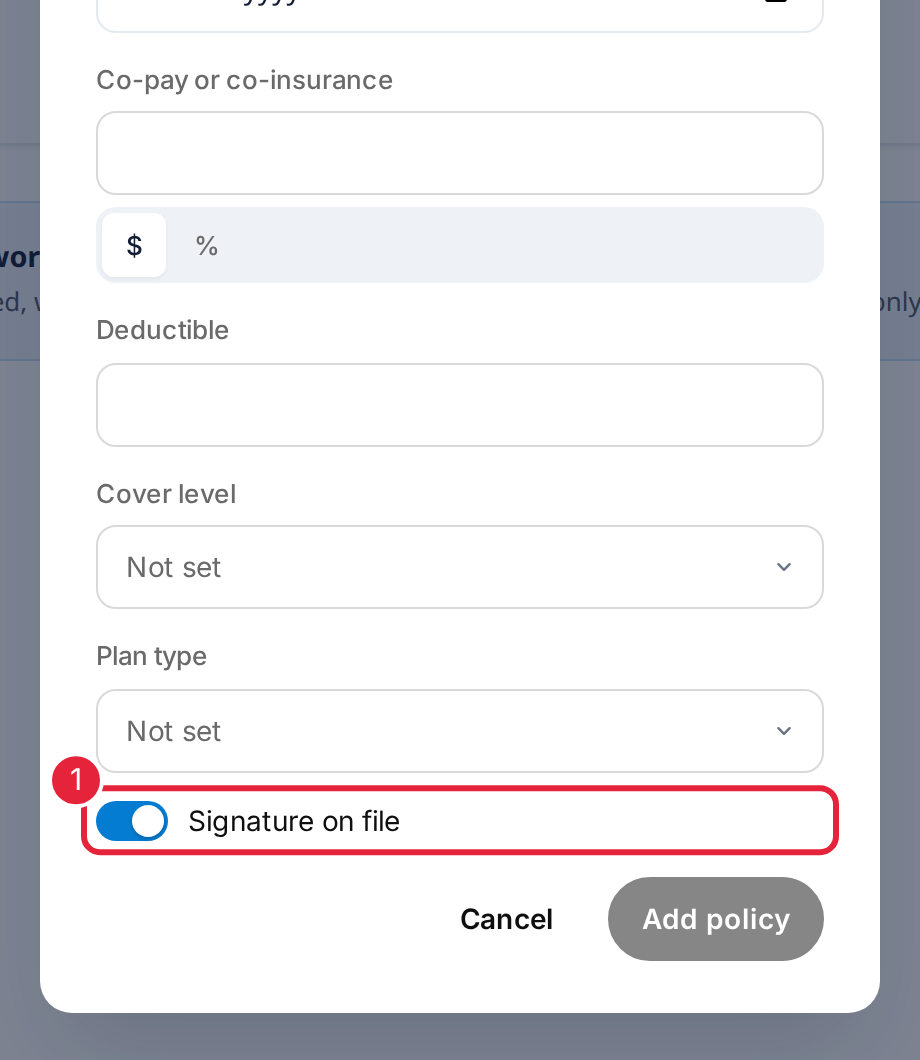
More options, with Signature on file
Step 4: Change a Policy
- Click Edit next to the policy. You can change your member ID, your pre-authorisation code and the details under More options. The insurer itself can’t be changed: to switch insurer, add the new one and remove the old one.
- Click Save changes. You see Policy updated.
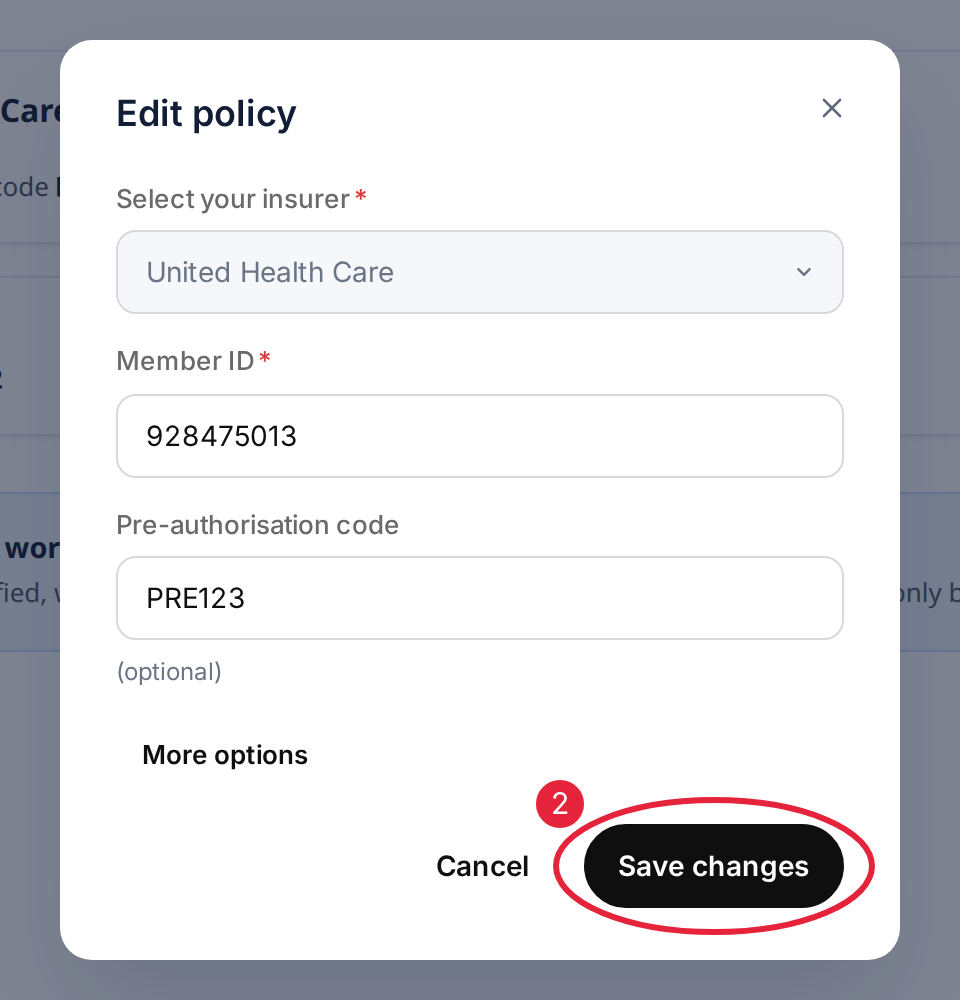
Edit a policy, then click Save changes
Step 5: Remove a Policy
- Click Remove next to the policy.
- In Remove this policy?, click Remove to confirm, or Cancel to keep it. The clinic stops billing that insurer for your treatments. You can add the policy again later.
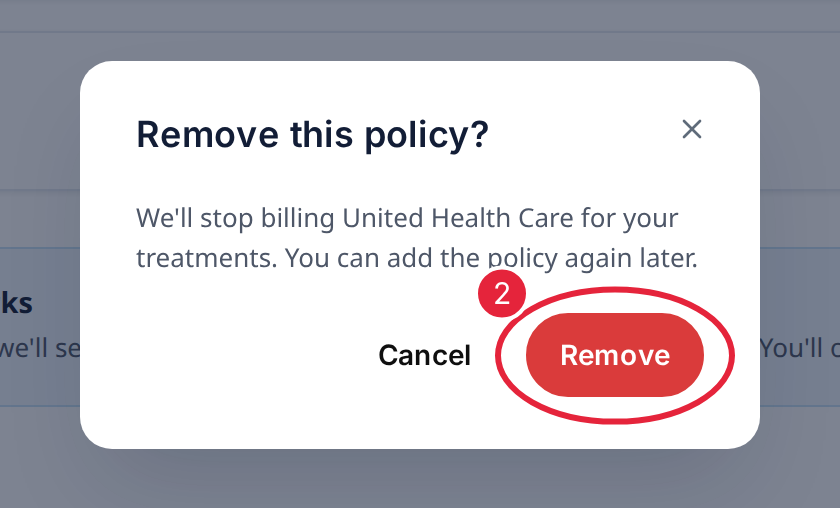
Confirm that you want to remove the policy
How Direct Billing Works
Your care team can see the policy details you add here. They are not shared with anyone else without your consent. If your insurer is verified, the clinic sends claims to them on your behalf after each treatment, and you are only billed for excess, co-pays or treatments outside your cover.
TIP: Some clinics also let you pay with insurance when you book online. Choose Pay with insurance on the payment step: if you have a policy on file, your saved policy is used, and if not, the same Add insurer window opens so you can add one.
What's next?
- How to Use Your Client Portal (New Client Portal)
- How to Book an Appointment Online (New Booking Page)
Questions about your cover? Contact your clinic directly. They will be happy to help.
Was this guide helpful? Let us know by voting below - your feedback helps us write clearer articles.
For more guides, browse the related articles below or use the search bar at the top of the page. You can also watch our video learning series, the Pabau Academy, or visit the Support page for additional help.