
Step 1: Navigate to the Invoices Page
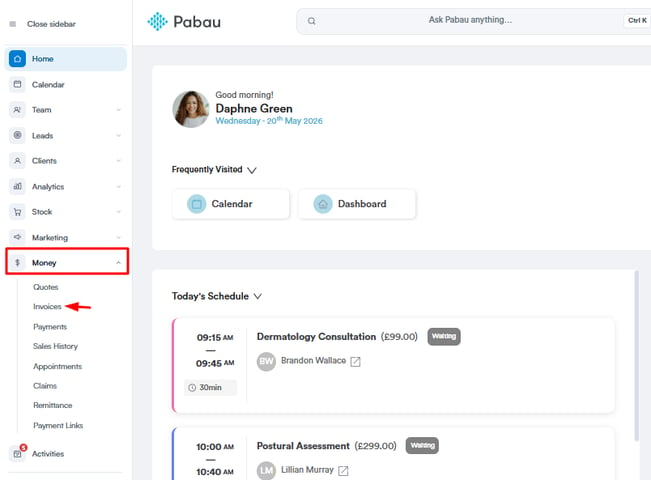
Log in to your Pabau account, and from the left sidebar menu, click on ''Money'', then select ''Invoices'' to open the Payments page.
Step 2: Understanding the Invoices Overview
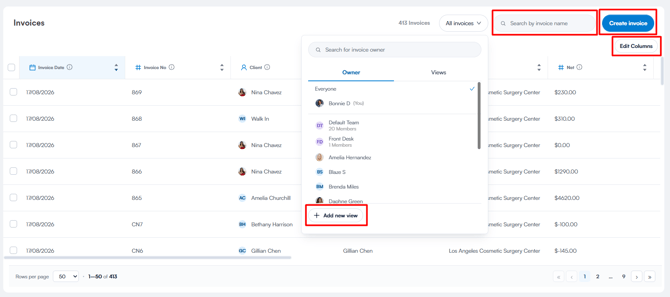
When you open the Invoices page, you’ll see a table listing all invoices for the selected date range. You can use the search bar and customize the view to show the information that matters most to you.
Here’s a breakdown of the key elements on the Invoices page:
Filters and Controls
At the top of the page, you’ll find options to help you filter and search through invoices:
-
Add View
Filter the information you would like to see. -
Search
Search by client name, invoice number, or other keywords. -
Edit Columns
Click this to show or hide specific columns in the table based on your needs. - Create Invoice
The ''Create Invoice'' button in the top-right corner opens the Point of Sale (POS), where you can generate a new invoice and process a sale.
NOTE: To learn more about how to create a custom view to display specific data, please check this article.
What Each Column Means
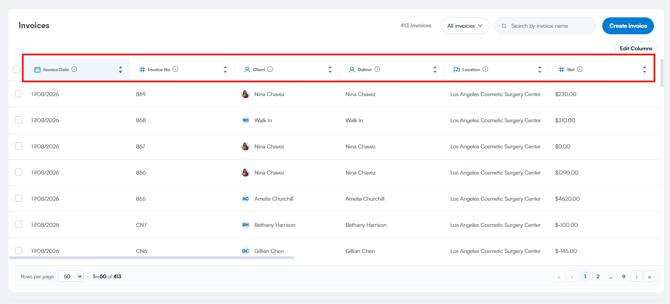
Each invoice is shown in a row, with the following details:
- Invoice Date - The date the invoice was created.
- Invoice Number - The unique reference number assigned to the invoice.
- Client - The name of the client the invoice is assigned to, along with their profile image or initials.
- Debtor - The party responsible for paying the invoice (for example, the client themselves or a third party such as an insurer).
- Location - The business location the invoice is associated with.
- Net - The invoice total before tax.
- Balance - The amount still outstanding on the invoice. If unpaid, this will be shown in red.
- Sync Xero - Displays whether the invoice is synced with Xero, if integration is enabled.
- Paid - The total amount that has been paid towards the invoice.
- Payment Due Status - Indicates whether the invoice is Paid, Pending, or Overdue.
- Next Payment Due Date (Days) - Shows how many days remain until the next scheduled payment is due - typically used for invoices that are part of a payment plan or subscription.
- Payment Method(s) - Displays the method(s) used to pay the invoice, for example Cash, Card, Bank Transfer, or Online. Multiple methods will be shown if a split payment was used.
- Payment Status - Indicates the payment progress of the invoice, for example Paid, Partially Paid, or Unpaid.
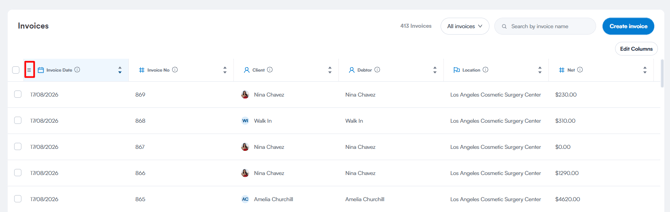
You can also reorder the columns by hovering over a column header, clicking and holding the three-line icon at the left side of the column name, then dragging the column to your preferred position. This helps you customize the table layout for your workflow.
Tips for Getting the Most Out of the Invoices Page
-
Use the filters together (e.g., date + status) to narrow down results quickly.
-
The Balance and Payment Due Status columns help you spot overdue invoices at a glance.
-
You can customise the view using Edit Columns to focus on the most relevant information.
-
Use the search field to quickly find an invoice by client name or number.
-
If using Xero integration, the Sync Xero column helps track which invoices are synced.
By following these steps and using the available filters and tools, you’ll be able to manage your invoices efficiently, stay on top of outstanding balances, and maintain clear financial records for your clinic.
Bulk Editing Invoices
NOTE: Bulk editing on this page becomes available after the next Pabau release. If you do not see the pencil icon when you select rows, your account has not received the update yet.
When you need the same change on several invoices - a shared note, a corrected location, a different issuing company - you can apply it to all of them at once instead of opening each invoice.
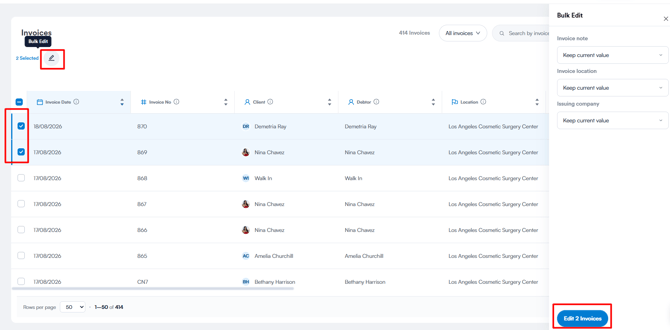
Step 3: Select the invoices You Want to Change
- Tick the checkbox at the start of each row you want to include. To take every row on the current page, use the checkbox in the table header.
- A toolbar appears above the table showing N Selected with a pencil icon.
NOTE: Bulk editing applies only to the rows you tick. If you use Select all N records to take everything matching your filters, the pencil is greyed out - clear that selection and tick rows instead.
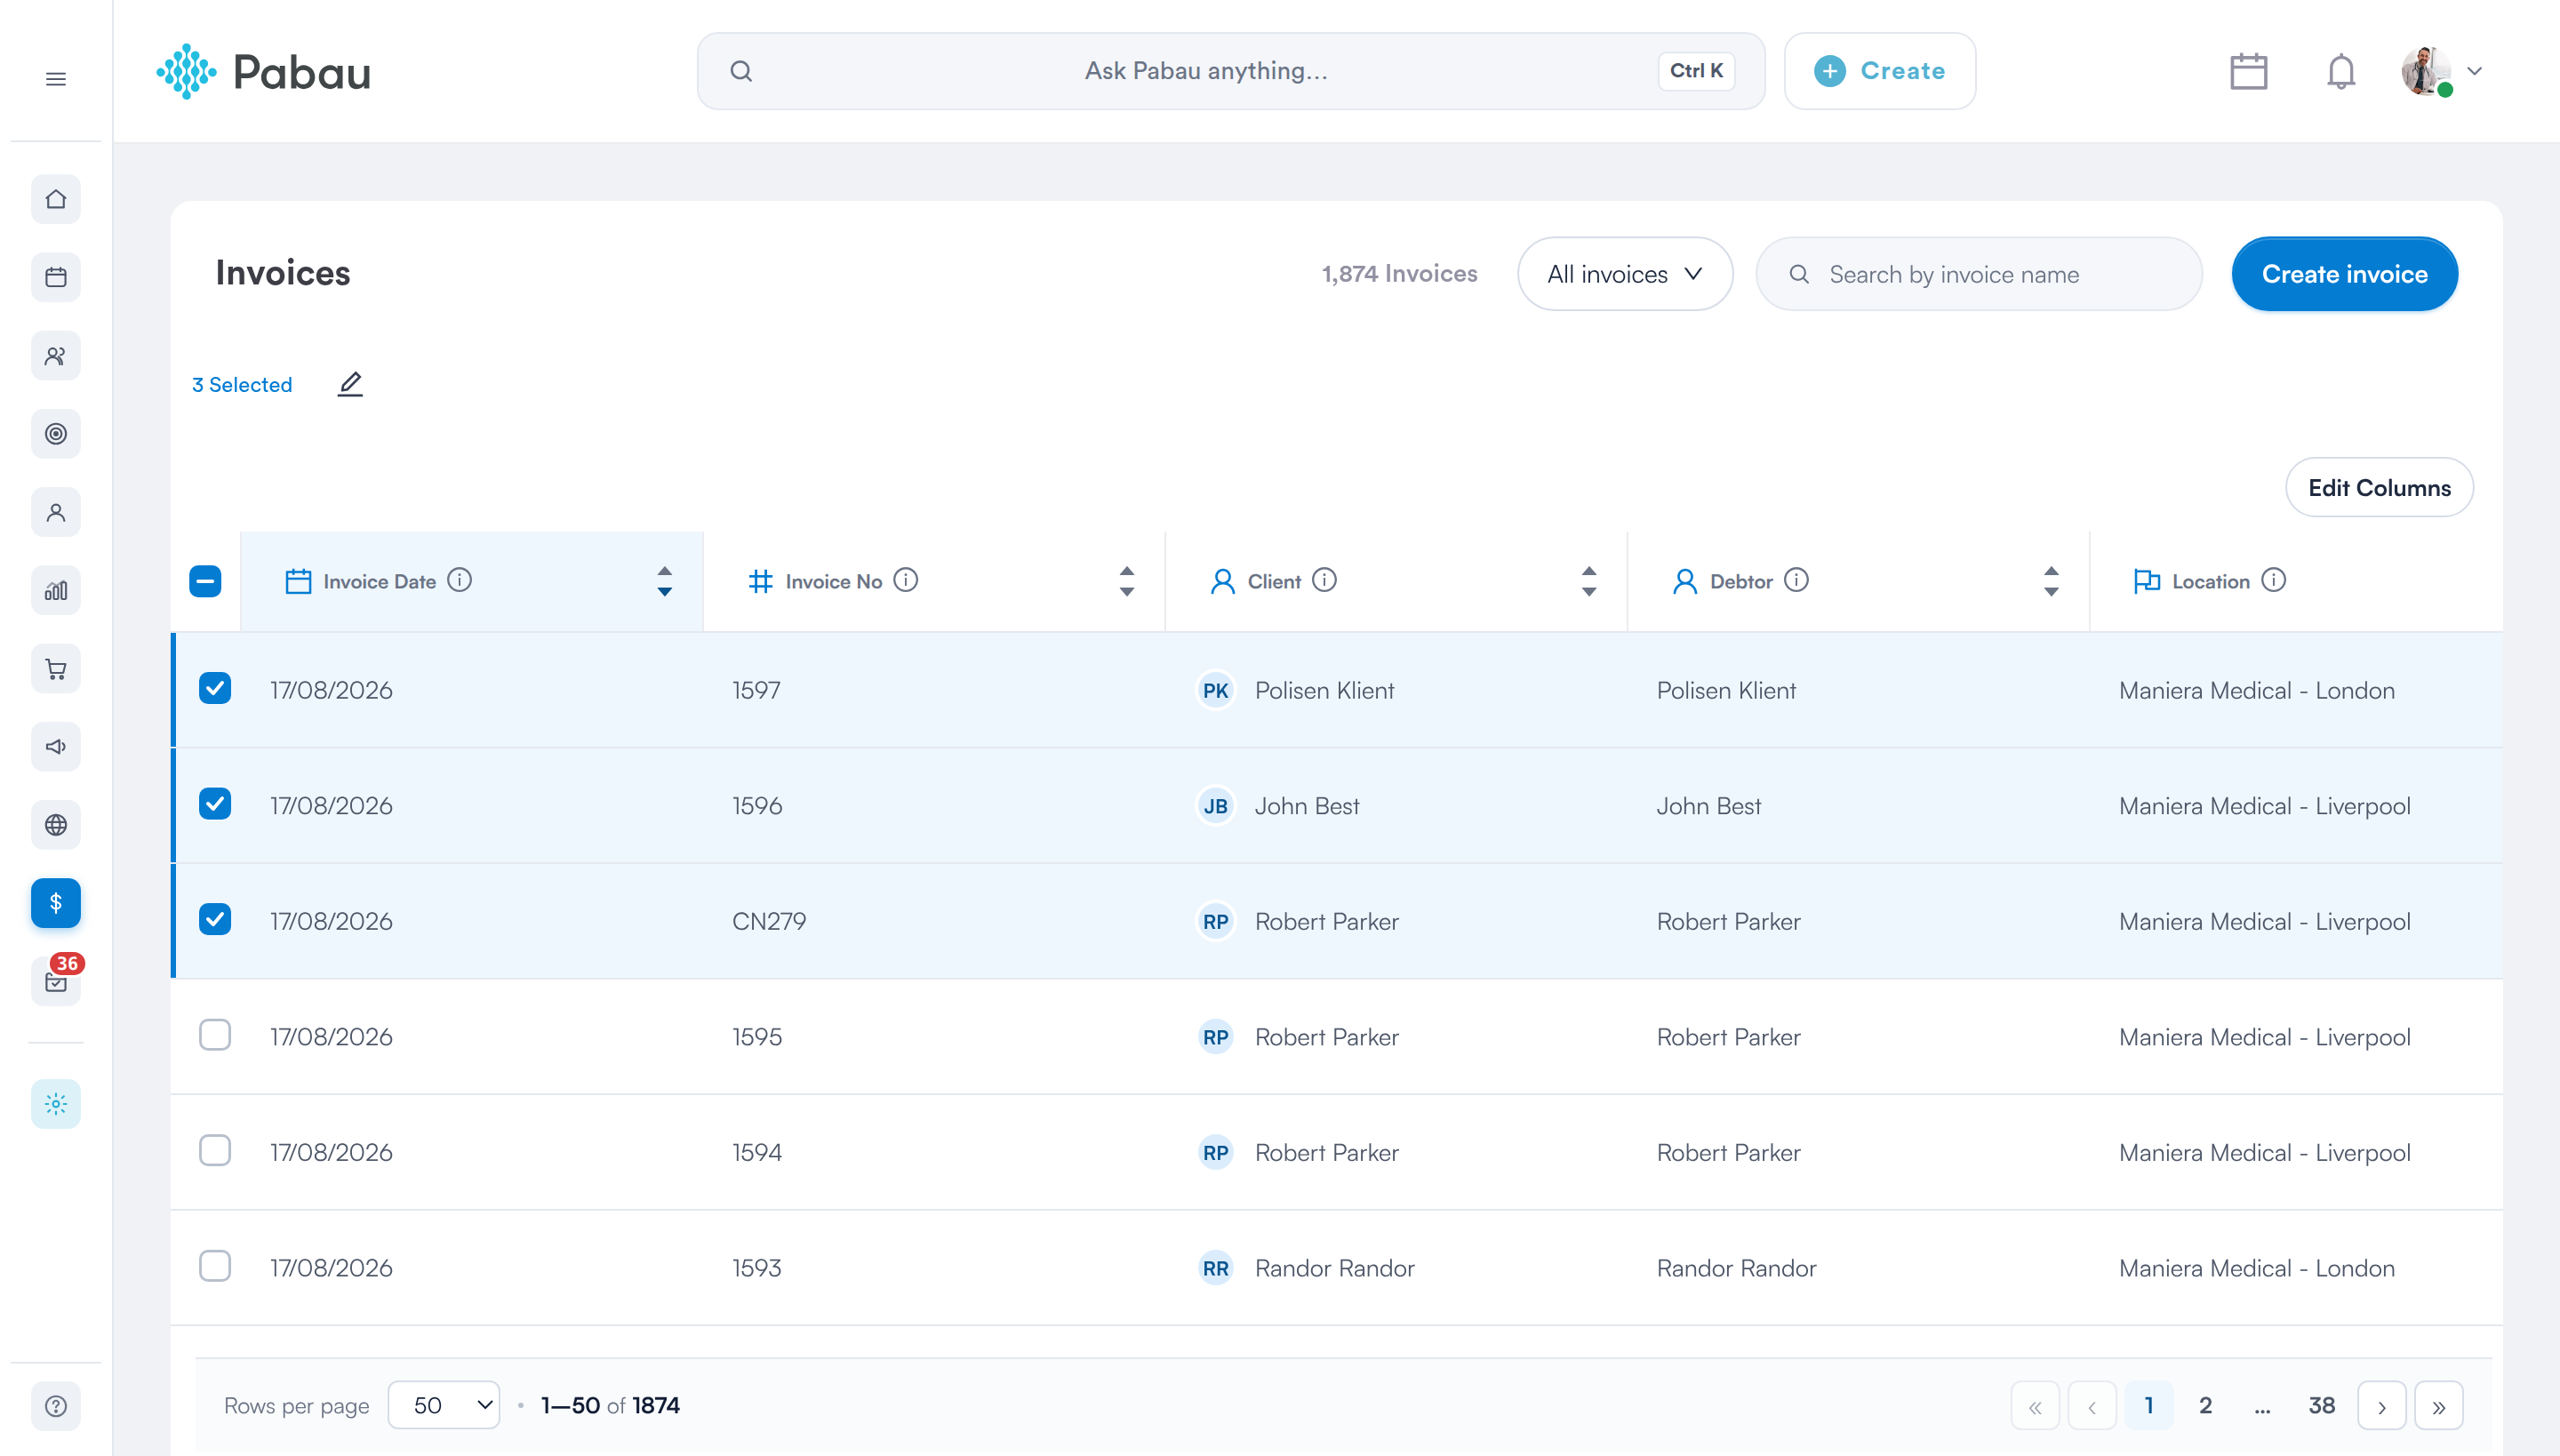
Rows ticked — the toolbar shows the count and the Bulk Edit pencil
Step 4: Choose What to Change
Click the pencil icon to open the Bulk Edit panel on the right. Each field you can change is listed with a dropdown:
- Keep current value — leave the field untouched. This is the default for every field.
- Edit current value — set the same new value on every selected record.
- Clear value — empty the field on every selected record.
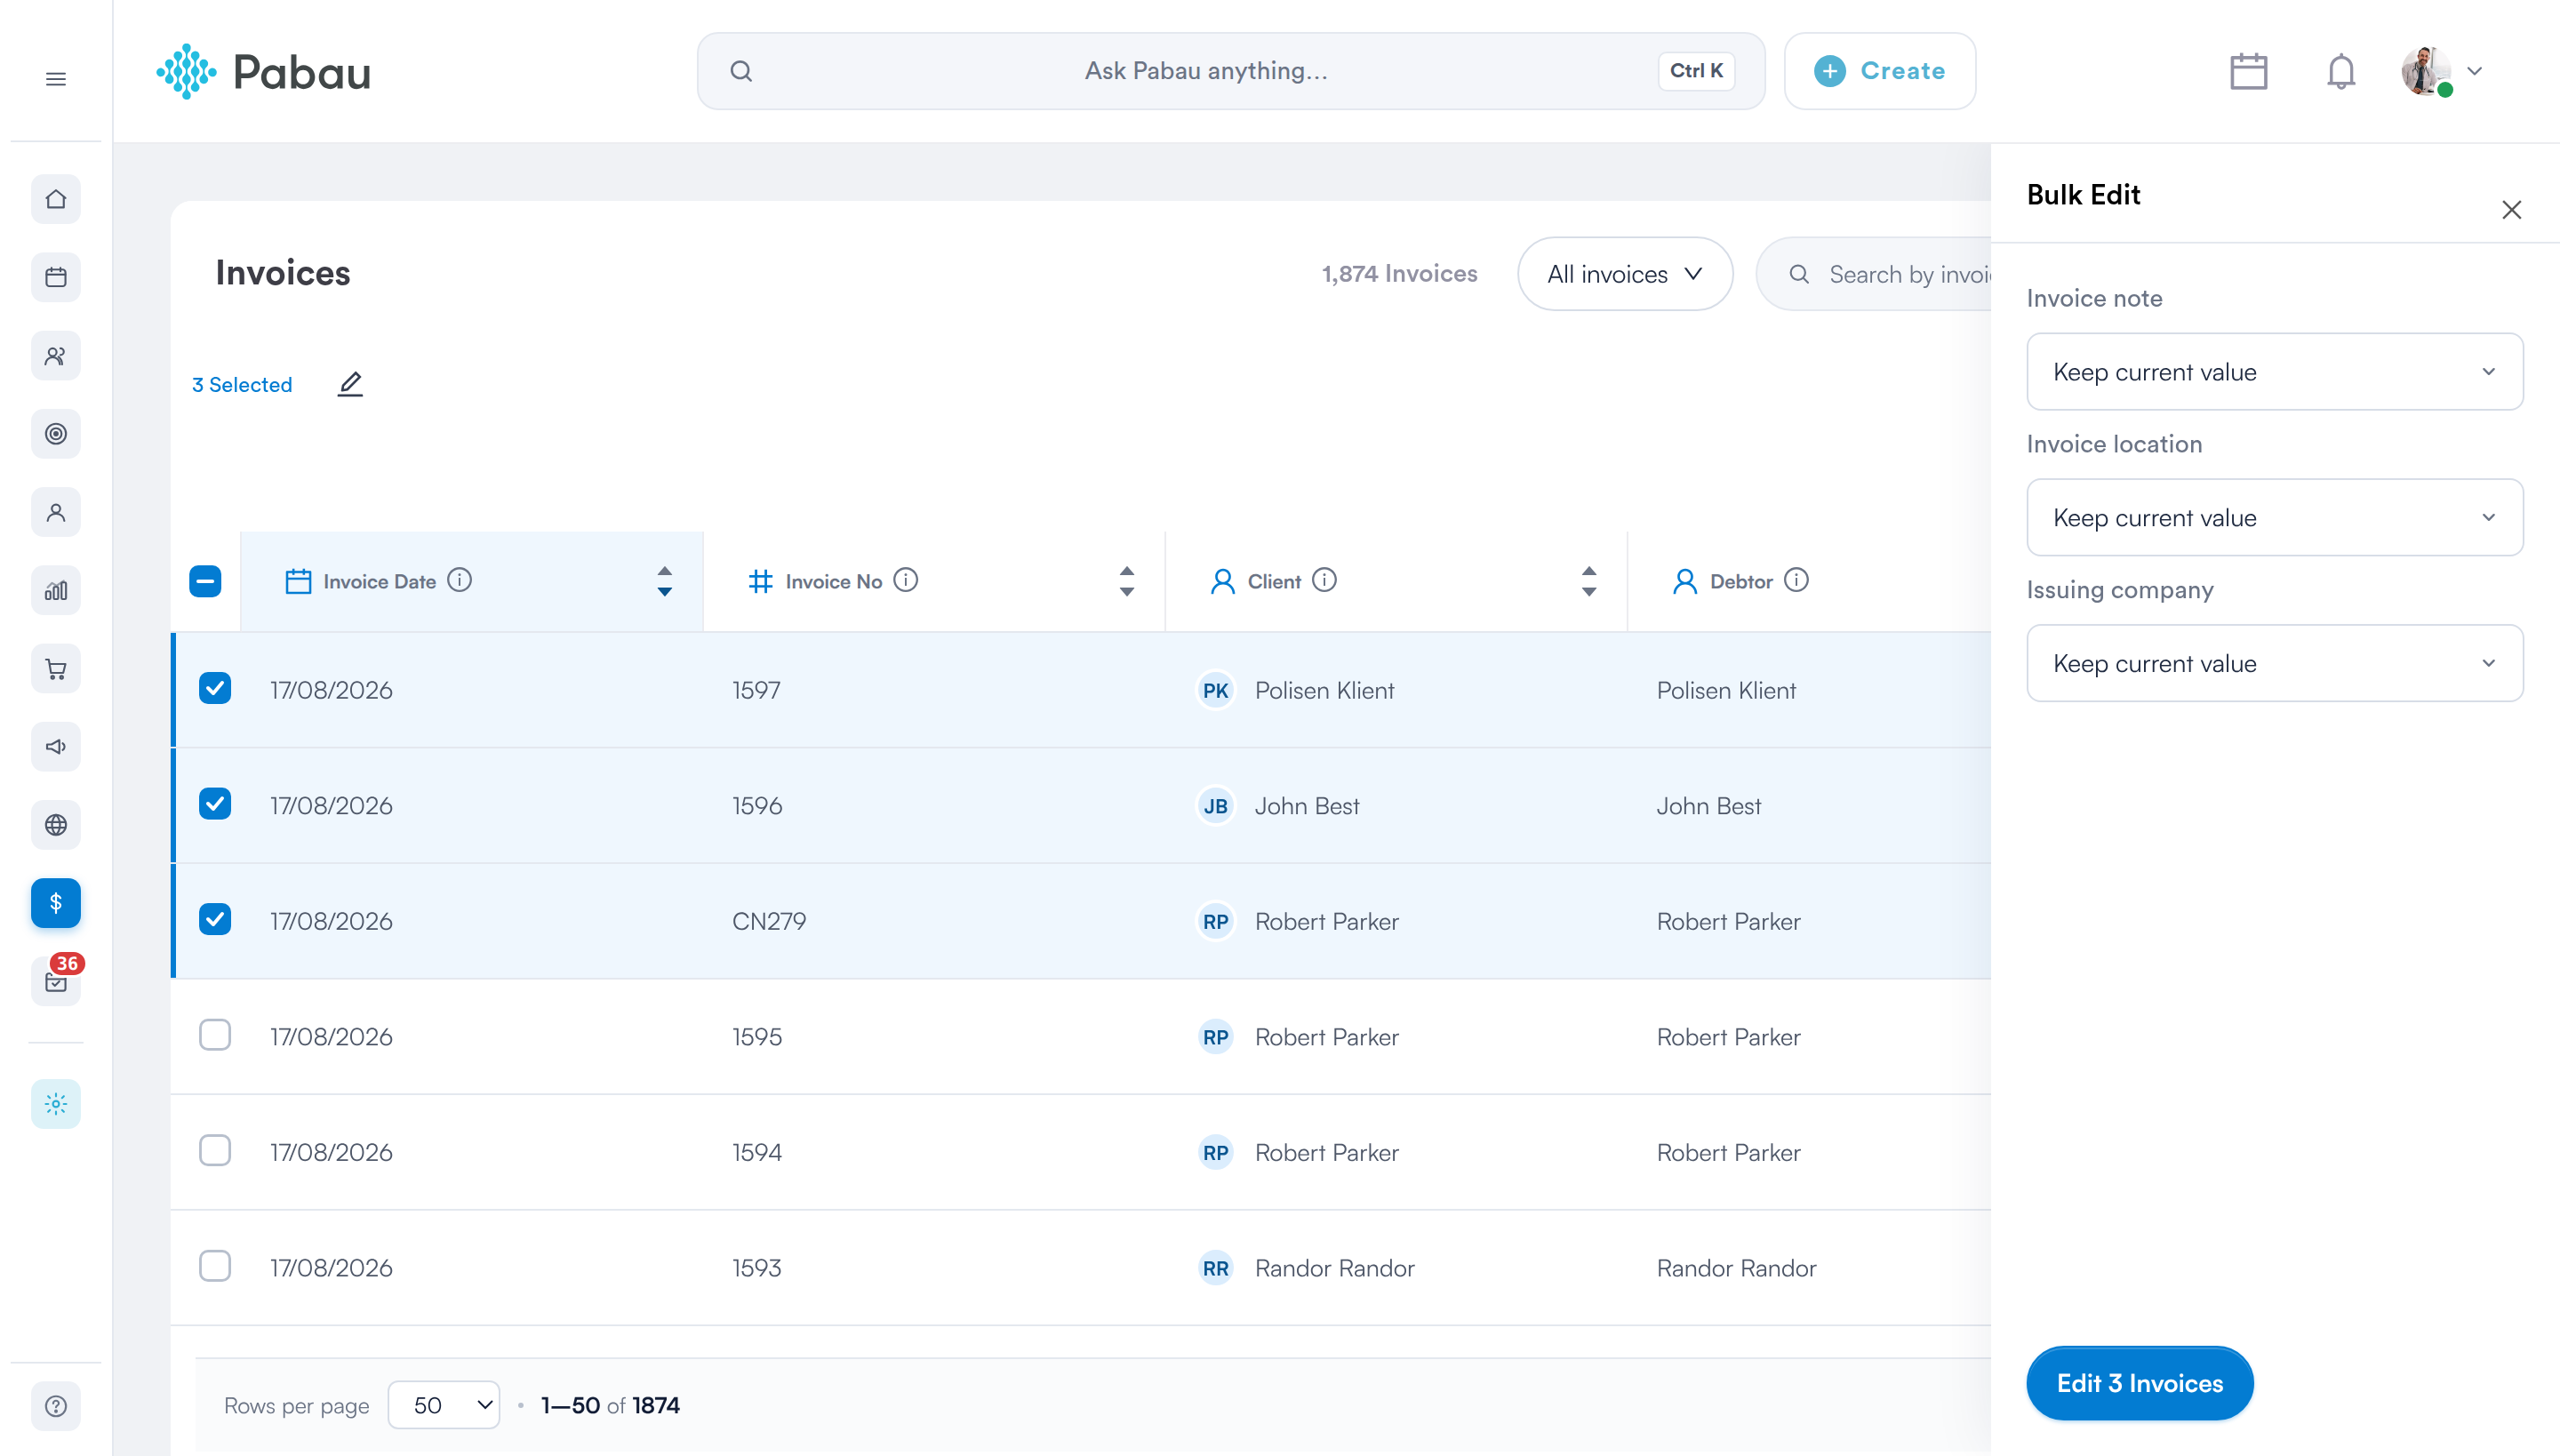
Every field starts on Keep current value, and the button names how many records will change
For invoices, the panel offers:
- Invoice note — free text, written to every selected invoice.
- Invoice location — the clinic location the invoice belongs to.
- Issuing company — the company shown as the issuer on the invoice.
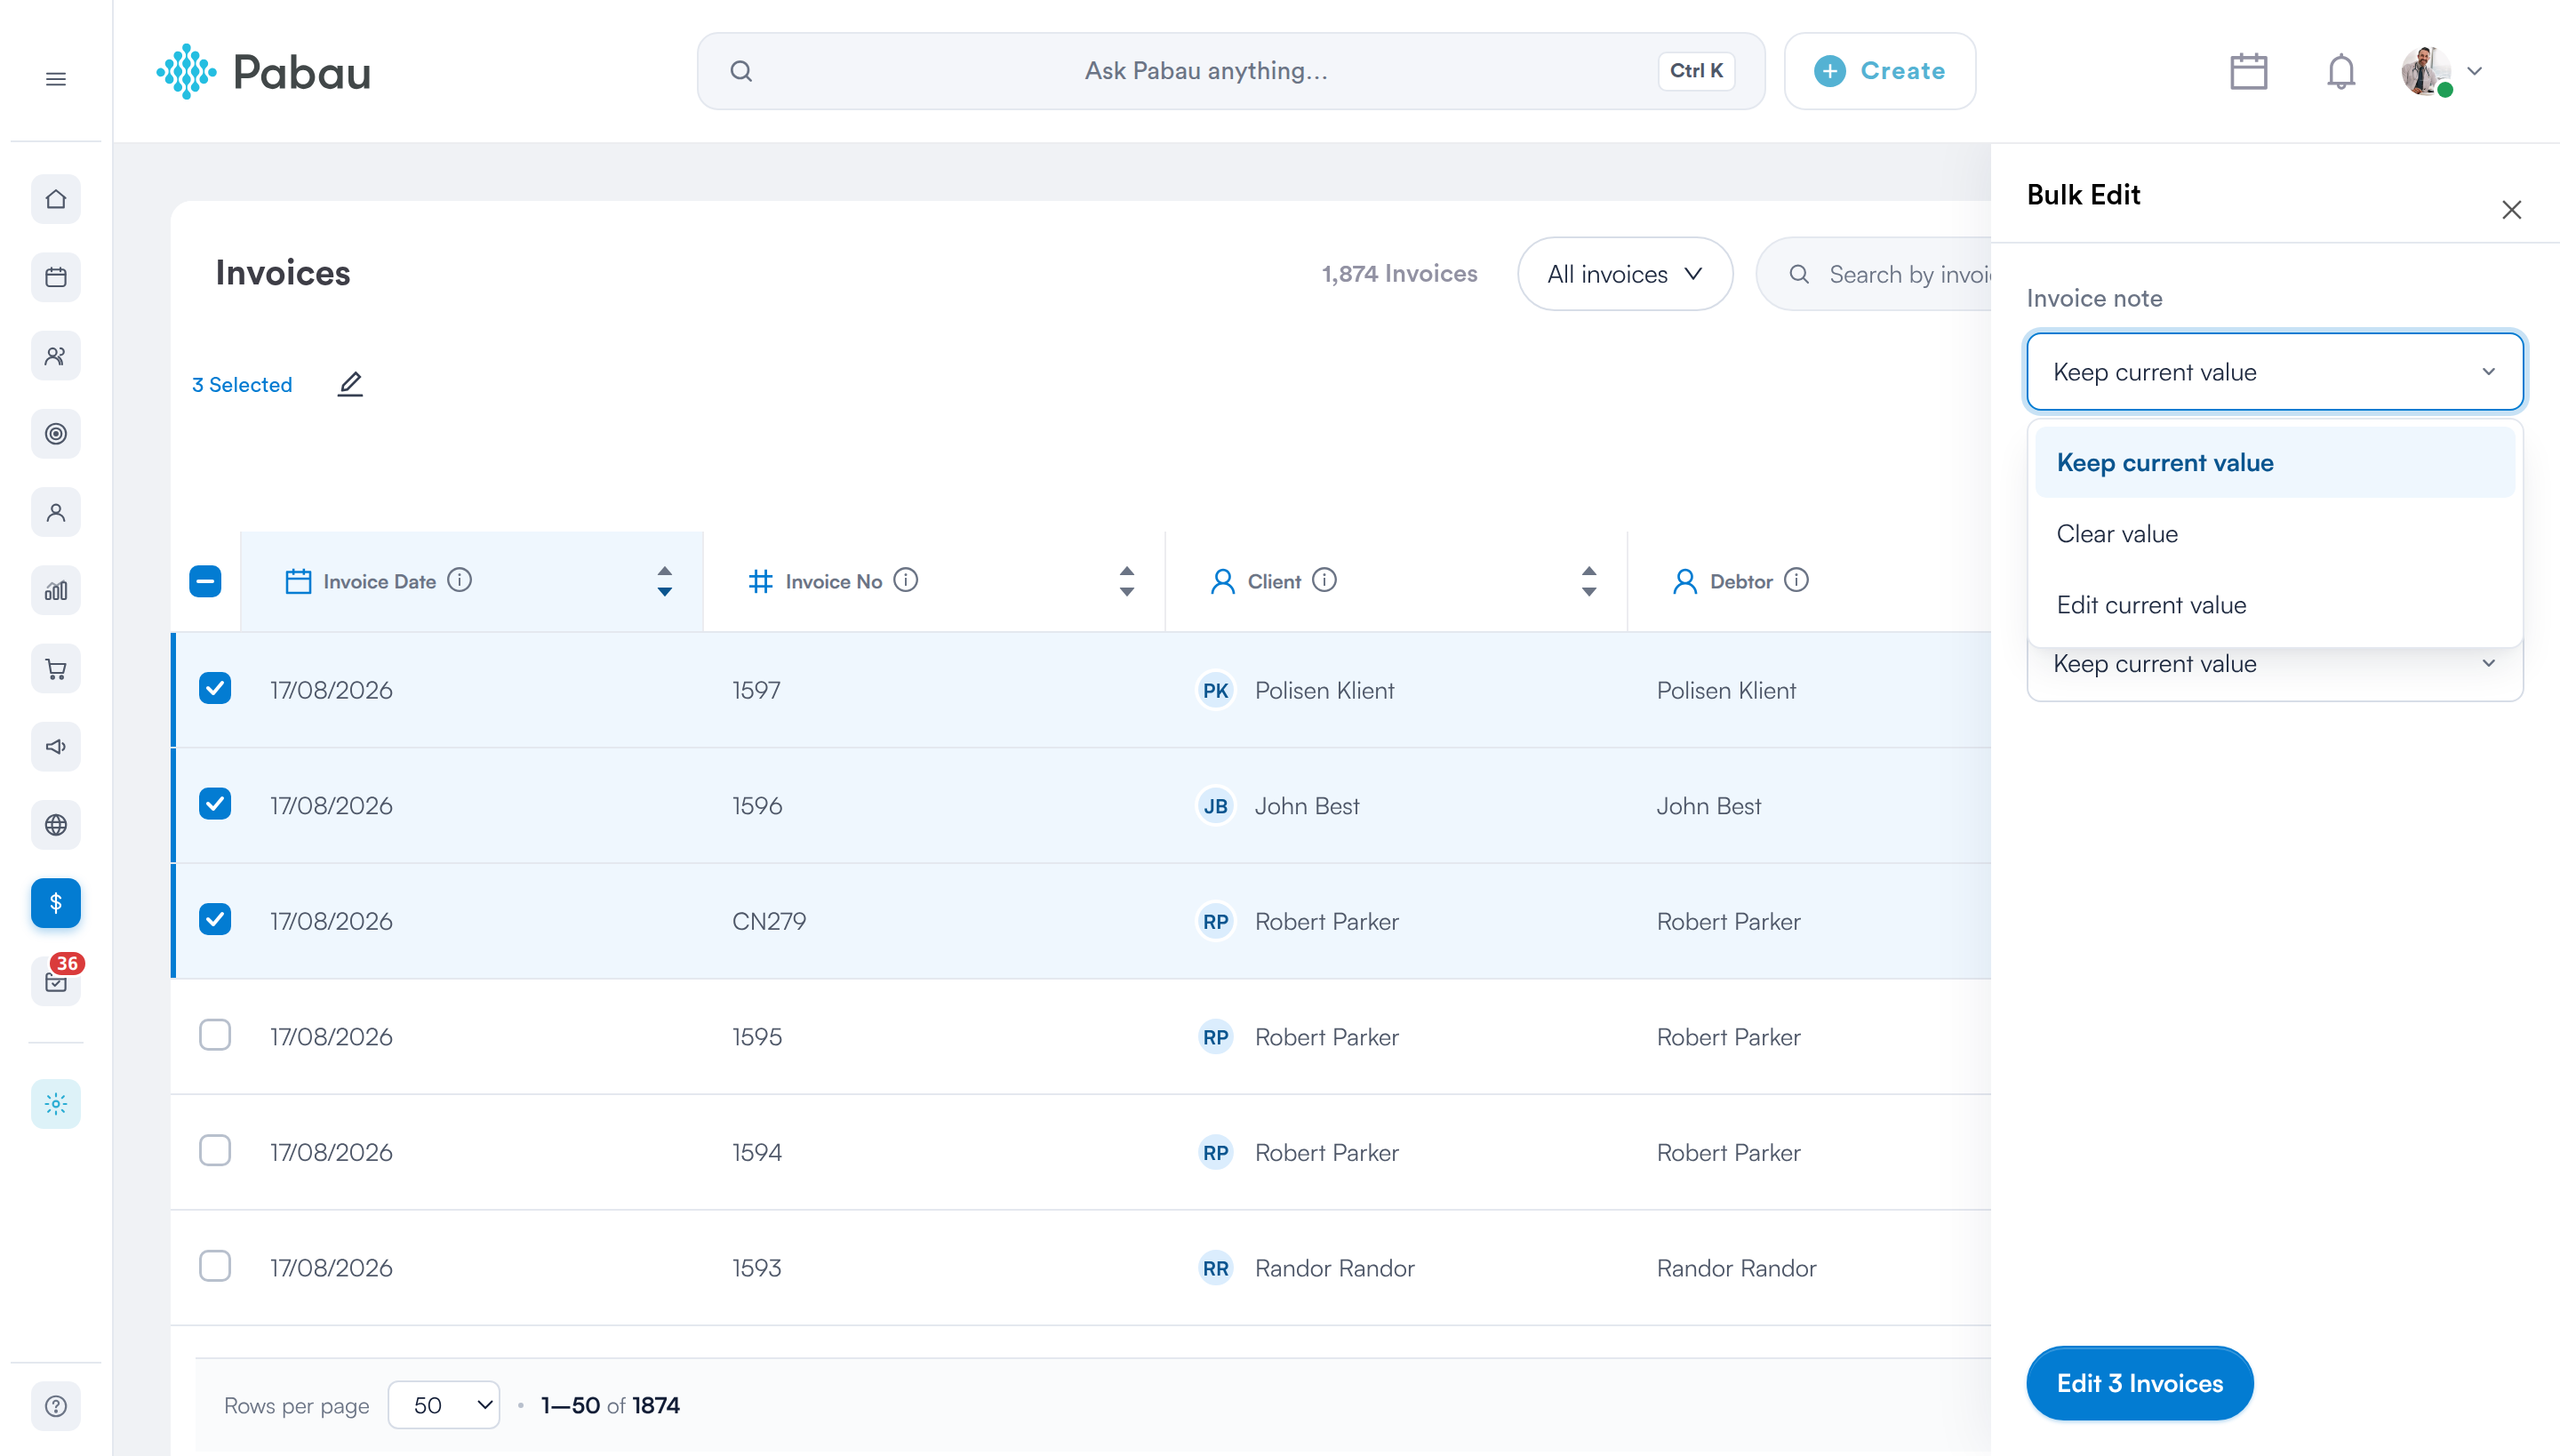
Each field offers Keep current value, Clear value and Edit current value
NOTE: Invoice location has no Clear value option. The Invoices page is filtered by location, so an invoice with no location would disappear from the list — you can move it to another location, but not empty it.
Step 5: Apply the Changes
- Click Edit 3 Invoices at the foot of the panel — the button names the exact number of records it will change.
- The table refreshes and a confirmation message names how many records were updated.
IMPORTANT: You can change up to 100 invoices in one go. Selecting more returns an error and nothing is changed — work in batches of 100 or fewer.
WARNING:
Bulk changes cannot be undone. Check the panel before you apply it — the values you set replace what is currently on every selected record.
Where These Values Come From
- Invoice location ← the locations set up under Setup → Locations. Only locations you have access to appear in the list.
- Issuing company ← the issuing companies set up under Setup → Issuing companies. If the list is empty, none have been set up yet.
The pencil only appears for staff members whose permissions include access to the Invoices page. See How to Set Money Permission for a Staff Member.
For more guides, refer to related articles below, select additional guides, or use the search bar at the top of the page. These guides will help you get the most out of your Pabau account.
Additionally, to help you fully utilize and understand your Pabau account, we recommend exploring additional guides and resources offered at the Pabau Academy. It offers in-depth video tutorials and lessons, offering a holistic learning experience that can equip you with the essential skills for achieving success with Pabau.