The waitlist feature in Pabau allows you to automatically fill last-minute cancellations and gaps in your schedule with clients who are waiting for their preferred time slots. This simple but powerful tool automatically notifies clients when a spot opens up, helping you boost your clinic’s revenue and improve client satisfaction.
Step 1: Navigate to Calendar
Log into your Pabau account and navigate to the Calendar where you manage your appointments.

NOTE: To learn more about managing your calendar, please refer to the this article.
Step 2: Access Waitlist
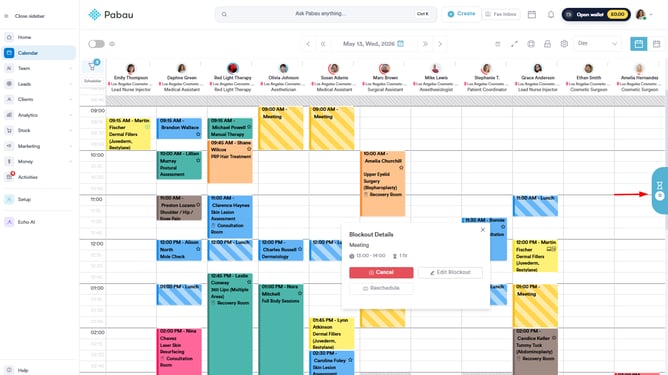
After opening the Calendar, click the "Waitlist" button on the right-hand side of the screen. The Waitlist panel will then slide open, allowing you to manage the waitlist.
Step 3: Add a Client to Waitlist
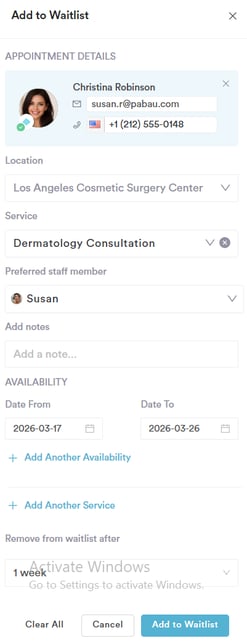
In the new window, click the "Add to Waitlist" button. This will open an appointment menu where you need to enter the client’s details:
Client Name – Type the client's name.
Service – Select the service the client is requesting.
Preferred Staff Member – Choose the staff member the client prefers (if applicable).
Availability – Specify the client’s preferred time and availability.
Remove After Time – Set the time when the client will automatically be removed from the waitlist if the appointment is not booked in time.
Step 4: Book a Client On or Send a Notification
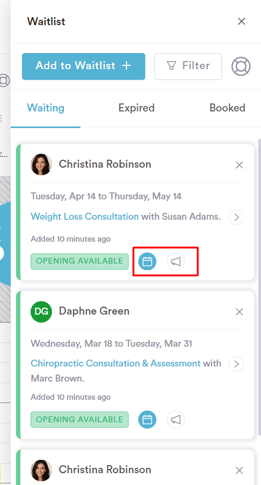
When an appointment slot becomes available:
Book the Client In: If the client is available and a match is found, you can immediately book the client into the available time slot.
Send a Notification: If the client prefers to self-book, you can send them a notification (email/SMS) allowing them to book the slot on their own.
Step 5: Waitlist Notifications
You can customize the waitlist notifications to ensure your clients receive the appropriate alerts when an appointment becomes available. To configure waitlist-specific notifications, please refer to the client notifications.
Additionally, when an appointment is canceled, Pabau now automatically checks the waitlist for matching entries. If a match is found, the system will display the entry in the following ways:
If the waitlist is open (meaning the user is actively viewing the list or has it open on their screen): Any matching waitlist entry will be highlighted in green to draw attention, until the waitlist is manually closed.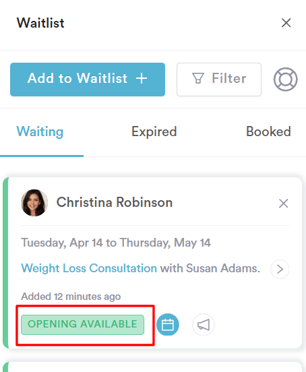
If the waitlist is closed (meaning the user is not actively viewing or has closed the waitlist):
A number will appear on the waitlist button itself to notify the user of the matching entry.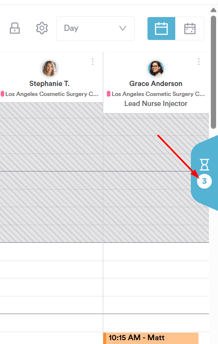
Now that you know how to use the Waitlist feature, you can efficiently manage last-minute cancellations and keep your schedule full.
For more guides, refer to related articles below, select additional guides, or use the search bar at the top of the page. These guides will help you get the most out of your Pabau account.
Additionally, to help you fully utilize and understand your Pabau account, we recommend exploring additional guides and resources offered at the Pabau Academy. It offers in-depth video tutorials and lessons, offering a holistic learning experience that can equip you with the essential skills for achieving success with Pabau.