Medical forms in Pabau can be customized in various ways to suit different needs. To help with this, the form builder includes a range of components that you can use to structure your forms efficiently.
Step 1: Navigate to Forms
Log into your Pabau account and navigate to Setup, then click on "Forms" under Clinical.

Step 2: Create a Blank Template
Click on "Create Form" in the top-right corner and select "Blank Template" to start creating a new form from scratch. If you need detailed instructions on setting up forms, you can refer to this guide.

Step 3: Access the Components
Once you are inside the form builder, locate the Components section on the side panel. You will see a list of components that can be added to the form. Drag and drop the required components into the design builder to structure your form as needed.

Step 4: Understanding the Components
Pabau’s components are grouped into two main categories: Basic and Custom. The Basic category is further divided into four subcategories:- General Components
- Choice Components
- Medical Components
- Other Components
This guide will explore different form types to demonstrate how these components can be effectively used.
Using General Components
-
Text Block
The Text Block component lets you display general information within the form. It’s typically placed at the beginning and can include merge tags to dynamically pull in details like the clinic name, logo, or patient information.
You can also use it for longer text, such as instructions, precautions, or treatment explanations in consent forms.
You can use merge tags to structure your form like this:
Merge tags you can use:
For example, the result may look like this:

-
Heading
The Heading component is used to define section titles in the form. It appears in a larger font to help important sections stand out.
For example, you can use this component as a heading title like this:

It will be displayed like this:

-
Short Answer
The Short Answer component is designed for brief text input, such as First Name, Last Name, or Practitioner Name.
For example, you can add separate Short Answer fields for First Name and Last Name, like this:

It will appear like this:

To enhance functionality, you can use the Linked Field or Default Value options in Advanced Settings.
NOTE: For how to use Linked Field, refer to this article. And for how to use Default Value, refer to this article.
- Long Answer
The Long Answer component allows for extended text input, making it ideal for detailed notes, including manually entered voice notes.
For example, you can use this component for a Voice Notes section:

When you use this form, it will appear like this:

You can use the Echo AI feature to automatically fill in the required information.
NOTE: For more details on How to Use Echo AI in Treatment Notes, refer to this article.
Using Choices Components
- Multiple Choice
The Multiple Choice component presents a question with several possible answers that clients can select.
For this example, we’ll refer to the Patient Intake Form, as this component is commonly used in intake forms, consent forms, and other client-facing forms.
For instance, it can be used like this:

When sent to clients, it will appear like this:
- Single Choice
The Single Choice component presents a question with only one selectable answer.
It functions similarly to Multiple Choice, but clients can select only one option. For example, it can also be used in a Patient Intake Form, like this:

When sent to clients, it will appear like this:

- Dropdown
The Dropdown component provides a list of options in a drop-down menu for clients to choose from.

When the form is being filled out, the client or you will be able to select one of the options in the dropdown menu:
- Slider
The Slider component is used for rating scales, allowing clients to slide the marker to rate aspects such as sleep quality.
For example, in a Patient Intake Form, clients can rate their sleep schedule using the slider:

It will look like this:

Using Other Components
- Image
The Image component allows you to upload and display images within the form.
You can set it up like this and upload any image you want to display:

- Drawing
The Drawing component is used for medical charts, enabling users to draw directly on selected chart templates.
You can select any chart already available in your system, for example:

When using this component, it will appear like this:

NOTE: For instructions on adding charts to your system, refer to this article.
- Signature
The Signature component enables digital signatures, allowing clients and staff to sign using a mouse, trackpad, or touchscreen.
For example, you can set it up like this:

And it will be displayed like this:

Using Medical Components
- Drugs
The Drugs component can only be used in forms of type Prescription, and allows you to add prescription medications from your Pabau database.
When a prescription is created in a client’s card, the pre-selected drugs from this form will be automatically included.
For example, you can set it up like this:

-
Lab Test
The Lab Test component enables you to create a lab order directly from the form. You can pre-select the lab test categories created under Services that can be selected in this field.
For example, select a lab test category from your system, and you can then include the tests included in that category in the form:

-
Code Lookup
The Code Lookup component is exclusive to treatment forms and enables you to search and select medical codes from the SNOMED database, ensuring precise clinical documentation.
You can configure the field to search for codes related to problems, family history, diagnoses, medical history, allergies, or social history. Each Code Lookup field can be set to retrieve only one type of code at a time.
You can configure it like this:

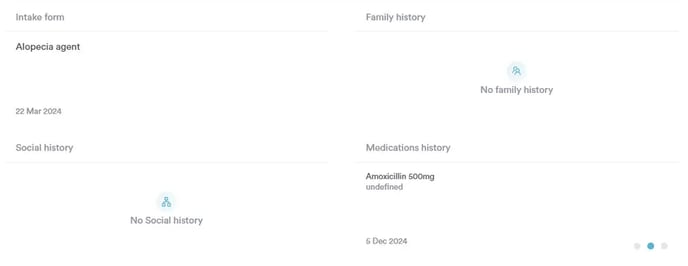
Codes entered in a note will appear in their respective widgets on the client card, if enabled.
- Medical Conditions
The Medical Conditions component allows you to search your custom medical conditions to add to the form or search both the ICD database and your custom conditions.
Conditions added through this component will automatically appear in the Client Problems tab on the client card.

- Allergies
The Allergies component allows you to record allergy information within the form. Any data entered here will automatically be added to the client’s record, ensuring their medical history remains accurate and up to date.
After adding and configuring the necessary components, ensure all changes are saved by clicking on "Save Component" after setting up each element.
Click "Save Form" in the top-right corner to finalize your medical form.
NOTE: We suggest checking out our Medical Forms article for more information on medical forms.
By using these medical components effectively, you can create structured, efficient, and professional forms tailored to your clinic’s needs.
For more guides, refer to related articles below, select additional guides, or use the search bar at the top of the page. These guides will help you get the most out of your Pabau account.
Additionally, to help you fully utilize and understand your Pabau account, we recommend exploring additional guides and resources offered at the Pabau Academy. It offers in-depth video tutorials and lessons, offering a holistic learning experience that can equip you with the essential skills for achieving success with Pabau.