
Discover the key aspects of Pabau's Broadcasts feature, covering newsletter and SMS campaigns. Learn how to craft effective email and SMS campaigns and set up client groups for precise marketing strategies.
Table of Contents:
1. How to Create a New Email Campaign
2. How to Edit an Email Campaign
3. How to Duplicate an Email Campaign
4. How to Delete an Email Campaign
5. How to Create a New SMS Campaign
6. How to View Broadcast Reports
7. How to Create Client Groups for Targeted Marketing Campaigns
How to Create a New Email Campaign
Newsletter campaigns serve as robust tools to uphold efficient communication with your clients in Pabau. They provide various advantages, such as precise outreach, valuable insights derived from statistics, and the capability to maintain a personalized and professional approach. In this guide, we'll guide you through the steps of creating and managing newsletters in Pabau.
Step 1: Navigate to Broadcasts
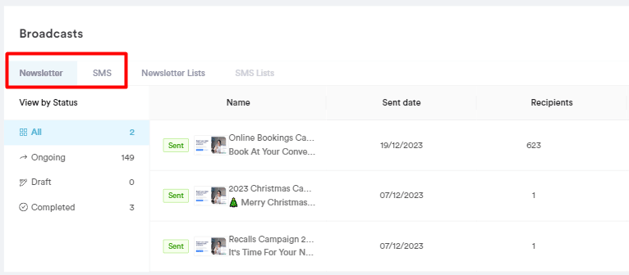
Step 2: Review Existing Campaigns
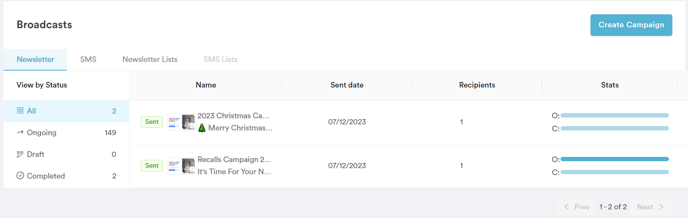
On the left side, view existing newsletter campaigns categorized by status - Ongoing, Draft, and Completed. In the center, see campaign details such as status, name, subject, sent date, recipients, and performance statistics.
Step 3: Initiate a New Email Campaign
To start a new email campaign, click "Create Campaign" in the top right corner. In the "Select a channel" window, choose "Email".
Step 4: Campaign Creation Sections
The newsletter creation page is divided into four parts: Settings, Design, Audience, and Send or Schedule.
Settings Tab: Provide the campaign title (for internal purposes) and the email subject (visible to clients). Choose the campaign type: Standard (one-time) or Automated.
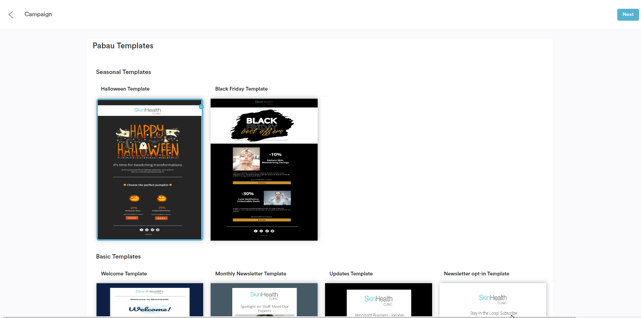
Design Tab: Choose a preexisting template or code your own.
- If using a preexisting template, click on the desired template, then click "Next" in the top right corner.
Add a new component (columns, heading, text, image button, divider, HTML code, or a menu) by closing the editing menu (clicking the X button or outside the template).
- If coding your own template, click on "Code Your Own," input HTML code, and preview the email before saving the code.
Audience Tab: Here you can choose who will receive your SMS campaign. If you want all clients to receive it, click on "All Clients".
If you choose to send it to all clients, you can easily select only clients who have opted into Newsletters. Additionally, you can filter clients by labels. To learn more about client labels, read this article.
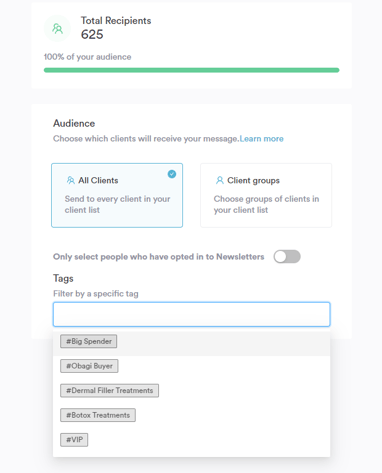
If you wish to send it only to a specific group of clients, click on "Client groups" and select the group you need.
To create a new client group, follow the steps provided in this article.
Send or Schedule Tab: Decide to send the campaign immediately by clicking "Send Campaign Now," or schedule it by expanding the "Schedule campaign" field and selecting the date and time.
Confirm by clicking "Scheduled" or cancel the schedule by clicking "Cancel Schedule." To send a test email, click "Send Test" in the top right corner.
Step 5: Campaign Completion
The campaign will appear in the Newsletter tab on the Broadcasts page, initially marked as "Processing" until sent, then changing to "Sent" status.
NOTE: You can also learn about this topic by watching a lesson on Pabau Academy.
How to Edit an Email Campaign
Step 1: Navigate to Broadcasts
Step 2: Locate the Draft Campaign
Step 3: Edit the Campaign
Upon clicking "Edit," you will be directed to the campaign editing page. Here, you have the flexibility to make changes to various aspects of your campaign, following the same steps as when creating a campaign:
-
General Settings: Adjust the campaign name, subject line, and other general details to ensure accuracy and relevance.
-
Design: Modify the visual elements of your email, including images, layout, and overall design to enhance its appeal.
-
Audience: Refine your target audience by adjusting segmentation criteria or adding and removing recipients as needed.
-
Sending Options: Choose whether to send the campaign immediately or schedule it for a specific date and time.
Make the necessary changes to suit your preferences and requirements.
Step 4: Review and Send
Once you've made the desired edits, navigate to the top right corner of the editing page and click on "Review & Send." This step allows you to review the final version of your campaign before sending it out.
Double-check all details to ensure accuracy, and if everything looks good, proceed to send the campaign.
If you've scheduled the campaign for a later time, it will be automatically sent at the specified date and time.
How to Duplicate an Email Campaign
Duplicating an existing campaign in Pabau is a convenient way to reuse successful campaigns for future marketing efforts. Follow these steps to efficiently duplicate an email campaign:
Step 1: Navigate to Broadcasts
Step 2: Choose Campaign Type
On the left side of the Broadcasts page, select whether you want to duplicate a Newsletter or SMS campaign by clicking on the respective tab.
Step 3: Locate the Campaign to Duplicate
Locate the specific campaign that you want to duplicate by clicking on the respective tab (Newsletter or SMS).
Step 4: Duplicate the Campaign
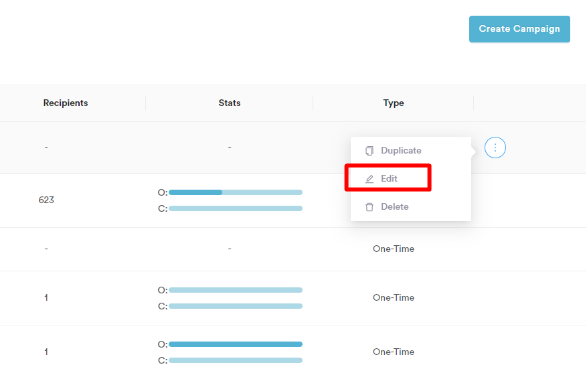
Hover over the campaign you wish to duplicate and click on the three-dots icon on the right. From the menu that appears, select "Duplicate."
Step 5: Confirm Duplication
The campaign will be duplicated as a copy of the original. You can proceed to make any changes or resend it without making any modifications.
By following these steps, you can efficiently duplicate an email campaign in Pabau, saving time and effort in creating similar campaigns for future use.
This feature allows you to leverage the success of previous campaigns while providing the flexibility to make any necessary adjustments for new marketing initiatives.
How to Delete an Email Campaign
Step 1: Navigate to Broadcasts
Step 2: Locate the Draft Campaign
Identify the draft campaign you wish to delete within the "Broadcasts" section. Hover over the campaign, and a three-dot icon will appear.
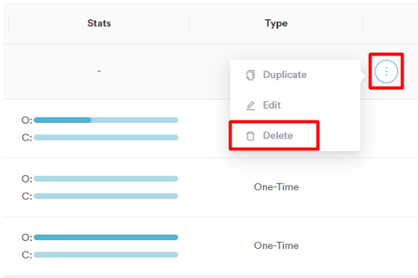
Step 3: Access Campaign Options
Click on the three-dot icon to reveal a menu of options for the selected campaign. From this menu, select "Delete" to remove the draft campaign.
Step 4: Confirm Deletion
After clicking "Delete," a confirmation prompt will appear to ensure that you intend to remove the draft campaign. In this prompt, click on "Yes, Remove the Campaign" to confirm the deletion.
By following these steps, you effectively delete the draft campaign, providing you with a clean slate to make the necessary changes or create a new campaign from scratch.
How to Create a New SMS Campaign
Step 1: Navigate to Broadcasts
Step 2: Access SMS Campaigns
In the "Broadcasts" section, locate the SMS campaigns by switching to the SMS tab next to Newsletters on the right. Here, you can view the status, name, sent date, recipient count, open rate, and click-rate statistics for each campaign.

Step 3: Create a New SMS Campaign
Click on "Create Campaign" in the top right corner. In the "Select a channel" prompt, choose "SMS."
Step 4: Campaign Creation Page
The SMS campaign creation page is divided into four parts: Settings, Design, Audience, and Send or Schedule.
Settings Tab: Here you will need to add a campaign title for internal purposes. The "From" field is prepopulated with information from the Senders Addresses section.
Choose between a standard one-time campaign or an automated one.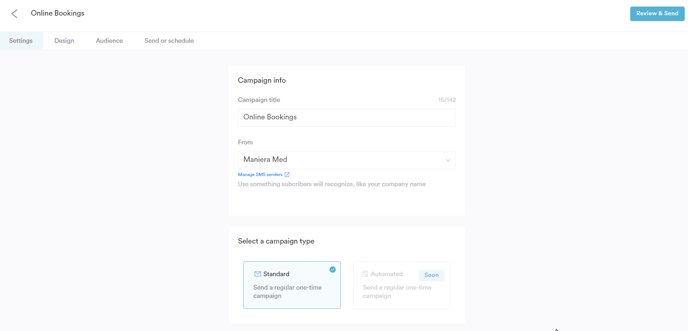
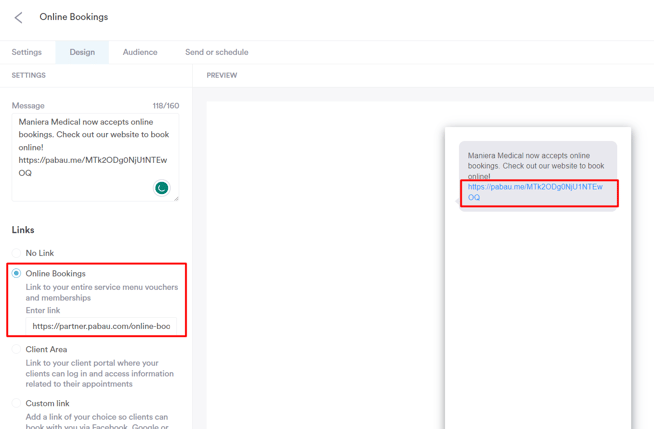
Design Tab: Type the message you want to send to clients. Preview the message in the center of the screen. Under "Links," choose to add a link to the text message, either from the pre-built links to your Online Bookings portal or Client Area, or a custom link.
Audience Tab: Here you can choose who will receive the SMS campaign. To send it to all clients, click on "All Clients". To send it to a specific group, click on "Client groups" and select the desired group.
To create a new client group, follow the steps provided in this article.
Send or Schedule Tab: Review the total cost of the campaign and the payment method. To send the campaign immediately, click on "Send Campaign Now."
By following these steps, you can create and send SMS campaigns in Pabau, ensuring that your messages reach the right audience at the right time.
NOTE: You can also learn about this topic by watching a lesson on Pabau Academy.
How to View Broadcast Reports
Monitoring the performance of your marketing campaigns is crucial for assessing their effectiveness. Pabau provides detailed reports for both newsletters and SMS campaigns. Follow these steps to view broadcast reports seamlessly:
Step 1: Navigate to Broadcasts
Step 2: Choose Campaign Type
On the left side of the "Broadcast" page, select whether you want to review the performance of your Newsletter or SMS campaigns by clicking on the respective option.
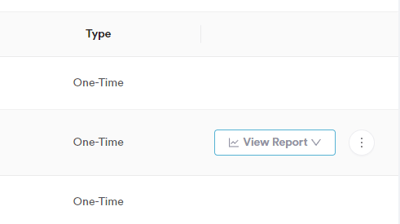
Step 3: Select Campaign for Report
Hover over the campaign for which you want to view the report. Click on the "View Report" button that appears on the right side of the campaign.
Step 4: Explore the Report
In the campaign report, you will find a comprehensive overview of the campaign's performance:
-2-2.png?width=688&height=295&name=image%20(2)-2-2.png)
- Sent: The total number of clients to whom the email or SMS was sent.
- Delivered: The number of emails or SMS messages successfully delivered.
- Opened: The number of clients who opened the email or viewed the SMS.
- Clicked: The number of clients who clicked on links included in the campaign.
- Bounced: Indicates if some emails bounced and were not delivered.
- Unsubscribed: Shows how many clients opted out of future communications.
- Spam Reports: Indicates if the email was reported as spam by recipients.
Step 5: Utilize the Chart
At the top of the report, a chart provides a visual representation of the opening rate over a specific period. This chart allows you to quickly assess the campaign's impact and engagement trends.
By following these steps, you can efficiently access and analyze broadcast reports in Pabau, gaining valuable insights into the success of your marketing campaigns.
Regularly reviewing these reports helps optimize future campaigns and ensures effective communication with your audience.
How to Create Client Groups for Targeted Marketing Campaigns
Step 1: Navigate to Clients
Step 2: Access Client Filtering
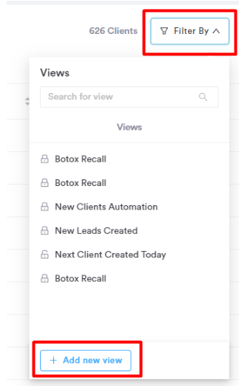
Click on "Filter By" located next to the search bar in the top right corner of the Clients feature. Then, select "Add new view."
Step 3: Create Client View Conditions
In the "Create View" menu, set conditions for clients who should be included in the list. For example:
- In the first section, conditions that all clients in the list should match can be set. In the example below, a list of active clients aged over 30 who haven't visited in the last 180 days is created.
The purpose of this list is to send these clients - who haven't visited us in a while - a targeted newsletter with a special offer to get them to book another appointment.
- In the second section, "And match ANY of these conditions," additional conditions can be added to further specify the clients on the list. Clients will be included if they match any of these conditions, even if they don't meet all the criteria.
This allows you to tailor the client view based on specific criteria for targeted marketing.
Step 4: Name and Visibility
Add a name for the client view that reflects the conditions set. Choose whether the view will be visible only to the creator or to all users in the account.
Step 5: Save the View
Once satisfied with the conditions and settings, save the view by clicking on "Save" in the bottom right corner of the "Create View" menu.
By following these steps, you've successfully created a client group or view in Pabau. This client view can now be used for targeted marketing campaigns, such as sending newsletters with special offers to clients who haven't visited in a while.
Step 6: Use the Client Group in Campaigns
You can now use this client view when choosing the audience for your newsletter or SMS campaigns. To do so:
- In the left sidebar menu, click on Marketing, then click on Broadcasts.
- Start creating a new email campaign, or create a new SMS campaign.
- After completing the fields in the Settings and Design tabs, proceed to the "Audiences" tab.
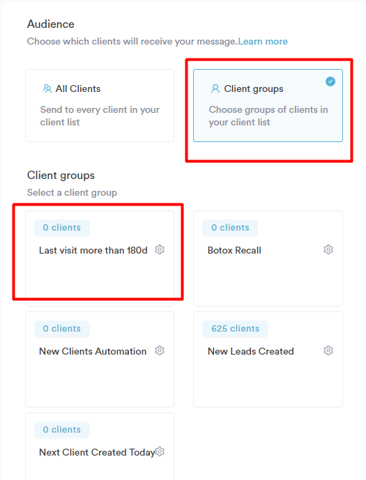
- Click on "Client Groups" and select the client group you just created.
- Proceed to send the campaign.
By following these steps, your campaign will reach only the clients included in the client group, allowing you to precisely target your audience for maximum impact and engagement. Regularly update client views to align with changing marketing strategies and business goals.
For more guides, refer to related articles below, select additional guides, or use the search bar at the top of the page. These guides will help you get the most out of your Pabau account.
Additionally, to help you fully utilize and understand your Pabau account, we recommend exploring additional guides and resources offered at the Pabau Academy. It offers in-depth video tutorials and lessons, offering a holistic learning experience that can equip you with the essential skills for achieving success with Pabau.