Table of Contents:
1.How to Create a Clinic List
2.How to Print Clinic List
3.How to Download Clinic List
4.How to Email Clinic List to Staff Members
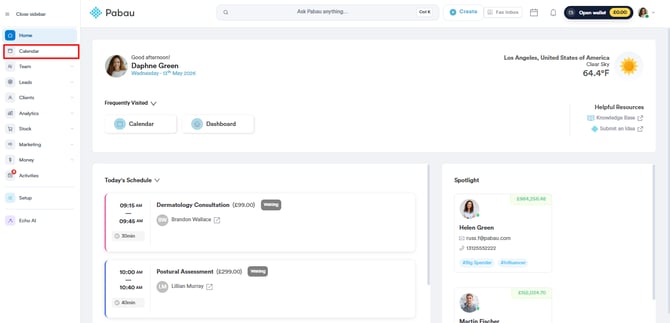
Step 1: Navigate to Team
Log in to your Pabau account, and in the left sidebar menu, go to Team, then select "Team" again, and click on the Team tab.

NOTE: To learn more on how to manage the Clinic List please refer to this article.
Step 2: Create a New Clinic List
Once you're in the ''Team'' section, click the ''Clinic List'' button in the top-right corner.

This will open the ''Clinic List'' page in a new tab, where you can view all previously created lists.
To create a new one, click ''Create New List''.

Step 3: Configure Your Clinic List
In the Clinic List setup, you can define who should be included, when the list should be generated, and what information should appear in the list.
Who
-
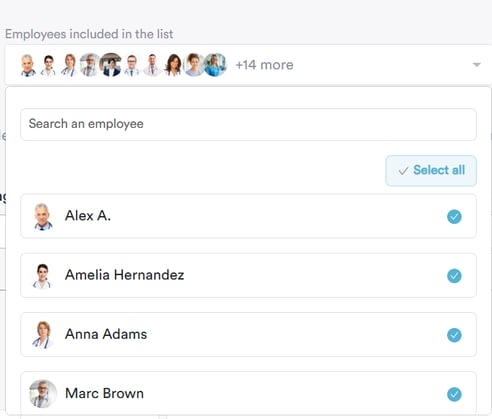
Employees included in the list:
Select the staff members whose bookings should appear in the list. You can select multiple employees, depending on your needs. -
Email addresses for recipients:
Add the email addresses of the people who should receive the Clinic List. You can input more than one — just separate them by pressing Enter, comma, or space after each one.

When
-
Generate on specific days:
Choose this option if your clinic operates on fixed days (e.g. every Monday, Wednesday, and Friday). -
Generate only on days with bookings (Recommended):
This is ideal if your schedule changes day to day. The system will only send the Clinic List when appointments are actually booked.

What
-
Choose which types of bookings to include in the list:
-
Past bookings (if available)
-
The current day’s bookings
-
Future bookings (Recommended)
-
-
Decide how many days of bookings the list should show.
For example, enter 1 to show just the next day’s appointments.

Step 4: Preview and Save the List
Once you’ve completed all the required fields in the Clinic List setup, you’ll have the option to preview the list before saving it.
Click ''Generate Preview'' at the bottom of the screen to view a sample of how the list will appear when sent. This enables you to verify that the correct employees, bookings, and timeframes have been selected.

When the preview meets your requirements, you can send a test email to verify how the list will appear to recipients. Once confirmed, click ''Create List'' in the top-right corner to save and activate the Clinic List.

After the list is created, it will be displayed alongside your other saved lists.

By following these steps, you will complete the setup process and successfully create and finalise your Clinic List for use.
How to Print Clinic List
Step 1: Navigate to Calendar
Begin by logging into your Pabau account and in the left sidebar menu, locate and click on "Calendar" to access your schedule.
Step 2: Open Calendar Settings
In the top right corner of the calendar, next to the calendar view mode, you'll find a cogwheel icon. Click on this icon to open the calendar settings options.

Step 3: Access Print Options
Within the calendar settings, click on the "Clinic List" option. This will open a side panel where you can customise the information that will appear on the printed version of your clinic list.

Step 4: Customize Printing Preferences
After opening the ''Clinic List'', a panel will appear on the right side of the screen where you can fully customize how the daily clinic list is displayed before printing.

Here’s a breakdown of the available options:
-
Date Selector
At the top of the panel, choose the date for which you want to print the list.
- Employee Dropdown
Select one or multiple employees whose appointments you want to include. This is helpful if you're printing the list for individual practitioners or departments.
-
Column Filters
You can choose which details to include in the printout by ticking or unticking various columns. Available options include:-
Time
-
Location
-
Date of birth
-
Address
-
Mobile number
-
And more
-
![]()
-
Day Summary
Use the dropdown to show or hide the day summary. When enabled, this section provides a high-level overview of the day's appointments and practitioners.
-
Break Page After Summary
Choose whether to insert a page break after the summary section. This is useful if you want the detailed list to begin on a new page.
-
Show Locations
Filter appointments by clinic location. You can select one or more locations to include only the relevant data.
Once you've configured your preferences, the Clinic List view will update to reflect your selections. If the summary is enabled, you'll see:
-
A count of total appointments
-
A count of practitioners with scheduled appointments

Below the summary, the appointment details will be listed based on the selected columns and filters, ready for review or printing.

Step 5: Print the Clinic List
To print the configured list, click the ''printer icon'' located in the top-right corner of the Clinic List panel. If preferred, you can also choose to email the list directly to selected staff members from the same panel.

NOTE: To learn how to email the clinic list to staff members, please refer to this article.
This will open your browser’s print preview window, where you can adjust how the list will appear before printing or saving.

Here’s what you can configure:
-
Destination
Choose where to send the document — for example, to a physical printer or to save it as a PDF. -
Pages
Select whether to print all pages or a specific range. -
Layout
Choose between Portrait or Landscape orientation depending on how you want the list formatted. -
Colour
Decide whether to print in Colour or Black and White.
Click ''More settings'' to fine-tune additional options:
-
Paper size (e.g., A4, Letter)
-
Pages per sheet (e.g., print multiple pages on one sheet)
-
Margins (Default, None, Minimum, or Custom)
-
Scale (Adjust the size of the content to better fit the page)
- Options (Enable or disable headers and footers or include background graphics, such as logos or shaded sections)
Once everything looks correct, click the final ''Print'' button to print the list — or choose ''Save as PDF'' if you'd prefer to store it digitally.
By following the outlined steps, you can customize the clinic list to include relevant information and efficiently manage your daily appointments.
How to Download Clinic List
Step 1: Navigate to Calendar
Begin by logging into your Pabau account and in the left sidebar menu, locate and click on "Calendar" to access your schedule.
NOTE: To learn more about the Calendar please refer to this article.
Step 2: Open Calendar Settings
In the top right corner of the calendar, next to the calendar view mode, you'll find a cogwheel icon. Click on this icon to open the calendar settings options.

Step 3: Access Print Options
Within the calendar settings, click on the "Clinic List" option. This will open a side panel of your daily appointment schedule.

Step 4: Customize the List Preferences
After opening the ''Clinic List'', a panel will appear on the right side of the screen, allowing you to fully customise how the daily schedule is displayed before downloading.

Once you're happy with the settings, click ''Print'' in the top-right corner to access the download options.

Step 5: Download the Clinic List
After clicking ''Print'', your browser’s print preview window will open. Click on the ''Destination'' dropdown and select ''Save as PDF''.

You can then customise how the clinic list will appear before downloading:
-
Pages – Choose to download all pages or a specific range.
-
Layout – Select between Portrait or Landscape orientation.

Click on ''More settings'' to access additional options, such as:
-
Paper size (e.g., A4, Letter)
-
Margins (Default, None, Minimum, or Custom)
-
Scale (Adjust the content size to better fit the page)
-
Options
– Include or remove headers and footers
– Enable or disable background graphics like logos or shaded areas

Once everything is set, click ''Save'' and choose where to store the file on your device.
By following these steps, you’ll have a professional-looking PDF version of your clinic’s daily schedule—ready to save or share as needed.
How to Email Clinic List to Staff Members
Step 1: Navigate to Calendar
Begin by logging into your Pabau account and in the left sidebar menu, locate and click on "Calendar" to access your schedule.
NOTE: To learn more about the Calendar please refer to this article.
Step 2: Open Calendar Settings
In the top right corner of the calendar, next to the calendar view mode, you'll find a cogwheel icon. Click on this icon to open the calendar settings options.

Step 3: Access Print Options
Within the calendar settings, click on the "Clinic List" option. This will open a side panel of your daily appointment schedule.

Step 4: Customize the List Preferences
After opening the Clinic List, a panel will appear on the right side of the screen, allowing you to fully customise how the daily schedule is displayed before emailing.

The staff members you select here will automatically be included as recipients when you choose to send the list via email.
Step 5: Email the List
Once everything is ready, click the ''Email'' button in the top-right corner of the Clinic List panel to proceed with sending the list.

A pop-up window will appear where you can:
-
Enter the email subject
-
Add a message body
-
Review the recipients, which will be automatically populated based on the staff members you selected earlier in the options
You can also add additional email addresses if you’d like to send the list to someone else.

When you’re happy with the details, click ''Send Email'' to deliver the clinic list to your staff members.
Preview of the Email
This is how the email will appear once it’s sent to the selected staff members, with the clinic list included as a PDF attachment.

By following these steps, you can easily share your clinic’s daily schedule with selected staff members, ensuring everyone stays informed and up to date.
Now that you know how to use the Clinic List, you can easily manage, share, and keep track of your clinic’s daily schedule with confidence.
For more guides, refer to related articles below, select additional guides, or use the search bar at the top of the page. These guides will help you get the most out of your Pabau account.
Additionally, to help you fully utilize and understand your Pabau account, we recommend exploring additional guides and resources offered at the Pabau Academy. It offers in-depth video tutorials and lessons, offering a holistic learning experience that can equip you with the essential skills for achieving success with Pabau.