
The Medical Forms are great way to collect all necessary data of your patients' health related information such as their name, birthday, health records, medication and other useful information.
Pabau offers you a whole section where you can create the most simple and easy to read and understand medical forms that can be used both on Desktop and iOS devices.
Note: To be able to create a medical form of any type (consent/questionnaire/prescription/treatment) you will need to have admin privileges for using Pabau.
Here are the steps you need to follow:
1. Proceed into "Setup" button in the top right corner

2. Click on "Data"

3. Locate the "Medical Forms" icon and click on it
4. The next button you need to click on is "Create Form"

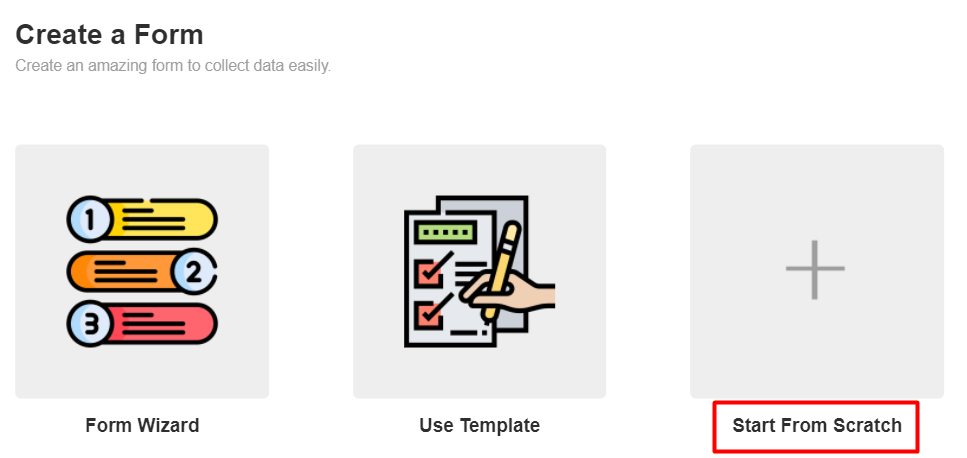
5. In the next window, 3 options will appear. If you have a specific medical form that you would like to continue using it, we recommend clicking the "Start from Scratch" button
6. You will be asked to enter the form name and the form type. Only when selecting the form type, the options will appear and you will be able to proceed with the creation of the form.
Note: Only 1 Questionnaire per clinic can be created. If you already have an active questionnaire and select "Questionnaire" from the "Select Form Type" dropdown, the system will display a pop up with a descriptive message.
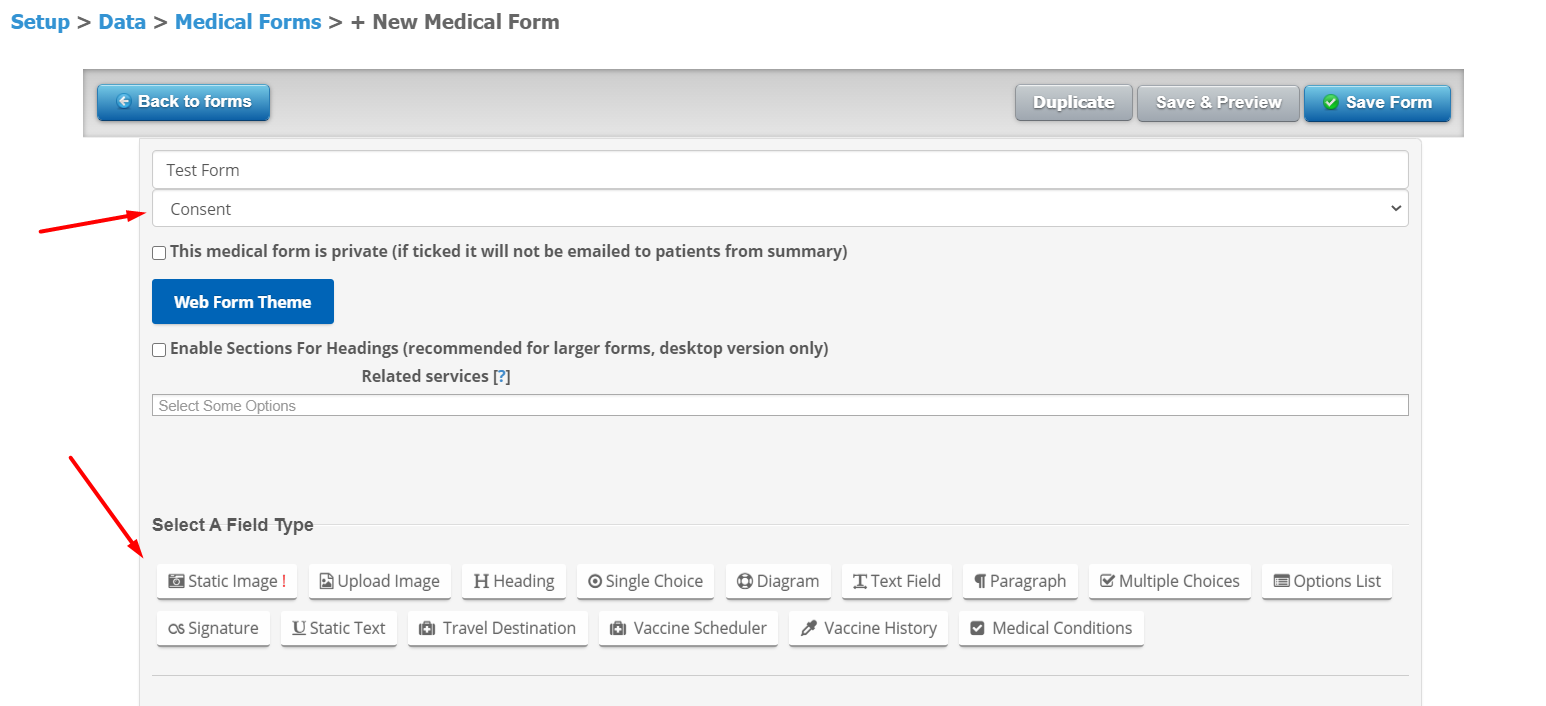
7. To better understand and decide which field type to use it in the form, hover the mouse over any field you need and a message with the explanation will be displayed.

-
You can click and drag the fields based on the position you want them to have in the form
-
In case there is a specific value (answer) that should always appear for that question, you can click on Advanced Settings if it is Text Field and Paragraph and add it in the designated box.
-
As we are using a lot of merge tags so that the system would automatically populate the values based on the information we have in Pabau, you can click on the Insert Merge Tags and based on the field you can choose what merge tag to use (these are good for Static Text when you do not want clients to change some info i.e. First Name, phone number etc)
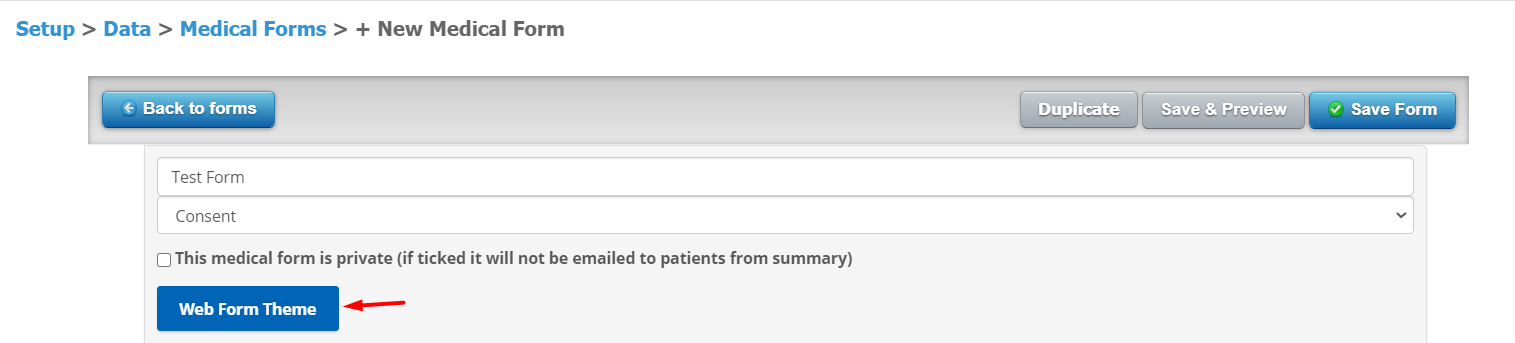
8. You can also add colors for different options within the form such as: its background, text, buttons. You can also change the font style for the form in question. To access these options, click on the "Web Form Theme" button
9. What is also a great option, is that you can associate the form in question with a specific service.

Note: Once you will book an appointment with the service that is associated with the form, the form will be automatically added in the Journey on the iOS application.
10. To save the changes you've made, simply press on the "Save Form" button.
Tips & Tricks: You can open any test client card and send yourself the created form just to see the design of it and make sure that everything is in place. If you are not sure of these steps, check the following article:
Did this answer your question?