Table of Contents:
1. How to Integrate With Xero
2. Troubleshooting Xero
2.1. Unable to Locate Xero in Pabau
2.2. Data Fields Not Mapping Correctly from Pabau to Xero
2.3. Xero Account Codes Not Showing in Pabau
2.4. How to Incorporate Service-Specific Account Codes into Pabau
2.5. How to Check if an Invoice Has Been Synced to Xero in Pabau
2.6. Detect Syncing Errors
2.7. Integration Errors
How to Integrate With Xero
This integration simplifies your financial workflows, ensuring accurate and up-to-date records in both systems. This includes any changes made to those invoices, as well as payments.
Step 1: Create a New Xero Application
Log in to your Xero account and access the "My Apps" section of the Xero Developer page.

Step 2: Create a New Xero App
Click on the "New App" button to initiate the creation of a new Xero application. Ignore any previously related apps to Pabau CRM, or delete them if necessary.
Fill out the form with the following details:
- App Name: Enter a name for your app (e.g., Pabau CRM).
- Integration Type: Choose "Web app."
- Company or Application URL: https://app.pabau.com/
- Redirect URI: https://app.pabau.com/setup/app-marketplace/xero

After completing the form, scroll down to click "Create App."

Step 3: Access App Details
You will be redirected to the newly created App details page. Navigate to the "Configuration" tab on the left to find your automatically generated Client ID. Click on "Generate a secret" to create a secret key for the app.

Step 4: Retrieve Client ID and Secret Key
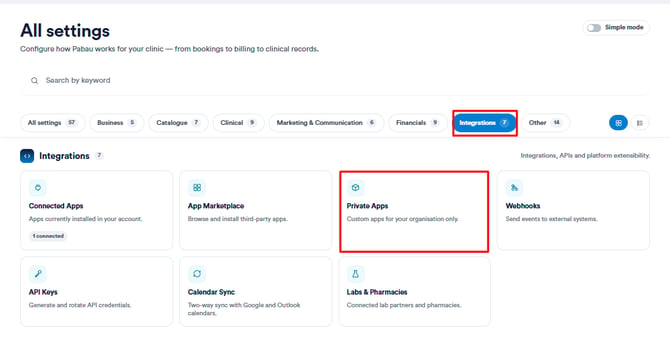
Log into your Pabau account and go to Setup by clicking on the "Setup" button from the left sidebar menu. Select "App Marketplace" in the Developer & Other section and then choose "Xero" from the list of integrations.

Paste the Client ID and Client Secret key generated in Xero into the integration form in Pabau CRM, then click "Generate sync link" to proceed.

Before continuing, make sure the relevant account in Xero is set to allow payments.
In your Xero account, go to Dashboard > Accounting > Chart of Accounts, then click on the account you wish to use. In the ''Edit Account Details'' screen, tick the box for “Enable payments to this account,” and save your changes.
This ensures the account can be selected when configuring invoice and payment settings in Pabau.
Step 5: Grant Permissions
You will be prompted to grant permissions to Pabau. Review the permissions required and click "Allow access."

You will be redirected back to your Xero Integration dashboard in Pabau CRM.

Step 6: Set the Default Invoice Status
On the Xero Integration page, under the Invoices tab, you can select how you want the invoices to sync into Xero. That is set up in the Default Invoices Status. Ensure you select the correct status.

-
Draft - the invoices created in Pabau will sync to Xero and maintain the same structure and details as when initially synced. For example, if you raise an invoice in Pabau with specific line items, client details, and payment terms, when this invoice syncs to Xero, it will appear in Xero with all these details intact. Any changes made to the invoice in Pabau after syncing will only automatically reflect in Xero if you manually update the invoice in Xero.
-
Awaiting Approval - the invoices will sync to Xero, but the process will only be finalized once you manually approve them in Xero. This status allows you to review the invoices in Xero before they are officially recorded. Once you approve the invoices in Xero, they will be processed and recorded in your accounting system.
- Awaiting Payment (Recommended) - any changes made to the invoices in Pabau will be immediately reflected in Xero. For example, if you update the details of an invoice in Pabau, such as adding a new line item or changing the payment terms, these changes will sync to Xero in real-time.
NOTE: We recommend setting it to the "Awaiting Payment" status.
Under the invoices tab, you will find Default Xero account code line items. Any codes enabled from Xero will appear in the dropdown menu, where you can select which code you would like to set as default.

Step 7: Save Changes
To finalize the integration, navigate to the "Save Changes" button in the top right corner of the page.

Step 8: Confirmation
Congratulations! You have successfully synced your Xero account with your Pabau account. You can now enjoy the benefits of automated invoice management and payment tracking between Pabau and Xero.

By following these steps, you've established a set-and-forget process, ensuring ongoing synchronization and efficiency in managing your financial data across platforms.
Troubleshooting Xero
Below are listed common issues and errors you might face with Xero in Pabau and instructions on how to resolve them.
#1 Unable to Locate Xero in Pabau
Step 1: Navigate to App Marketplace
Start by logging in to your Pabau account using your login credentials. Then, navigate to the Setup page; you will find App Marketplace under the Integrations section.
Step 2: Navigate to Xero
On the App Marketplace page, you will be able to locate Xero. If you have already integrated Xero into your Pabau account, you can also identify it in the "Connected Apps" tab.
NOTE: To find out how you can integrate Xero into your Pabau account, refer to this article.
#2 Data Fields Not Mapping Correctly from Pabau to Xero
Step 1: Check the Default Invoice Status
On the Xero Integration page, under the Invoices tab, you can select how you want the invoices to sync into Xero. That is set up in the Default Invoices Status. Ensure you have selected the correct status.
-
Draft - the invoices created in Pabau will sync to Xero and maintain the same structure and details as when initially synced. For example, if you raise an invoice in Pabau with specific line items, client details, and payment terms, when this invoice syncs to Xero, it will appear in Xero with all these details intact. Any changes made to the invoice in Pabau after syncing will only automatically reflect in Xero if you manually update the invoice in Xero.
-
Awaiting Approval - the invoices will sync to Xero, but the process will only be finalized once you manually approve them in Xero. This status allows you to review the invoices in Xero before they are officially recorded. Once you approve the invoices in Xero, they will be processed and recorded in your accounting system.
- Awaiting Payment (Recommended) - any changes made to the invoices in Pabau will be immediately reflected in Xero. For example, if you update the details of an invoice in Pabau, such as adding a new line item or changing the payment terms, these changes will sync to Xero in real-time.
NOTE: We recommend setting it to the "Awaiting Payment" status.
Step 2: Check Xero
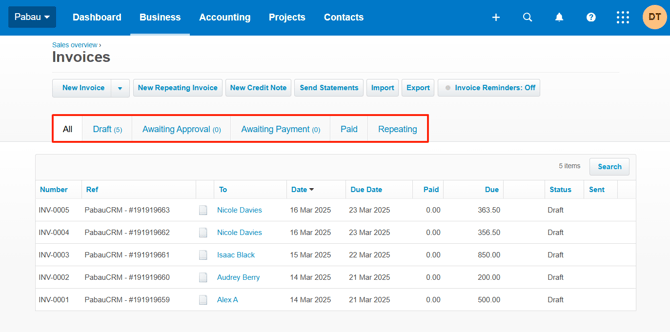
To double-check if everything is synced properly in Xero, log in to your Xero account using your login credentials. Under the Business Tab located at the top left side of the page, you will find the "Invoices" tab. All the invoice statuses will be shown at the top of the page.
#3 Xero Account Codes Not Showing in Pabau
Step 1: Log in to Xero
Start by logging in to your Xero account. Under the Accounting tab on the top left side of the page, you will find the Chart of Accounts option.

Step 2: Enable Account Code
Once you are on the Chart of Accounts page, you can view a list of codes to integrate into your Pabau account. These codes help categorize every transaction.

After locating the code you need, click on the name, and a pop-up window will appear where you need to tick the "Enable Payments to this Account" option. Click on the Save button to finalize the action.

Step 3: Check the Code in Pabau
After enabling the code in Xero, log in to Pabau to ensure everything reflects properly. Navigate to the Xero integration page to proceed. Under the invoices tab, you will find Default Xero account code line items. Any codes enabled from Xero will appear in the dropdown menu, where you can select which code you would like to set as default.

#4 How to Incorporate Service-Specific Account Codes into Pabau
If you want to map some specific services with different codes, you can do that by going to the Services tab on the Xero integration page and selecting the available codes that appear on the dropdown menu on the far right side of the service name.

NOTE: If you don't assign a code to a service, it will have the default account code you set on the Invoices tab.
#5 How to Check if an Invoice Has Been Synced to Xero in Pabau
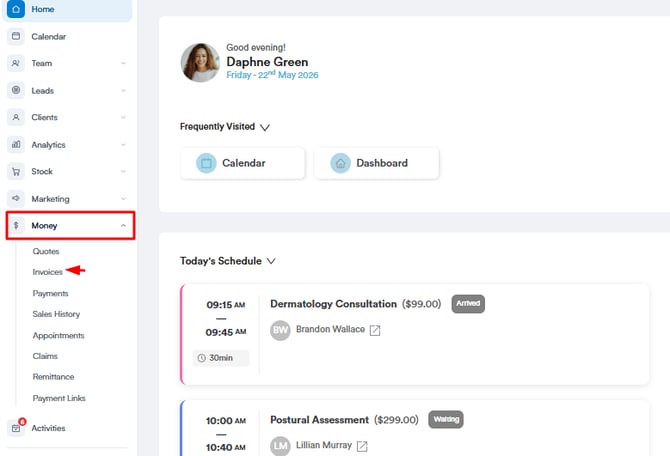
Step 1: Navigate to Money
Once logged into Pabau, expand the Money tab on the left sidebar menu and click Invoices to get started.
All invoices will be displayed on the Invoices page, and the Sync Xero column will be added automatically upon integration with Xero.

The icon on the Sync Xero column indicates the status of the invoice.
- Gray Icon- Syncing is in progress
- Red Icon- The Invoice is not synced
- Blue Icon- Invoice has been successfully synced
Step 2: Navigate to the Client Card
To view a client card, you can either click on the client name from the invoices listed on the invoices page or navigate to the search bar at the top of the page and type at least three letters of the client's name. Pabau will filter the results as you type.

Step 3: Switch to the Financials Tab
After selecting the client, you will find the "Financials" tab in the client card. This tab contains a record of all payments made by the client. Click on the invoice number to show all invoice details.

You can view the Sync Xero icon at the top left corner of the invoice. If you hover over it, it will display its syncing status.

Step 4: Verify Syncing Status
Under the Payments tab, ensure that the "Sync payments to XERO" option is enabled. If all settings are correct and invoices are not syncing, please escalate these cases to customer support for further investigation.

NOTE: After the invoice is raised, it may take 3-5 minutes for the update to complete and for the invoice to appear on the Xero platform.
#6 Detect Syncing Errors
Whenever a sync fails to establish or complete its operation towards your Xero organization, the Red icon will appear, and a message will display when you hover over it.

If you hover over the Icon that did not sync automatically, you can click to schedule it for manual sync.
You can also identify all sync errors on the Xero integration page in Pabau under the Sync Errors tab. This page shows all invoices that have not been automatically synced and which errors you received.

If there was an attempt to sync the invoice and for some reason it failed, these are the most commonly identified reasons and errors we've encountered so far:
XEROINV-01
It means that the invoice you tried to sync cannot be found in Pabau; the potential cause is that a staff member might have deleted it from the system in the meantime.
XEROINV-02
This means that the contact assigned to the invoice cannot be found in Pabau; the potential cause is that a staff member might have deleted it from the system in the meantime.
XEROIN-03
We could not match the requested invoice GUID with an invoice for your Xero organization. A potential cause is that the invoice in Xero might have been deleted/archived.
XEROINV-04
It means the data was malformed to your Xero organization; please report these cases to customer support for investigation.
XEROINV-05
It means your company has Payments Enabled to be synced to Xero, but there were no payments attached to the requested invoice for sync. The invoice will be synced without payment information.
XEROIN-06
It means there was an error while trying to sync the attached payment information for the invoice to your Xero organization; please report these cases to customer support for investigation.
XEROINV-07
This means the invoice was edited/updated on the Xero Platform when initially it was generated from Pabau; these cases will not be processed by the API as they are considered illegal updates that do not follow the regular update process from Pabau to your Xero organization.
XEROINV-08
It means the invoice was generated with "Authorized" status; this is the final form of the invoice on the Xero platform, and they are not eligible to receive any sort of update from external APIs and/or systems.
XEROINV-09
This means that the default account code of 200 was deleted/archived from your Xero organization; in order to proceed with correct syncing, select a valid payment account in your Xero Integration dashboard.
XEROINV-10
This error indicates that the invoice ID could not be matched on your Xero platform. The potential cause for this is that the invoice is no longer available on your Xero platform.
For these types of issues, please email support, and we will manually trigger a new insert of those invoices to be synced on your Xero platform.
XEROINV-11
This error code shows that there has been an error while processing payments for this invoice; please take a look at your payment settings on the Xero Integration Dashboard on Pabau and make sure you have all proper Account Codes set with valid accounts that can accept payments.
#7 Integration Errors
If you're having trouble connecting Xero to Pabau, listed below are the most common error messages and how to resolve them.
Error Code: 500
Message: unauthorized_client: Unknown client or client not enabled
This error means that the Client ID you entered in Pabau is either incorrect or the client has not been enabled in your Xero app.
How to fix it:
-
Log in to your Xero account and go to My Apps.
-
Find the app you created following the Xero integration setup guide.
-
Click on the app and switch to the "Configuration" tab.
-
Copy the Client ID.
-
In Pabau, go to Setup > App Marketplace> Connected Apps> Xero.
-
Click the Configure button.
-
Paste the Client ID into the form and click Generate Sync Link to proceed.
Error Code: 400
Message: The requested URL returned error: 400
This error typically appears when the Client Secret Key is incorrect or missing.
How to fix it:
-
Open the details page of your Xero app as described above.
-
If you didn’t save the original secret key, you can delete the old one or ignore it.
-
Click Generate another secret to create a new key.
-
Copy and securely save the new key immediately, as you won’t be able to view it again.
-
In Pabau, go to Setup > App Marketplace> Connected Apps> Xero.
-
Click the Configure button.
-
Paste the new Client Secret Key into the form and click Generate Sync Link.
Error Code: 500
Message: unauthorized_client : Invalid redirect_uri
This error means that the OAuth 2.0 redirect URI has not been set correctly in your Xero app.
How to fix it:
-
Go to the details page of your Xero app.
-
Locate the OAuth 2.0 redirect URI field.
-
Ensure the correct URL is entered without typos.
If your Pabau URL is app.pabau.com, use this URI:https://app.pabau.com/index.php?p=xero_integration
If your account uses a different domain, replace it accordingly. For example, if your URL is clinic.pabau.me, use:https://clinic.pabau.me/index.php?p=xero_integration
-
Click Save to update the application details.
-
Retry the integration process in Pabau.
If you encounter a warning message attached to your icon that is not listed in our list, please report it to our customer support staff.
For more guides, refer to related articles below, select additional guides, or use the search bar at the top of the page. These guides will help you get the most out of your Pabau account.
Additionally, to help you fully utilize and understand your Pabau account, we recommend exploring additional guides and resources offered at the Pabau Academy. It offers in-depth video tutorials and lessons, offering a holistic learning experience that can equip you with the essential skills for achieving success with Pabau.