
Table of Contents:
1. How to Enable and Access the Wallet
2. How to Manage Wallet Payout Settings
3. How to Review Your Wallet's Activity
4. How to Link Payments With Invoices in the Wallet
How to Enable and Access the Wallet
This article provides step-by-step instructions on enabling Wallet permission for designated users.
After setting up your Pabau Pay card terminals, managers and/or owners at your clinic must have access to the Wallet feature to manage payouts efficiently.
Step 1: Accessing Team Settings
To begin, log into your Pabau account and navigate to the Team feature located in the left sidebar menu. Then, select Team again to access the list of team members.

Step 2: Selecting User Profile
Identify the profile of the user who requires Wallet permission and click on their profile to access their settings.
Within the user's profile, navigate to the "Permissions" tab located on the left side of the screen. Here, you'll find various groups of permissions.
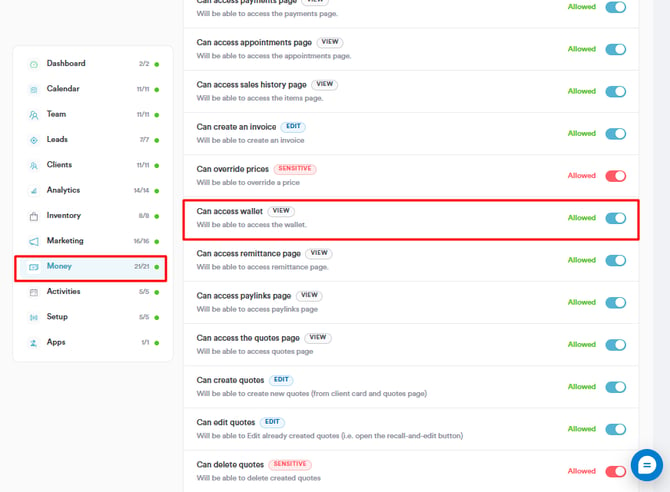
Step 3: Enabling Wallet Permission
Expand the "Money" group of permissions and locate the "Can access wallet" permission. Toggle this permission to the "on" position to enable access to the Wallet feature.
Step 5: Saving Changes
Once you've enabled the Wallet permission, ensure to save the changes by clicking on the "Save Changes" button located in the top right corner of the screen.
Step 6: Accessing the Wallet
To access the Wallet feature, users can click on the Wallet icon located in the top right corner of the screen, adjacent to their avatar.

By following these steps, you can successfully enable Wallet permission for designated users in your Pabau account, allowing them to manage payouts effectively.
How to Manage Wallet Payout Settings
In this article, we'll cover how you can manage the payout settings in your Wallet, allowing you to schedule your payouts to your liking.
Step 1: Accessing Wallet Payout Settings
To begin managing your Wallet payout settings, log into your Pabau account. Navigate to the top right corner of the screen and click on the Wallet icon, located next to your avatar.
NOTE: The Wallet icon will only be visible to staff members who have the Wallet permission enabled. If you need to enable this permission, please refer to this article for guidance.
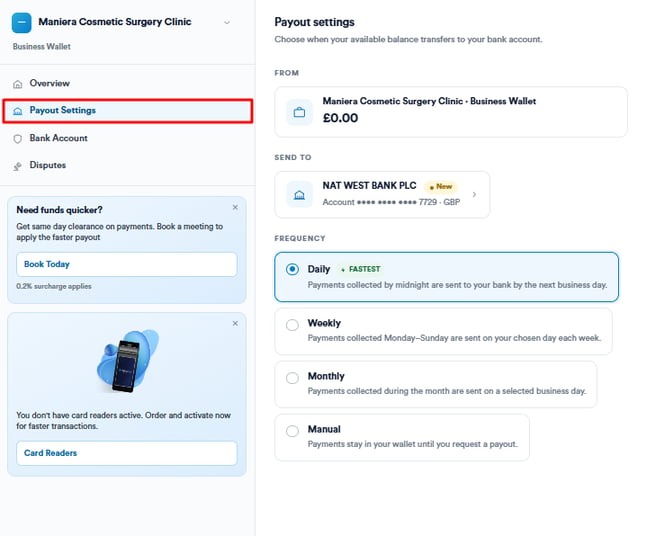
Step 2: Configuring Payout Settings
Once you've accessed the Wallet, click on "Payout Settings" located on the left side of the Wallet modal. In the "From" field, you'll find your available balance. The "Send to" section displays the bank account where the funds will be transferred.
Within the "Frequency" section, you can choose between different payment scheduling options: Daily, Weekly, Monthly, and Manual. Please note that you can only select one option at a time.
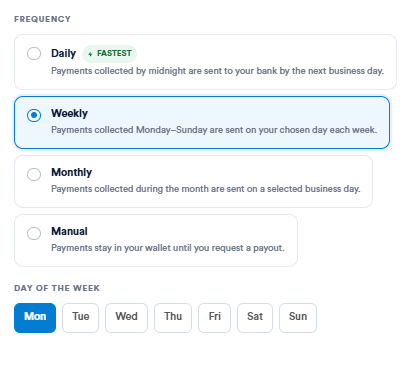
Step 3: Understanding Payment Scheduling
If you select "Daily," payments collected by midnight each day are sent to your bank account by the next business day.
For the "Weekly" or "Monthly" options, a dropdown menu will appear, allowing you to select, respectively, which weekday or month day you prefer for the funds to be transferred to your bank account.
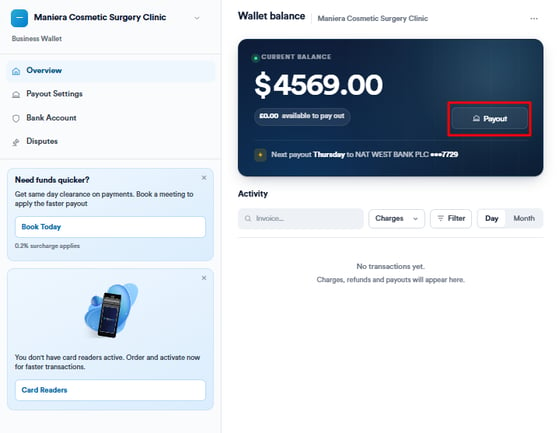
Regardless of your established payment schedule, you retain the flexibility to manually request a payment anytime. Simply click on the "Payout" button located in the top right corner of your Wallet.
Step 4: Saving Changes
After configuring your payout settings according to your preferences, ensure to click on "Save" to apply the changes.
By following these steps, you can effectively manage your Wallet payout settings in Pabau, ensuring seamless scheduling and transfer of funds to your designated bank account.
How to Review Your Wallet's Activity
In this article, we'll guide you through the steps to review the activity in your Wallet within your Pabau account.
Step 1: Access the Wallet
Log into your Pabau account using your credentials. Once logged in, click on the Wallet icon located in the top right corner, right next to your avatar.
NOTE: The Wallet icon will only be visible to staff members who have the Wallet permission enabled. If you need to enable this permission, please refer to this article for guidance.
Step 2: Navigate to the Activity Section
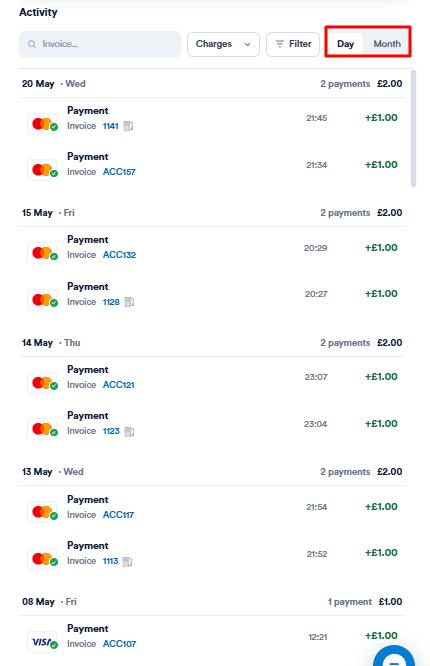
The Activity section is located below the Payout schedule within your Wallet dashboard. Here, you'll find a comprehensive log of all your financial transactions, including payments and payouts, grouped by either Day or Month.
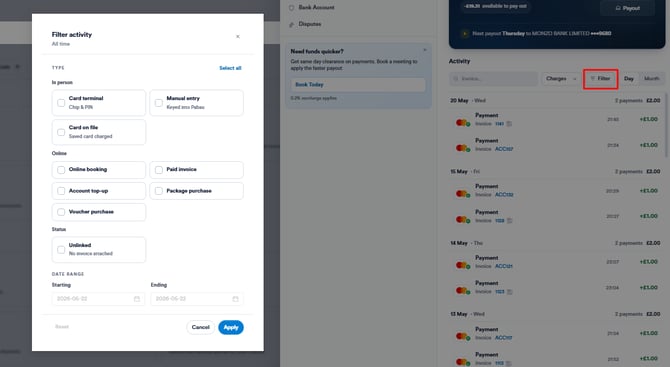
You can also filter payments and payouts by type by clicking on "Filter." Choose the transaction type you want to view and specify the desired timeframe, then click on "Apply".
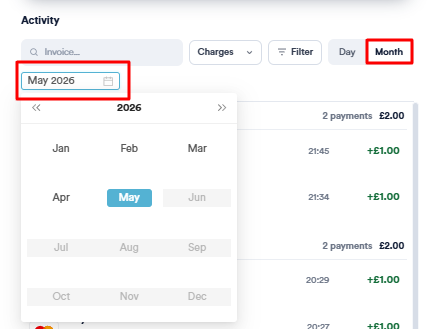
Step 3: Select a Specific Month and Year
In the Month tab within the Activity section, you can choose which month and year you want to review transactions for. Utilize the dropdown menu to select your desired timeframe.
Step 4: Understand Transaction Visual Indicators
Payment entries are highlighted in green, while payouts are represented in red and displayed in negative values. Next to the payment method icon for each payment, a green checkmark indicates a successful transaction, while a red X icon denotes a failed transaction.
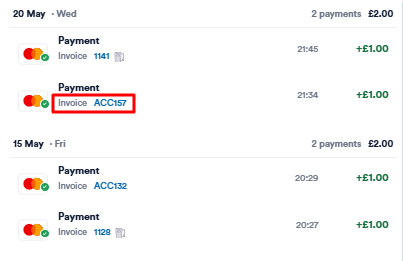
Step 5: Access Invoice Details
For each payment transaction listed, there is a corresponding invoice number displayed. Click on the invoice number to open and review the details of the associated invoice, providing quick access to essential information.
By following these steps, you can efficiently review and manage the activity in your Wallet within your Pabau account.
Step 1: Access Wallet
Start by logging into your Pabau account using your login credentials. Then, navigate to the top right corner of the screen next to your avatar and click the wallet icon to view your wallet activities.
NOTE: To access the Wallet feature in Pabau, make sure it's enabled. Check this article for setup details.
Step 2: Locate Unlinked Invoice
In cases when an invoice is not linked to a payment, you have the option to manually link it. The option will appear on the payment stating "+Link Invoice."

Step 3: Create an Unpaid Invoice
The "+Link Invoice" option appears when a payment is made online but doesn’t reflect on the client card, meaning no invoice is generated. In this case, you’ll need to create an unpaid invoice. To do this, navigate to the calendar located on the left sidebar menu.
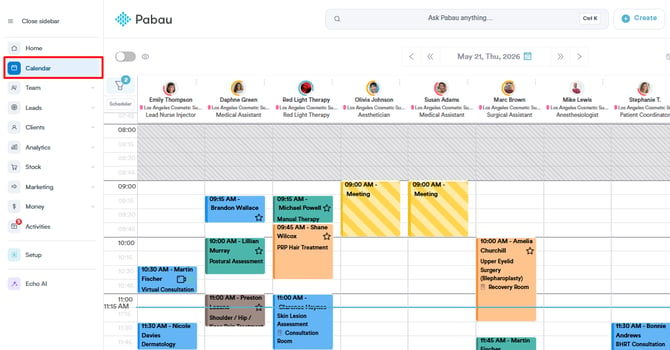
Locate the appointment for which you need to raise an invoice and click the checkout button to proceed.

On the checkout page, you can verify that all payment information is accurate and make any necessary changes. Then, click the "Continue" button located at the bottom right corner to proceed.

On the payment page, all available payment methods will be displayed. To raise the invoice as unpaid, click the "Save Unpaid" button located at the bottom right corner.

After raising an unpaid invoice for the client, the system will display the 'Checkout Completed' page. Here, you can view and copy the invoice number for your records.

Step 4: Link Invoice
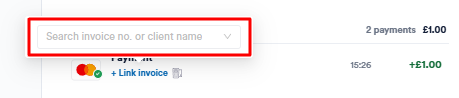
To link the invoice, click "+Link Invoice," and an input field will appear where you can enter the invoice number. Start your search with "#," and make sure to enter the invoice number of the unpaid invoice you previously created. Once you select the corresponding invoice, click "Confirm" to finalize.
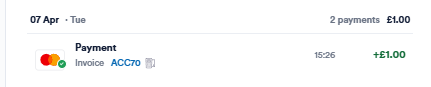
The invoice has now been successfully linked to the payment.
By following these steps, you can manually link invoices to payments in the Wallet feature.
For more guides, refer to related articles below, select additional guides, or use the search bar at the top of the page. These guides will help you get the most out of your Pabau account.
Additionally, to help you fully utilize and understand your Pabau account, we recommend exploring additional guides and resources offered at the Pabau Academy. It offers in-depth video tutorials and lessons, offering a holistic learning experience that can equip you with the essential skills for achieving success with Pabau.