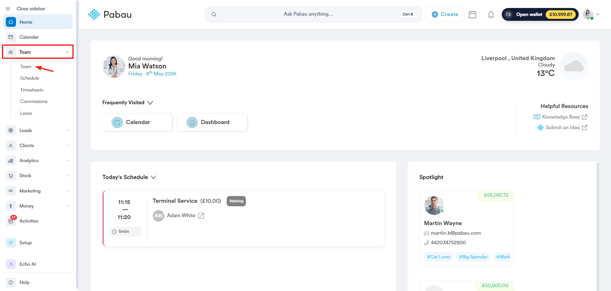
Step 1: Navigate to the Team feature
Log in to your Pabau account, and in the left sidebar menu, go to Team, then click on the "Team" button. Click on the user whose permissions you wish to edit.
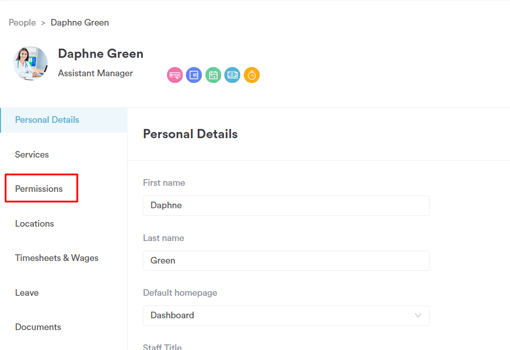
Step 2: Access User Permissions
Click on the user whose permissions you want to edit, then select "Permissions."
Step 3: Set up Permissions
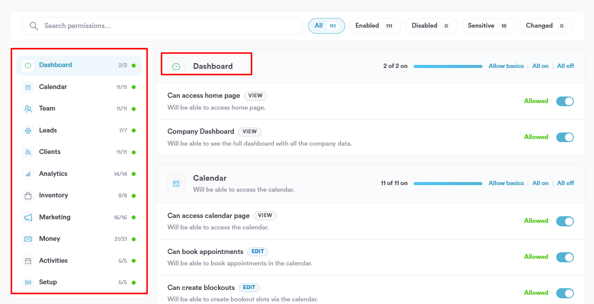
In the Permissions section, you will find a list of permission categories on the left, each corresponding to a main feature in Pabau, such as Dashboard, Calendar, Team, Leads, and more. Each category displays the number of active permissions out of the total available (e.g. 11/11).
Click on a category to view and manage its individual permissions. Each permission includes a label indicating the type of action — View or Edit — along with a short description of what it allows within the system.
To manage permissions within a category, you can use the following options:
- Allow basics — enables only the essential permissions for that category.
- All on — enables all permissions within the category at once.
- All off — disables all permissions within the category at once.
To enable or disable a specific permission individually, toggle the switch on the right. When enabled, the toggle will appear blue and display Allowed.
You can also use the search bar at the top to quickly find a specific permission by name. Use the filter buttons — All, Enabled, Disabled, Sensitive, and Changed — to narrow down the permissions list based on their current status.
Step 4: Assign a Role
For more details on setting up roles, please read this article.
.png?width=590&height=264&name=Screenshot%20(1).png)
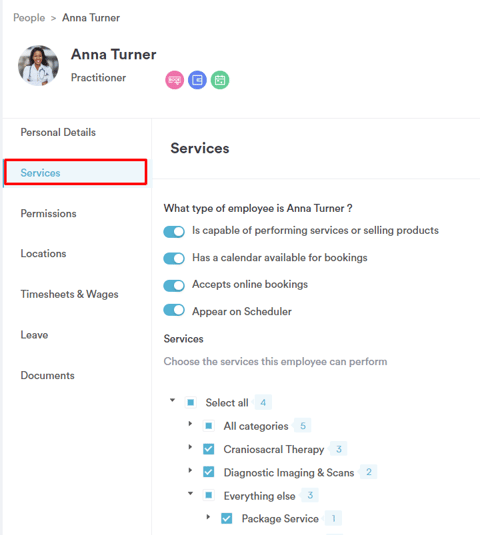
Step 5: Switch to the Services Tab
Additional permissions for the staff member can be found under the Services tab. To enable a permission, simply toggle the switch. A blue toggle means the permission is active for the staff member, while a grey toggle indicates it’s disabled.
On the "What type of employee is ____?" section you have the following settings:
- Is capable of performing services or selling products
Enable this if the staff member will be actively performing treatments or selling products. This allows their name to be assigned to services and product sales in the system.
- Has a calendar available for bookings
This gives the staff member their own calendar where appointments can be booked. If disabled, they won’t appear on the calendar or be available for scheduling.
- Accepts online bookings
Toggle this on if clients should be able to book appointments with this staff member through your online booking portal. If turned off, they’ll only be bookable internally by your team. - Appear on Scheduler
This setting controls whether the staff member appears on the main scheduler where you create and manage shifts. Turn it off if the team member doesn’t need to be included in the shift scheduling view.
On the "Services" section you can select which services the employee can perform (if they perform services).
Step 6: Save Changes
Once adjustments are made, click on "Save Changes" in the top right corner to apply and save the modified permissions.
By following these steps, you can easily customize and manage user permissions in Pabau, ensuring your team has the appropriate access to the features they need.
NOTE: You can also learn about this topic by watching a lesson on Pabau Academy.
In addition, we suggest reading our Team article for a more in-depth exploration of this topic.
For more guides, refer to related articles below, select additional guides, or use the search bar at the top of the page. These guides will help you get the most out of your Pabau account.
Additionally, to help you fully utilize and understand your Pabau account, we recommend exploring additional guides and resources offered at the Pabau Academy. It offers in-depth video tutorials and lessons, offering a holistic learning experience that can equip you with the essential skills for achieving success with Pabau.