Prescriptions
In this article, we explore the details of managing prescriptions in Pabau. We cover various aspects such as how to create a prescription, share it with clients, repeat prescriptions, and more.
Table of Contents:
1. How to Create a Prescription
1.1. How to Edit a Prescription
1.2. How to Delete a Prescription
1.3. How to Repeat a Prescription
2. How to Print a Prescription
3. How to Use the Pabau AI Tool for Prescriptions
4. How to Submit a Prescription to CloudRx
5. Managing Centralized Prescriptions
How to Create a Prescription
Step 1: Insert Prescription Info for Prescribers
Prescription information should be added to the profiles of staff members who will be creating prescriptions.
This information includes credentials that enable your staff members to create prescriptions, such as GMC numbers, DEA numbers, or NPI numbers.
To add prescription info to the relevant staff members, follow the steps provided in this article.
Step 2: Navigate to the Client Card
Navigate to the search bar at the top of the page and proceed to type at least three letters of the client's name for whom you wish to create a prescription.
Step 3: Create a Prescription
Once you are viewing the client's profile, click on the Create button, represented by a blue plus sign at the bottom right corner of the page, to reveal the option to create a prescription.

Step 4: Select a Template
Select the form you want to use from your existing templates. If you haven't created a prescription form template yet, read our article on how to create a prescription form.

Step 5: Complete the Prescription form
After selecting the template, you will be prompted to complete the fields in the form.
Initially, select the appointment related to the prescription and choose the prescriber.

Proceed to select the drug that you need to prescribe by searching from the drugs that you have created previously.

After selecting the drug, you will need to add the dosage. There are two ways to go about this.
The first option is to click on the cogwheel icon to configure the instructions.
This action will open a pop-up window where you can manually build the instructions.

Alternatively, clicking anywhere in the field will reveal recommended instructions on the right side, which you can click to insert.

After selecting a drug, you can preview information from BNF and medicines.org.uk about the drug on the right side of the menu.

Enter the Prescriber Signature after completing all other fields.
Step 6: Save Form
Make sure to select "Save Form" so the Prescription can be saved in the client card.

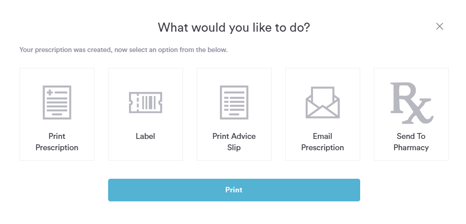
After clicking "Save Form," a prompt appears giving you several options: print the prescription, print a label, print an advice slip, email it, or send it directly to the pharmacy. This allows you to complete all necessary actions quickly from one place.
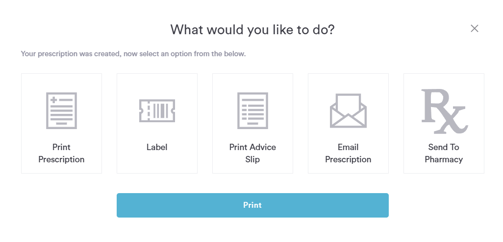
You will be able to locate the created prescription by navigating to Chart/EMR and then clicking on the Prescriptions tab in the specific client card where you can review the details of the prescription, make any necessary edits, or print it for your records.

On the Medications tab, you can view all the medications that were prescribed to the client.

By following these steps, you will be able to create prescriptions in Pabau efficiently, ensuring accurate records and effective patient care management.
How to Edit a Prescription
Step 1: Navigate to the Client Card
Start by logging in to your Pabau account using your login credentials. Then navigate to the search bar at the top of the page and proceed to type at least three letters of the client's name. Pabau will filter the results as you type.
Step 2: Switch to the Prescriptions Tab
Under the "Chart/EMR" section, locate and click on the "Prescriptions" tab. Here, you will find a list of all prescriptions associated with the client.

Step 3: Select the Prescription to Edit
From the list of prescriptions, select the prescription you'd like to edit. Click on the three dots at the far right side of the prescription and click on the "Edit" option next to the prescription.
Step 4: Edit the Prescription
Once you've selected the prescription to edit, you can make the necessary changes. The process is much the same as when creating a prescription, allowing you to adjust dosage, instructions, and other details as needed.

You can also use the AI tool to generate a summary of any risks or benefits this drug might pose to the client.

Step 5: Save Form
After making the desired changes, click on the "Save Form" button to save your edits.

Step 6: Print the Prescription (Optional)
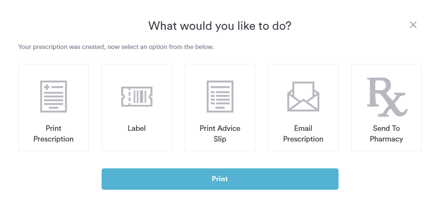
In the prompt that appears after saving the form, you can select if you'd like to print the prescription. If selected, the prescription will be opened in another tab in PDF format. Proceed as you normally would to print the prescription. If you do not wish to print it, simply close the prompt.
By following these steps, you can easily edit prescriptions in Pabau, ensuring that the information is up-to-date and accurate for your clients.
How to Delete a Prescription
Step 1: Navigate to the Client Card
Start by logging in to your Pabau account using your login credentials. Then navigate to the search bar at the top of the page and proceed to type at least three letters of the client's name. Pabau will filter the results as you type.
Step 2: Switch to the Prescriptions Tab
Click on the "Prescriptions" tab under "Chart/EMR" to view the client's prescriptions.
Step 3: Select the Prescription to Delete
Select the prescription you want to delete, click on the three dots on the far right side of the prescription, and select "Delete".
Step 4: Delete the Prescription
After selecting the "Delete" option, you will receive a prompt asking if you're sure you want to permanently delete the prescription. Select "Yes" if you're sure, as this action cannot be undone.
By following these steps, you can easily delete a prescription in Pabau, ensuring that your records are up-to-date and accurate.
How to Repeat a Prescription
Step 1: Navigate to the Client Card
Start by logging in to your Pabau account using your login credentials. Then navigate to the search bar at the top of the page and proceed to type at least three letters of the client's name. Pabau will filter the results as you type.
Step 2: Switch to the Prescriptions Tab
Click on the "Prescriptions" tab under the "Chart/EMR" section to access the list of prescriptions associated with the client. 
Step 3: Select the Prescription to Repeat
Choose the prescription you want to repeat from the list, click on the three dots on the right side of the prescription, and select "Repeat".

Step 4: Repeat the Prescription
After clicking on the "Repeat" option, the successful repetition of the prescription will be indicated by a symbol on the right side of the prescription, located next to the three-dot button that highlights "Repeat".
By following these steps, you can easily repeat a prescription in Pabau.
How to Print a Prescription
Step 1: Navigate to the Client Card
Start by logging in to your Pabau account using your login credentials. Then navigate to the search bar at the top of the page and proceed to type at least three letters of the client's name. Pabau will filter the results as you type.
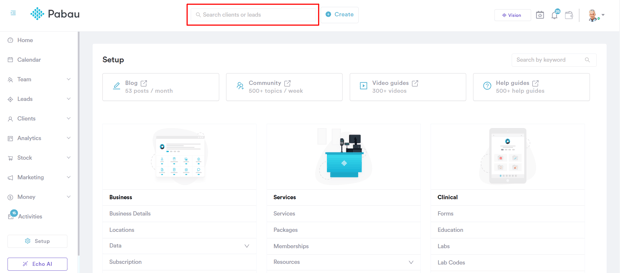
Step 2: Switch to the Prescriptions Tab
Under the "Chart/EMR" section, locate and click on the "Prescriptions" tab. Here, you will find a list of all prescriptions associated with the client.
Step 3: Select the Prescription to Print
From the list of prescriptions, select the one you'd like to print. The "Print" button will appear when you click on it.

Step 4: Print the Prescription
You will receive a prompt when you click on the "Print" option at the top right side of the prescription.
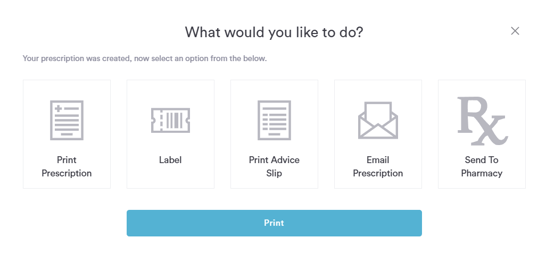
In the prompt, select whether you'd like to print the prescription. It will be opened in another tab in PDF format—proceed as you normally would.
By following these steps, you can easily print a prescription in Pabau. This allows you to provide a physical copy to your clients or keep a record of your files.
How to Use the Pabau AI Tool for Prescriptions
The primary function of the Pabau AI in prescriptions is to offer recommended medications based on allergies and client problems, assisting the physician in creating a successful treatment plan.
In the case of prescriptions, the AI tool helps to combine several types of information:
- Suggestions for drugs suited to treat the client's problems, as recorded in their client card.
- Drugs that should be avoided based on the client's listed allergies.
- Drugs that should be avoided based on alerts present on the client card.
- Possible issues based on previous drugs prescribed for that client.
We can utilize the AI tool while creating a prescription. After selecting a drug, we can find the "Generate" option on the right side of the screen.

When you click on "Generate," you will be provided with important details about the drug, including its potential effects on the client, possible reactions, and benefits.
When viewing drug side effects, the system compares them with the client’s diagnoses and allergies.
-
Any matches are highlighted in red.
-
Hovering shows the reason (e.g., “Diagnosis: Rash” or “Allergy: Fluoxetine”).
-
If there are no relevant issues, nothing is highlighted.

When multiple drugs are prescribed, the system automatically uses AI to check if they can be taken together. It works with both brand and generic names and gives a simple “safe / not safe” result with a short explanation.
Using the Pabau AI tool for prescriptions can enhance the efficiency of your prescription process. By generating detailed information about drugs tailored to each client's specific needs, you can ensure that prescriptions are personalized.
How to Submit a Prescription to CloudRx
Please note that this process is specifically designed for UK clinics. If you are a US clinic seeking guidance on sending prescriptions to pharmacies, please take a look at this article.
If you need to become more familiar with creating prescriptions, please read our article on how to create a prescription. Additionally, make sure you've enabled your CloudRx integration.
Step 1: Navigate to the Client Card
Start by logging in to your Pabau account using your login credentials. Then, navigate to the search bar at the top of the page and type at least three letters of the client's name. Pabau will filter the results as you type.
Step 2: Create a Prescription
Once you are viewing the client's profile, click on the Create button, represented as a blue plus sign at the bottom right corner of the page, to reveal the option to create a prescription.

Step 3: Select a Template
Select the form you want to use from your existing templates. If you still need to create a prescription form template, read our article on how to create a prescription form.
Step 4: Complete the Prescription Form
After selecting the template, you will be prompted to complete the fields in the form. When selecting the drug, click on the filter on the right side of the search bar. 
Select a drug available via CloudRx. They'll feature an icon indicator and a stock quantity.

After selecting the drug, you will need to add the dosage. There are two ways to go about this.
The first option is to click on the cogwheel icon to configure the instructions.
This action will open a pop-up window where you can manually build the instructions.
Alternatively, clicking anywhere in the field will reveal recommended instructions on the right side, which you can click to insert.
On the right side of the menu, after selecting a drug, you can preview information about it from BNF and medicines.org.uk.
Enter the Prescriber Signature after completing all other fields.
Step 7: Save Form
Select "Save Form" so the prescription can be saved to the client card.
 After clicking "Save Form," a prompt will appear asking if you want to print the prescription. If you choose to print, it will open in another tab in PDF format. From this same prompt, you can also send the prescription directly to the pharmacy, and you have other options as well, such as printing a label, printing an advice slip, or emailing the prescription. If you don’t want to take any action, simply close the prompt.
To verify the status of the prescription, navigate to the EMR section within the client's profile and and click the expand button to open the prescription.

Here, you will find the CloudRx button located at the top right of the prescription details. If the prescription has been successfully submitted, a green checkmark will appear next to the button, confirming that the submission was successful.
By following these steps, you will be able to submit a prescription to CloudRx efficiently.
Managing Centralized Prescriptions
The Prescription Page in Pabau helps you keep track of every individual medication prescribed, across all prescriptions in your clinic. This is especially useful for auditing, reviewing medication history, and ensuring every detail is accurate before sending prescriptions to pharmacies.
NOTE: For detailed information on the Prescription Report, refer to this article.
Step 1: Navigate to the Prescription Page
Start by logging into your Pabau account using your login credentials. Then, navigate to your avatar located at the top right corner of the screen and click to open the available options.
The Prescription tab will be displayed.

Step 2: Manage Prescriptions
On the 'Prescription' page, you can find and manage every prescription you have created. Each entry in the list provides key information about the prescriptions you have written.
NOTE: This report is drug-based, not prescription-based. That means each row represents a single medication, even if multiple drugs were prescribed under the same prescription.
You can identify each prescription by its unique Prescription number, which serves as a reference for tracking. The Date column shows when each prescription was originally created.
A key feature of this page is the Status icon. This icon provides an "at-a-glance" validity check, telling you whether a prescription is complete and ready to be sent to a pharmacy.

- The icon will appear green if all necessary checks are passed. This includes ensuring that the patient's details are complete, the dosage and quantity are set, all required prescription fields are filled out, and the prescriber is authorized.
- If any of this information is missing or incomplete, the icon will appear grey or red, signaling that the prescription needs your attention before it can be finalized and sent. If you hover over the icon, it will show what is missing.
For each entry, the Client column displays the name of the patient who received the prescription.
The specific details about the medication itself are also clearly laid out. You'll see the Medication Name, the prescribed Dosage, and the Quantity of units included in the prescription. Additionally, the Description column contains any important notes or specific instructions that were included for the for pharmacy.
Step 3: Send Prescription to Pharmacy
Before a prescription can be sent to a pharmacy, it must pass a validity check. To initiate this check, first click the 'Approve' button. If the prescription is valid, the 'Send' button will become active, allowing you to click it.

After clicking the 'Send' button, a window will appear where you can finalize the prescription details. Before sending, you will need to:
- Select the Pharmacy: Choose the destination pharmacy from your list of integrated options.
- Select the Drugs: If the prescription includes more than one medication, you can select which specific drugs you want to send at this time.
- Add Notes (Optional): You can also add any additional instructions or notes for the pharmacy in the provided field.
Once you have configured these options, click the 'Save' button in the top right corner to finalize and transmit the prescription to the selected pharmacy.

By following these steps, you can confidently prepare, approve, and send prescriptions directly to pharmacies through the Centralized Prescriptions feature in Pabau.
For more guides, refer to related articles below, select additional guides, or use the search bar at the top of the page. These guides will help you get the most out of your Pabau account.
Additionally, to help you fully utilize and understand your Pabau account, we recommend exploring additional guides and resources offered at the Pabau Academy. It offers in-depth video tutorials and lessons, offering a holistic learning experience that can equip you with the essential skills for achieving success with Pabau.


