Table of Contents:
1. Understanding Client Relationship Types
2.How to Add a Client Relationship
3.How to Remove a Client Relationship
4.How to Manage Sharing in Client Relationships
5.How to Create Third Parties
Understanding Client Relationship Types
The Relationships tab allows you to link clients to different types of contacts, such as family members, general practitioners (GPs), insurers, or other organizations. Each relationship type serves a specific purpose and can affect how records are shared and managed. Understanding these types will help you set up relationships accurately and use them effectively.
Relationship Types:
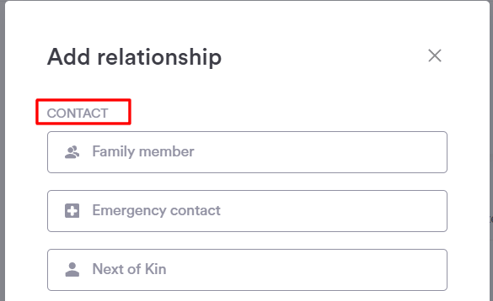
Contact
-
Family Member - A relative of the client, such as a parent, sibling, or guardian, who may need access to records or updates regarding the client.
-
Emergency Contact - A person to reach in urgent situations. Staff can contact them as needed, but they do not automatically have access to client records.
-
Next of Kin - The client’s closest living relative, often designated for official or legal purposes. Like emergency contacts, they are notified in important situations but do not have default access to records.
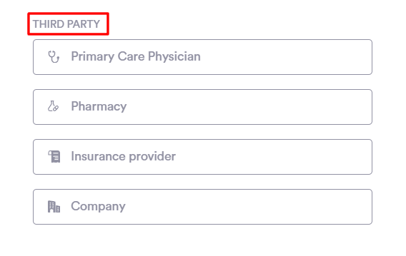
Third Party
-
Primary Care Physician (GP) – The client’s doctor, linked to allow secure sharing of medical records or treatment updates when necessary.
-
Pharmacy – The client’s pharmacy, which can receive prescription or medication-related information.
-
Insurance Provider – The client’s insurer, connected to facilitate sharing of treatment records or invoices for claims. Note: Insurance management is handled separately in the Insurance tab.
-
Company / Organization – Any other relevant organization involved in the client’s care, such as schools or legal representatives. Access can be adjusted depending on what the organization needs to see.
By understanding each relationship type, you can link clients to the right contacts and manage access appropriately. This ensures secure sharing of information and helps maintain accurate client records.
How to Add a Client Relationship
Step 1: Navigate to the Client Card
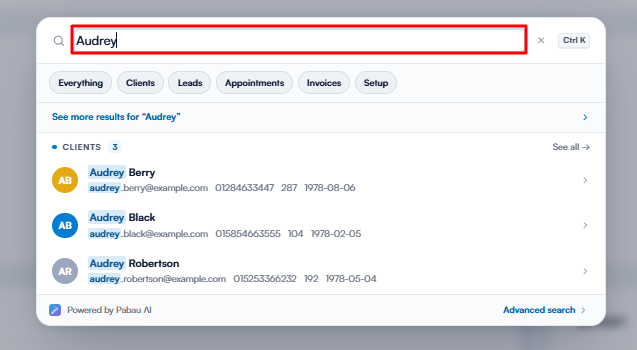
Log in to your Pabau account and navigate to the client card of the client you want to add a relationship to by using the search bar at the top of the screen.
Step 2: Navigate to the Relationships Tab
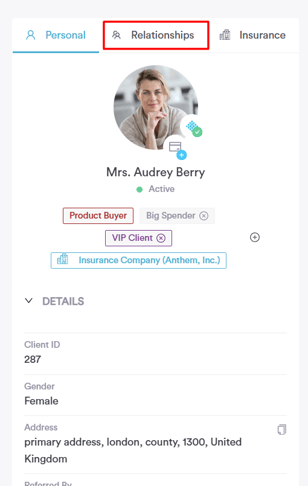
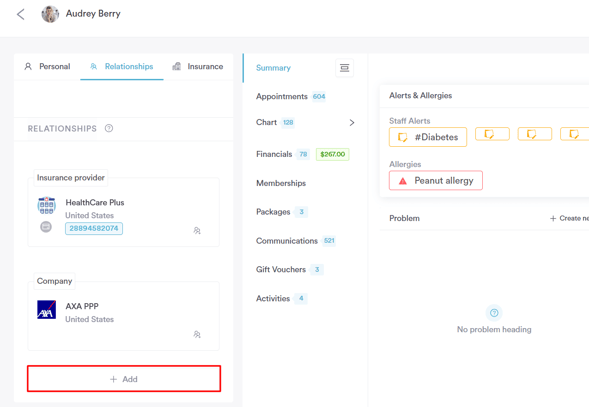
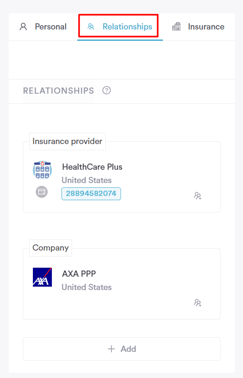
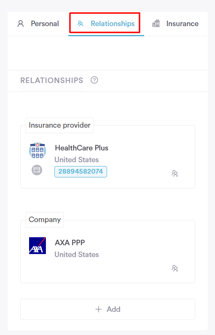
At the top of the client card, click on the ''Relationships'' tab next to Personal to access and manage the client's linked contacts and connections.
Step 3: Add Relationship
Click on the "Add" button to initiate the process of adding a relationship.
In the "Add Relationship" menu, select the type of relationship you want to add. Based on your selection, the steps will vary from this point onward.
Relationship-Specific Steps:
Family Member:
Type in the name of the contact and their relationship, then click "Add" to finalize.
Emergency Contact and Next of Kin:
Primary Care Physician:
Pharmacy:
This option allows you to add a pharmacy related to this particular client. Search by name or postcode, then click on the pharmacy, or create a new pharmacy manually by clicking "Add Pharmacy."
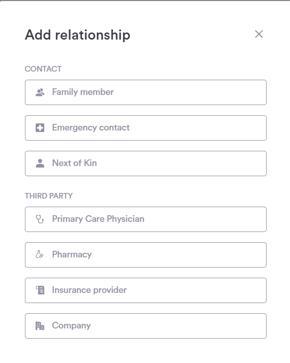
Insurance Provider:
Then, you'll also need to add your client's membership number. Complete the set-up by adding the desired pricing list.
Company:
This option allows you to add a company related to this particular client. Search by name or postcode, click on the company, and click "Set as a company" to confirm. Additionally, you can create a new one on the spot.
NOTE: We suggest reading our Clients article for a more in-depth exploration of this topic.
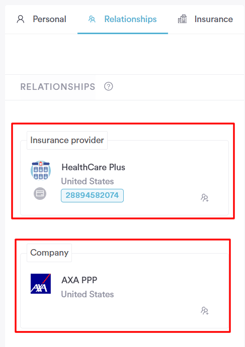
Once you’ve added the contact or insurer, the relationship will be saved directly in the client’s profile under the ''Relationships'' section. From here, you can quickly view, edit, or remove the link whenever needed, keeping all related contacts organized and easily accessible.
By following these steps, you can quickly add contacts or insurers to a client’s profile, keeping all relationships organized and easy to access.
How to Remove a Client Relationship
Step 1: Navigate to the Client Card
Log in to your Pabau account and navigate to the client card of the client you want to add a relationship to by using the search bar at the top of the screen.
Step 2: Navigate to the Relationships Tab
At the top of the client card, click on the ''Relationships'' tab next to Personal to access and manage the client's linked contacts and connections.
Step 3: Remove the Relationship
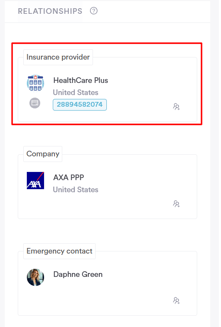
Once you open the ''Relationships tab'', you’ll see all contacts linked to the client. To remove a relationship, hover over the contact and click the X button.
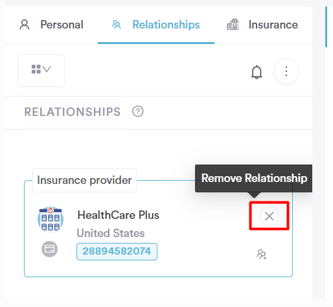
A confirmation prompt will appear - click ''Yes'' to confirm the removal.
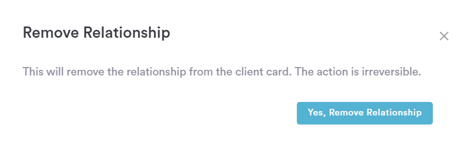
The relationship is now successfully removed from the client card.
By following these steps, you can successfully remove a client’s linked contact, keeping their Relationships section accurate and up to date.
How to Manage Sharing in Client Relationships
You can control whether a linked contact, such as a family member, GP, or insurer, can access a client’s records. Using the sharing options, you can either allow sharing or restrict access entirely, giving you full control over who sees the information.
Step 1: Navigate to the Client Card
Log in to your Pabau account and navigate to the client card of the client you want to add a relationship to by using the search bar at the top of the screen.
Step 2: Navigate to the Relationships Tab
At the top of the client card, click on the ''Relationships'' tab next to Personal to access and manage the client's linked contacts and connections.
Step 3: Select the contact
After you open the Relationships tab, locate the contact whose sharing permissions you want to manage.
Step 4: Choose a sharing option
Click the sharing icon next to the contact or organization to open the sharing options.
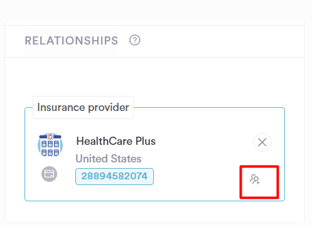
Then select one of the following:
- Restrict Sharing: Prevent this contact from accessing any records.
- Sharing: Allow this contact to access and receive shared records.

The changes will apply immediately, and the contact’s sharing status will update accordingly.
By following these steps, you can easily manage sharing permissions for any linked contact, ensuring that client records are only shared with the right people.
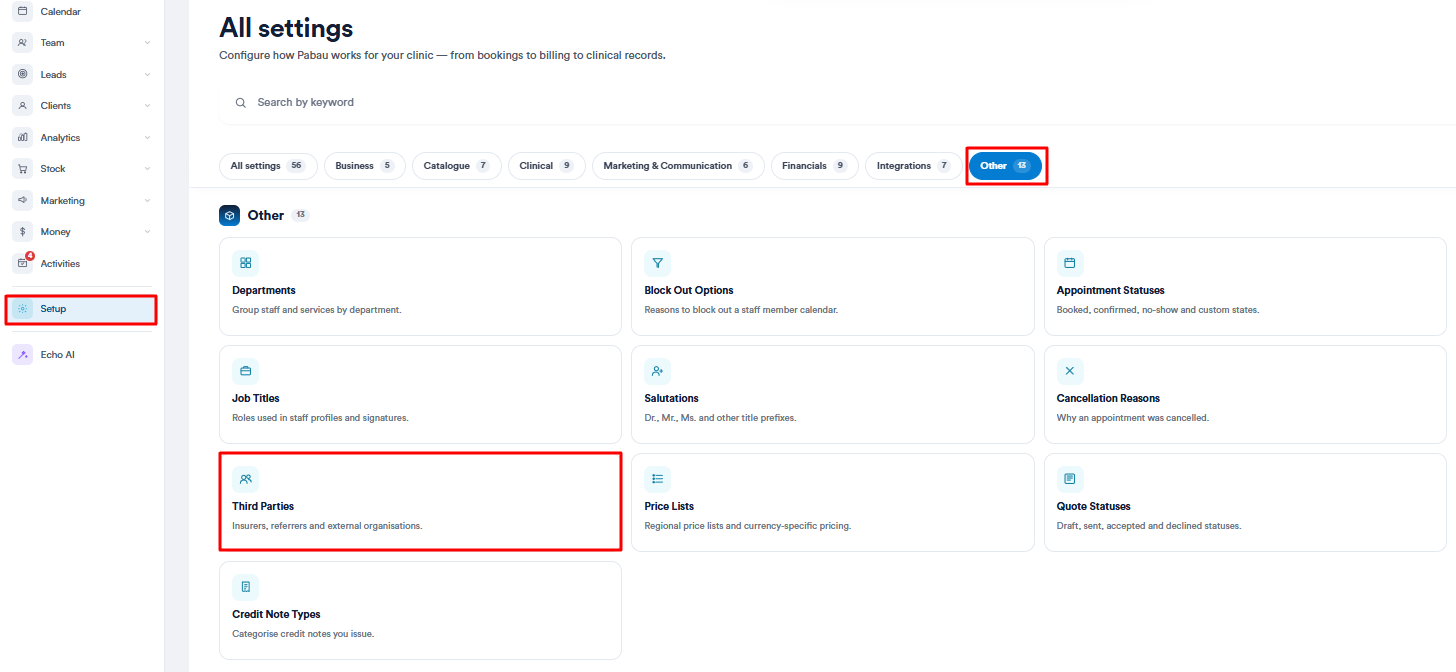
Step 1: Navigate to Third Parties
Start by logging into your Pabau account. Click on Setup in the left sidebar menu, then under the "Other," section select ''Third Parties''.
Step 2: Create a Third Party
Click the ''Create Third Party'' button in the top-right corner.
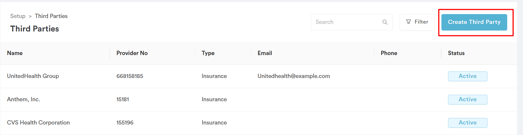
In the window that appears, select the type of third party you want to create - Company, Insurance Provider, or Pharmacy. Then, enter the required information such as the name, provider number (if applicable), contact details, and address.
Once completed, click ''Create'' in the top-right corner to save the third party.

Step 4: Link Third Parties with Clients
To associate a third party — like a pharmacy, insurer, or employer with a client:
-
Go to the client’s Client Card.
-
Hover over the client's avatar and click the arrow that appears.
-
Choose the type of relationship you'd like to add.
-
Search for the third party and click Add to link it to the client.
NOTE: The button may say "Link" or another term based on the type of third party.
Linking third parties to clients helps you manage workflows more efficiently. For example:
-
Send prescriptions directly to the client's preferred pharmacy.
-
Bill an insurance provider or employer on behalf of the client.
By following these steps, you can successfully create and manage third parties in your Pabau account.
Now that you know how to manage client relationships, you can keep profiles organized and ensure the right contacts have access when needed.
For more guides, refer to related articles below, select additional guides, or use the search bar at the top of the page. These guides will help you get the most out of your Pabau account.
Additionally, to help you fully utilize and understand your Pabau account, we recommend exploring additional guides and resources offered at the Pabau Academy. It offers in-depth video tutorials and lessons, offering a holistic learning experience that can equip you with the essential skills for achieving success with Pabau.