Table of Contents:
1. How to Create a Loyalty Campaign
2. How to Edit a Loyalty Campaign
3. How to Delete a Loyalty Campaign
4. How to Add Points Manually
5. How to Use Loyalty Points to Pay for an Appointment
How to Create a Loyalty Campaign
Loyalty campaigns serve as powerful tools to enhance customer loyalty and drive revenue growth for businesses. These campaigns incentivize customers to engage in specific actions by rewarding them with loyalty points, which can later be redeemed to cover appointment costs.
NOTE: You can also learn about this topic by watching a lesson on Pabau Academy.
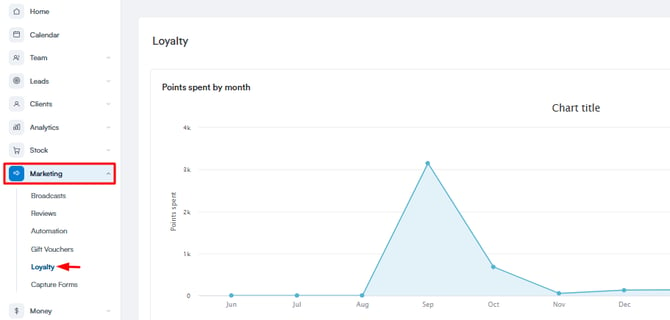
Step 1: Accessing the Loyalty Feature
Log into your Pabau account and navigate to the Marketing section in the left sidebar menu, then select "Loyalty."
If the Loyalty feature is not visible, ensure that the necessary permissions are enabled. To do this, go to the "Team" section, click on your profile, then navigate to the "Permissions" tab on the left. Enable all relevant permissions related to Loyalty under the Marketing category.

Step 2: Customizing Loyalty Settings
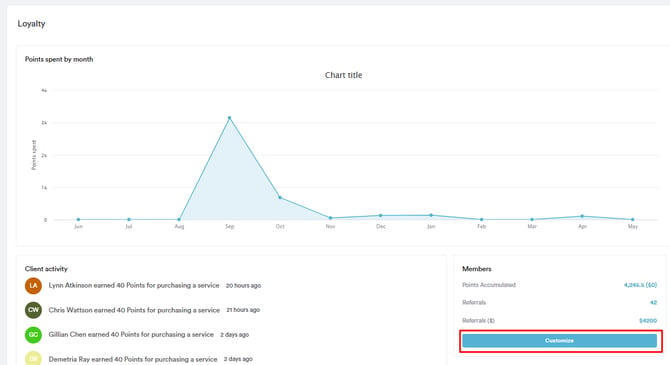
Upon accessing the Loyalty page, you'll find a graph displaying the monthly expenditure of loyalty points and a client activity section showcasing the latest points earned by individual clients.
In the "Members" section, click on "Customize" to define the value of one loyalty point. Click on "Save" to confirm the customization.
Step 3: Creating a Loyalty Campaign
Navigate to the "Points" section to view existing loyalty campaigns. To create a new campaign, click on "Add New Campaign", then choose Loyalty.
NOTE: Referral campaigns will be introduced soon.

Select from two reward categories:
- User-generated content
- Sales
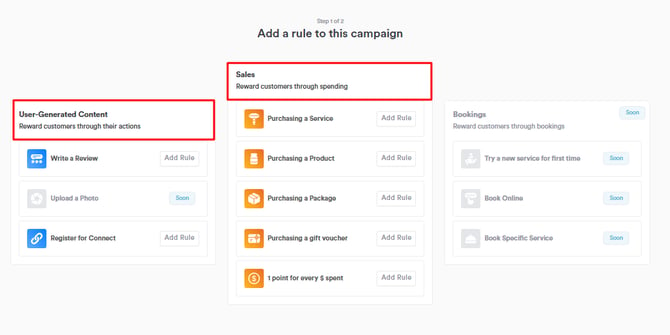
NOTE: Booking-related rewards will be introduced soon.
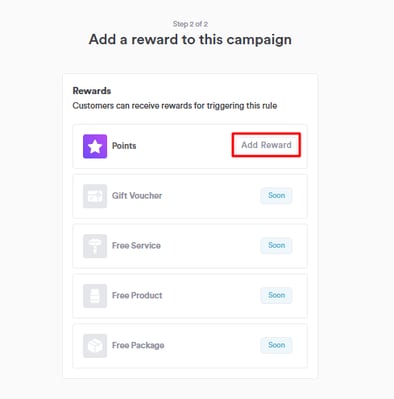
Select the action you wish to incentivize and click on "Add Rule". Then, click on "Add Reward" to specify the points clients will earn for that action.
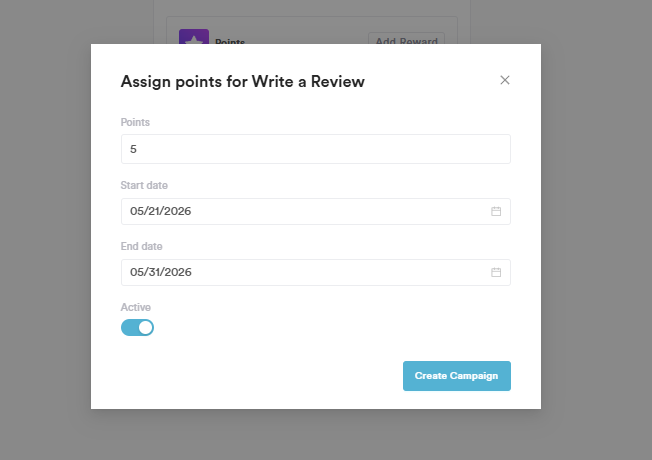
Choose the campaign duration and ensure it's set to "Active" before clicking "Create Campaign".
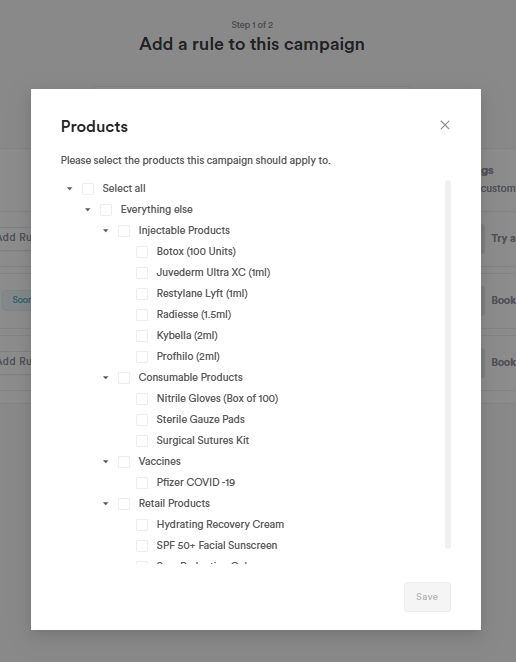
For rewards related to purchasing a service, product, or package, after adding the rule, specify the applicable items. You can choose to apply the campaign to all services by selecting the "Select All" option or opt for specific categories by checking the corresponding boxes. Click "Save" to proceed.
Next, click "Add Reward" again to set the points clients will receive for the action, alongside the campaign duration. Ensure the campaign remains active before clicking "Create Campaign" to finalize.
Once activated, clients will automatically accrue loyalty points upon completing the campaign action. These points will be added to their client card and can be used towards future appointment payments.
NOTE: We suggest reading our Loyalty article for a more in-depth exploration of this topic.
How to Edit a Loyalty Campaign
Step 1: Accessing the Loyalty Feature
To begin editing your loyalty campaign, log into your Pabau account and navigate to the Marketing section in the left sidebar menu. From there, click on "Loyalty."
Step 2: Viewing All Points
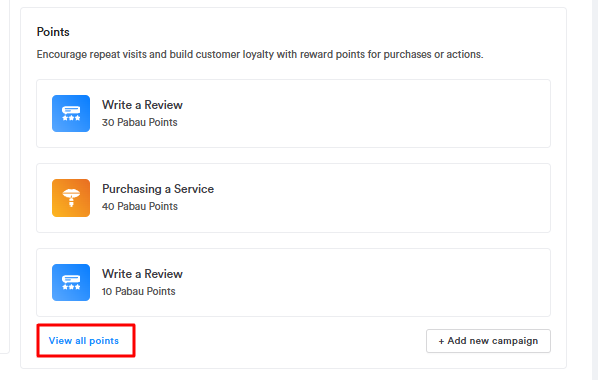
In the Points section located in the bottom right corner of the Loyalty page, click on "View all points."
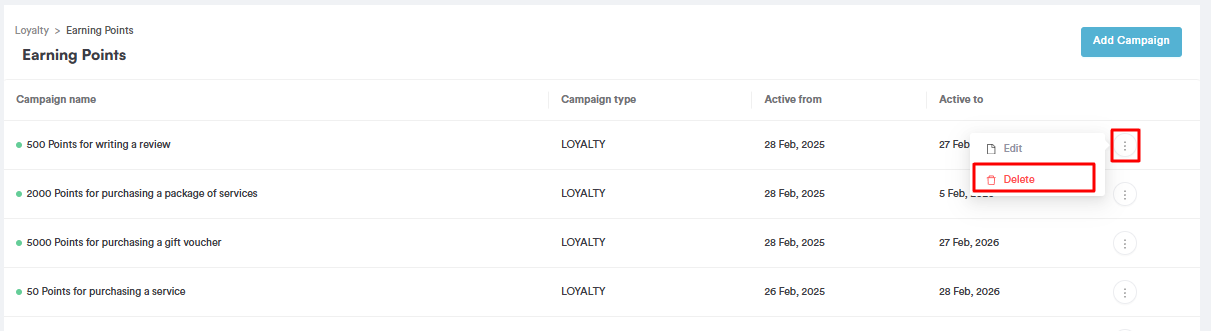
Step 3: Editing the Loyalty Campaign
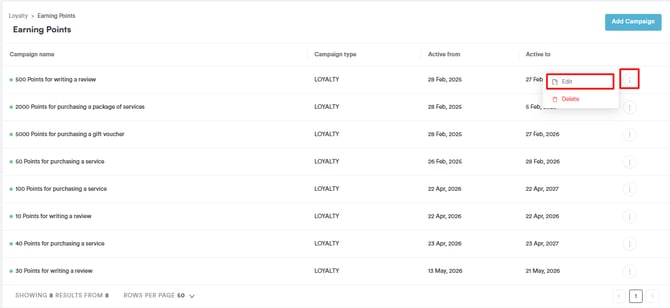
Once you've accessed the list of all campaigns, locate the specific campaign you wish to edit. Next, click on the three dots located on the far right of the campaign entry. From the dropdown menu that appears, select "Edit."
Step 4: Modifying Campaign Details
To modify the reward structure, select "Edit Reward" next to Points. Here, you can adjust the points allocated to clients or extend the campaign's end date. Once you've made the necessary changes, click "Edit Campaign" to save your modifications.
How to Delete a Loyalty Campaign
Step 1: Accessing the Loyalty Feature
To begin the process of deleting a loyalty campaign, log into your Pabau account and navigate to the Marketing section in the left sidebar menu. From there, click on "Loyalty."
Step 2: Viewing All Points
In the Points section located in the bottom right corner of the Loyalty page, locate and click on "View all points."
Step 3: Deleting the Loyalty Campaign
Once you've accessed the list of all points, identify the campaign you wish to delete. Click on the three dots located on the far right of the campaign entry. From the dropdown menu that appears, select "Delete."
Step 4: Confirming Deletion
After selecting "Delete," a prompt will appear asking you to confirm the deletion. To proceed, click on "Yes, Remove Campaign."
How to Manually Add Loyalty Points
Step 1: Accessing the Client Card
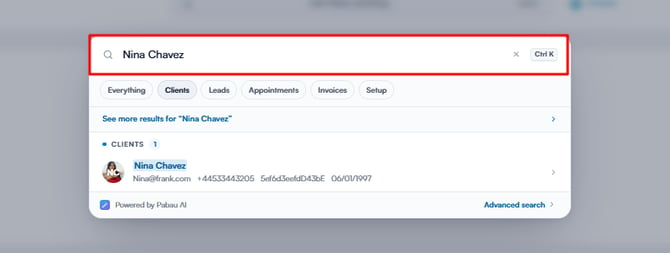
Begin by logging into your Pabau account. Use the search bar at the top of the screen to search for the client to whom you wish to add loyalty points.
Step 2: Navigating to the Loyalty Section
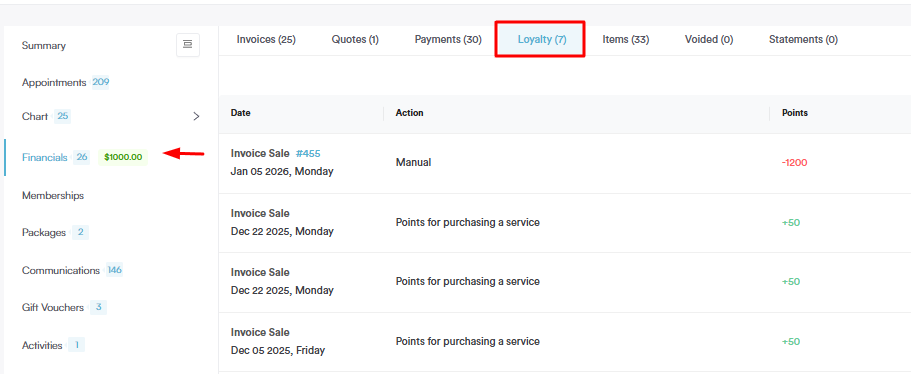
Once you've accessed the client's profile, navigate to the Financials tab. Within this tab, click on the Loyalty sub-tab to access the loyalty-related information for the client.
Step 3: Adding Loyalty Points
In the Loyalty section, locate the "Add Points" button located in the top right corner. Click on this button to initiate the process of adding loyalty points manually.
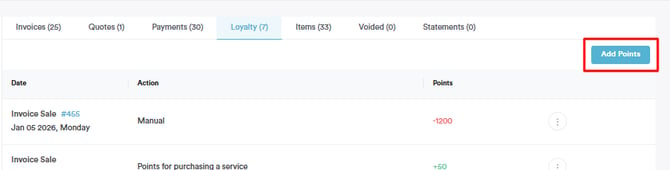
Input the number of points you wish to add in the designated field. Additionally, you can provide further details regarding the addition of points in the Description field if necessary.
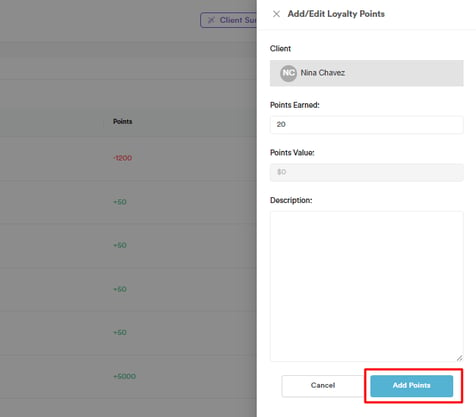
To finalize the addition of points, click on "Add Points."
How to Use Loyalty Points to Pay for an Appointment
Step 1: Accessing the Point of Sale
To begin, log into your Pabau account and navigate to the Point of Sale. You can access the Point of Sale using one of the following methods:
- Use the Create button at the top of the screen and select "Sale."
- Navigate to "Calendar" in the left sidebar menu and click on the appointment you wish to check out, then select "Checkout."
- Open the client card of a client, then click on the blue plus icon in the bottom right corner of the screen and select Sale.
Step 2: Processing the Transaction
Within the Point of Sale interface, proceed with the transaction as usual.
If you used the Create button to access the Point of Sale, first add a client in the top right corner. Then, add the products and services that should be included in the invoice.

If you are raising the invoice from within the calendar, the client and service will be pre-selected. If necessary, you can add additional products and services. Once the items on the invoice are correct, click on Continue in the bottom right corner.

Step 3: Paying with Loyalty Points
To pay for the appointment with loyalty points, select "Points" from the available payment methods.

Choose the amount the client wishes to pay using loyalty points and click on "Pay." If they wish, they can pay for only part of the appointment using loyalty points, and they can pay for the rest using another payment method.

If the client wishes to split the payment, click on "Pay," then choose the other payment method for the remainder of the total price. Click on "Confirm Payment" in the bottom right corner to complete the checkout.
For more guides, refer to related articles below, select additional guides, or use the search bar at the top of the page. These guides will help you get the most out of your Pabau account.
Additionally, to help you fully utilize and understand your Pabau account, we recommend exploring additional guides and resources offered at the Pabau Academy. It offers in-depth video tutorials and lessons, offering a holistic learning experience that can equip you with the essential skills for achieving success with Pabau.