How to Submit a Timesheet as an Admin
In this article, we'll cover how you can submit a timesheet as an admin.
Whether you, as an admin, or a non-admin team member forgot to clock in, clocked in late, or accidentally clocked out early, you can manually submit a timesheet to ensure accurate records are maintained.
Step 1: Access Timesheets
Start by logging into your Pabau account. On the left sidebar menu, locate and click on the "Team" option. From the dropdown menu that appears, select "Timesheets." This will take you to the main timesheet management page, where all timesheet data is housed.

Step 2: Add a New Timesheet
If you need to add a timesheet for a staff member or yourself, click on the "Add Timesheet" button located on the Timesheet page.

Step 3: Select a Location
You’ll then be prompted to select the location where the employee works. You’ll only be able to choose from your primary and allowed locations, which will display only the team members from those specific locations.
If you choose the “All Locations” option, it will display all team members from your primary and allowed locations.

Step 4: Search for Employees
Use the search bar to easily find the staff member you’re adding a timesheet for by typing in their name.

Step 5: Assign a Location
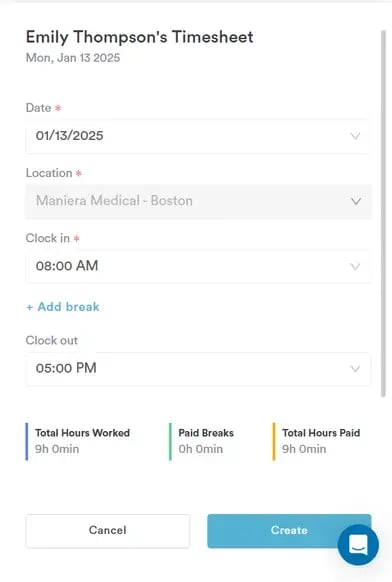
If the selected employee only has access to one location, that location will be pre-selected.
If the employee has access to multiple locations but is scheduled to work at one on the selected date, that location will be selected and non-editable.

If the employee doesn’t have a shift scheduled on the selected date, you’ll be able to choose from the employee’s primary and allowed locations.
Selecting a location is mandatory.
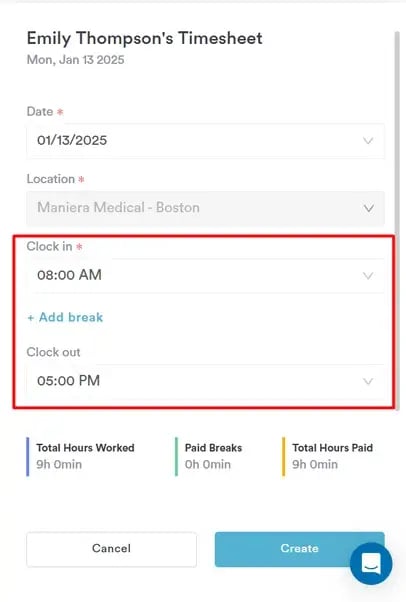
Step 6: Set Clock-In Time
If the team member had a scheduled shift at the selected location, the clock-in time will automatically reflect the team member’s scheduled shift start time.
If the team member does not have a scheduled shift, the system will display the location's standard working hours. You can either accept the default time or edit it by clicking on the field and selecting a new time.

Step 7: Add Breaks
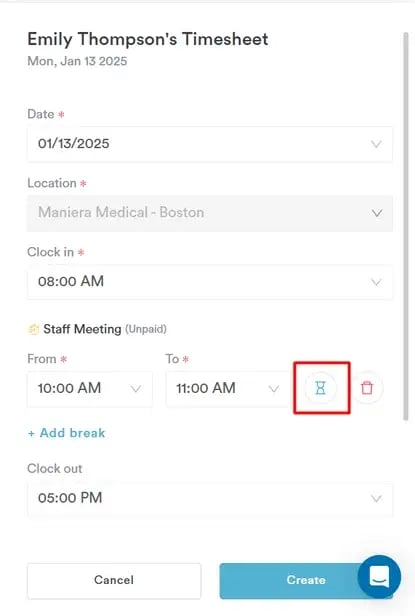
To add a break, click on the “Add Break” button. This will display a list of break types as defined in the Blockout Options settings.
After selecting a break type, it will appear on the create timesheet modal. You can manually enter the break duration, or use the hourglass icon to set the break duration.

Step 8: Set Clock-Out Time
If the team member had a scheduled shift, the clock-out time will default to the scheduled end time, though it can be edited.
If the team member did not have a scheduled shift, the clock-out time field will be empty, and you’ll need to select an end time.
Step 9: Total Hours Section
After entering the clock-in time, breaks, and clock-out time, in the Total Hours section you can see the following:
- Total Hours Worked: This field will display the total number of hours worked, calculated as the time between clock-in and clock-out, including paid breaks but excluding unpaid breaks.
Paid Breaks: This field calculates the time spent on paid breaks.
Total Hours Paid: This field displays the total number of hours worked minus the time spent on unpaid breaks.

Step 10: Save the Timesheet
Once all the details have been entered, click “Create” to save the timesheet. The new timesheet will now appear on the timesheet listing page.

By following these steps, you can easily submit a timesheet as an admin, ensuring accurate and complete time records for your team.
For more guides, refer to related articles below, select additional guides, or use the search bar at the top of the page. These guides will help you get the most out of your Pabau account.
Additionally, to help you fully utilize and understand your Pabau account, we recommend exploring additional guides and resources offered at the Pabau Academy. It offers in-depth video tutorials and lessons, offering a holistic learning experience that can equip you with the essential skills for achieving success with Pabau.