Table of Contents:
1.How to Share an Invoice with Third Parties
2.How to Send an Email to Third Parties
3.How to Send a Letter to Third Parties
The Relationships feature allows you to connect third parties such as GPs or insurance providers directly to a client’s profile, making it simple to share invoices, letters, and emails with them. This helps save time by streamlining communication, improves coordination with external contacts, and reduces errors, ultimately enhancing the quality of care.
How to Share an Invoice with Third Parties
Step 1: Navigate to the Client Card
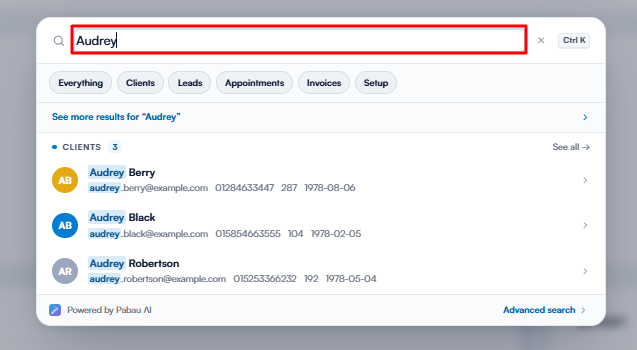
Start by logging in to your Pabau account using your login credentials. Then navigate to the Search bar at the top of the page and proceed to type at least three letters of the client's name. Pabau will filter the results as you type.
Step 2: Switch to the Financials Tab
After selecting the client, in the client card you will find the "Financials" tab. This tab contains a record of all invoices issued to the client.

Step 3: Locate the Invoice
In the Financials tab, you can access the "Invoices" sub-tab, where all raised invoices are listed. To share the invoice, locate the specific invoice and click on its number to view all associated details.

Step 4: Share the Invoice with a Third Party
In the detailed invoice view, click the ''Share'' button on the top right. You will see a list of relationships linked to the client, such as their GP, insurance provider, or other contacts. Select the third party you want to send the invoice to and complete the sharing process.

⚠️ To share an invoice with a third party, make sure you have assigned a staff member with a valid email address to that third-party relationship. Without this, the third party won’t appear as an option to share the invoice.
Once you select the third party to share the invoice with, the invoice will be sent directly to their email address registered in the relationship.
Now that you know how to share invoices with third-party contacts using Relationships, you can streamline your communication and ensure all relevant parties stay informed effortlessly.
How to Send an Email to Third Parties
Step 1: Navigate to the Client Card
Start by searching for the client you wish to send an email to. Use the search bar at the top of the screen for quick access.
Step 2: Access Email Communication
Once you've located the client, click on the blue plus sign button in the bottom right corner of the client card. From the menu that appears, choose "Communication" and then select "Email." Note that this option is available only for clients for whom you have an email address.

NOTE: For more information on how to compose and send an email from the client card, please refer to this article.
Step 3: Select the Third-Party Recipient
Once you open the email window, click on the ''Details'' tab to expand it. This will reveal several options, including the recipient selection. In the search bar, you can type or select from the list of third-party contacts linked to the client via the Relationships feature.
Choose the appropriate third-party recipient, then continue composing the email by adding the subject and any additional information needed. After composing your email, click the ''Send'' button located at the bottom left to deliver it.

When sending an email to a third party, you can send it directly to the email address saved in the relationship, whether it’s a general company email or a staff member’s email. Assigning a staff member is optional but recommended for better tracking and management.
Step 4: View the Sent Email
After sending the email, it will be automatically saved under the ''Communications'' tab in the client card, where you can view it at any time.

Now that you know how to email third parties linked to a client, it’s easy to keep everyone in the loop and share important updates when needed.
How to Send a Letter to Third Parties
Step 1: Navigate to the Client Card
Start by searching for the client you wish to send an email to. Use the search bar at the top of the screen for quick access.
Step 2: Access Letter Communication
Once you've located the client, click on the blue plus sign button in the bottom right corner of the client card. From the menu that appears, choose "Communication" and then select "Letter."

To create a letter in the client card, the client must have a valid postal address saved in their profile.
For more information on creating and managing letters, please refer to this aticle.
Step 3: Select the Third-Party Recipient
Once you open the letter window, choose the appropriate template or create a new one. At the top of the screen, you’ll see the recipient email field — by default, this is set to the client’s email. Click to change it and select a third-party contact (such as a GP or insurance provider) linked via the Relationships feature.

If your letter template includes merge tags like [RECIPIENT] or [CLIENT NAME], these will automatically update based on the third-party contact you select — making sure the letter is correctly addressed with the right name and contact details.
Example: 

Once you've finished composing the letter, click ''Save & Print'' located at the bottom left of the template screen.

After that a prompt will appear with options to send the letter, forward it as a referral, or print it.

If you close the prompt by clicking the “X”, the letter will still be saved to the client’s record and marked as Completed in the Communications section - but it won’t be sent or printed unless you choose one of the available options.
Step 5: View the Saved Letter
After sending, forwarding, or printing the letter (or even if you close the prompt), the letter will be saved and marked as Completed under the Communications tab in the client card, where you can access it anytime.

Now that you know how to send letters to third parties using Relationships, you can easily keep all relevant contacts informed while maintaining accurate and organized client records.
For more guides, refer to related articles below, select additional guides, or use the search bar at the top of the page. These guides will help you get the most out of your Pabau account.
Additionally, to help you fully utilize and understand your Pabau account, we recommend exploring additional guides and resources offered at the Pabau Academy. It offers in-depth video tutorials and lessons, offering a holistic learning experience that can equip you with the essential skills for achieving success with Pabau.