This ensures that the correct layout and details are applied automatically to every invoice you generate, saving time and reducing manual errors.
Step 1: Access your Invoice Templates
Start by logging into your Pabau account. Go to the Setup section from the left sidebar, then scroll to Financials and click Invoice Templates.
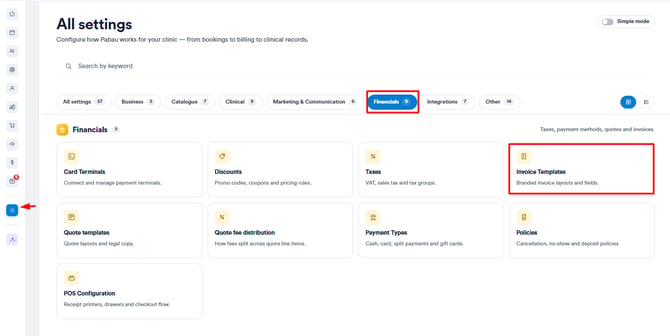
You can also use the search bar in the top right of the Setup page to find “Invoice Templates” quickly.
Step 2: Open the Template you Want to Set as Default
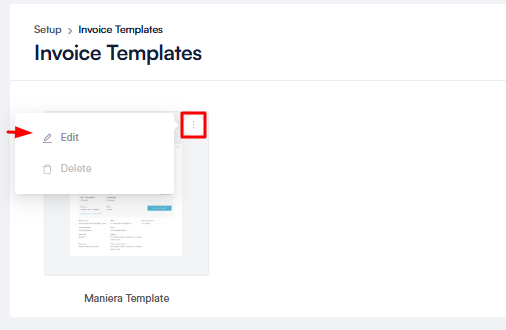
Find the invoice template you’d like to use as your default. Click the three dots on the right side of the template, then select "Edit."
Step 3: Set the Template as Default
Inside the edit page, toggle on “Set as default.” This will automatically apply this template to all new invoices unless you manually select another one.

Step 4: Save your Changes
Click "Save" in the top right corner to apply your changes.

Setting a default invoice template helps maintain consistency in your billing process and ensures that your branding and payment details are always accurate.
For more guides, refer to related articles below, select additional guides, or use the search bar at the top of the page. These guides will help you get the most out of your Pabau account.
Additionally, to help you fully utilize and understand your Pabau account, we recommend exploring additional guides and resources offered at the Pabau Academy. It offers in-depth video tutorials and lessons, offering a holistic learning experience that can equip you with the essential skills for achieving success with Pabau.