By sending your clients heartfelt birthday wishes along with a special discount code, you not only foster goodwill but also encourage repeat business. Below are step-by-step instructions on how to set up a birthday automation in your Pabau account:
Step 1: Access Automations
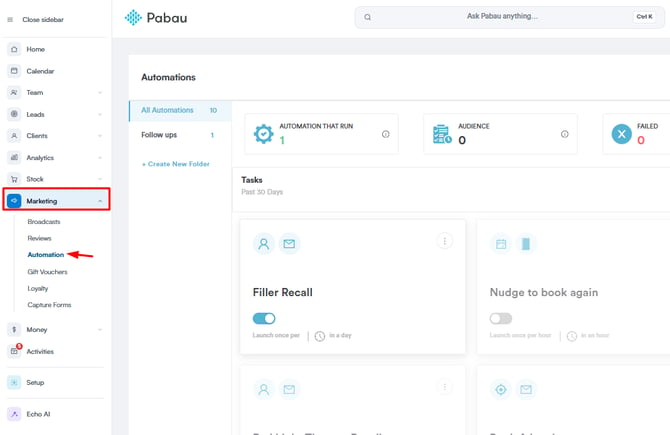
Log into your Pabau account and navigate to the Marketing section in the left sidebar menu. From there, select "Automation".
Step 2: Create a New Automation
Click on "Create Automation" located in the top right corner of the screen. Choose "Start from scratch" to begin building the birthday automation from the ground up.

Step 3: Define Filtering Criteria
Next, you need to specify the criteria for filtering clients. Choose "Clients" as the data object for this automation. Depending on your preference, opt for either an email or SMS automation. You'll follow similar steps regardless of whether you choose email or SMS. For the sake of this guide, we'll proceed with creating an email automation.
Step 4: Title and Subject
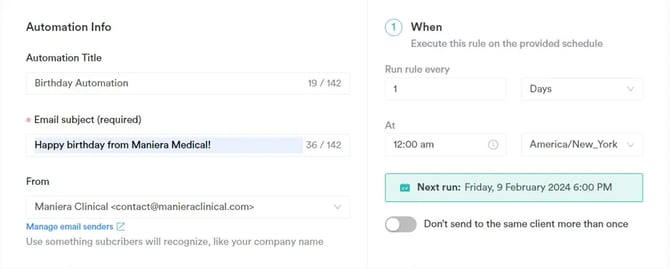
Assign a title to the automation (e.g., "Birthday Automation") for internal reference and add a subject line for the email that clients will receive. Additionally, select the sender address from which the email will be dispatched.
Step 5: Set Execution Rules
Determine when the automation will run. Since it's a birthday automation, you can set it to run once per day at noon. This ensures that the system checks for clients whose birthdays match the current date and sends them the designated email.
For this particular automation, refrain from toggling the "Don’t send to the same client more than once" option. Enabling this setting would result in clients receiving the email only once, thus they won't receive it next year on their birthday.
Step 6: Audience Definition
Under the Audience tab, create an audience filter. For a basic version, include conditions such as "Client is active" and "Client Date of Birth is Today." This ensures that the automation runs daily and sends birthday emails to clients with birthdays on that day.

Step 7: Design the Email
Move to the Design tab and craft the email's design. You can choose from existing templates and customize them to suit your preferences, or code your own template using HTML.
Consider adding a special discount code as a birthday gift for clients to redeem during their next appointment.

Step 8: Review and Activation
Finally, review all settings in the Review tab to ensure everything is configured correctly. If everything looks good, click on "Turn on" to activate the birthday automation.
To review the automation's performance, simply click on the three dots positioned in the top right corner of the automation interface and select "View details".

Congratulations! Your birthday automation is now set up and ready to delight your clients on their special day. Keep track of its performance and make adjustments as needed to optimize client engagement and satisfaction.
NOTE: We recommend reading our Automations article for a more in-depth exploration of this topic.
For more guides, refer to related articles below, select additional guides, or use the search bar at the top of the page. These guides will help you get the most out of your Pabau account.
Additionally, to help you fully utilize and understand your Pabau account, we recommend exploring additional guides and resources offered at the Pabau Academy. It offers in-depth video tutorials and lessons, offering a holistic learning experience that can equip you with the essential skills for achieving success with Pabau.