
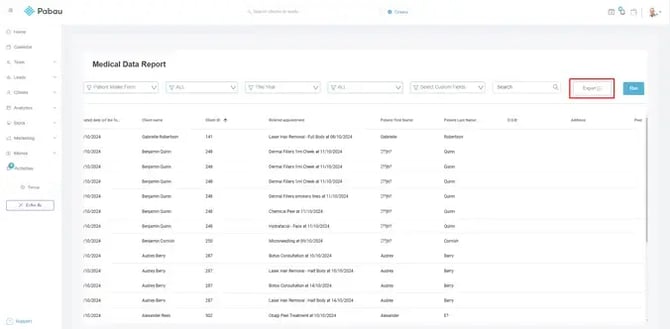
The Medical Data Report gives you an organised view of every response your clients have given on a medical form — one row per completed form, and one column per question.
It answers: who completed a given medical form, when, against which appointment, and exactly what they answered — question by question, version by version.
For example, if Emma Thompson completes your "Skin Consultation" form twice in the selected period, she appears twice in the report — one row per completed form, each showing that form's answers.
How to find it
Step 1: Navigate to the Analytics Feature
Log in to your Pabau account, and in the left sidebar menu, go to Analytics, then click on the "Reports" button.
Step 2: Access the reports banner
On the "Try our new suite of reports" banner, click Try it now.
Once you're in the new reports view, go to the Business section, then scroll to the Clinical group and click on Medical Data Report to open the report.
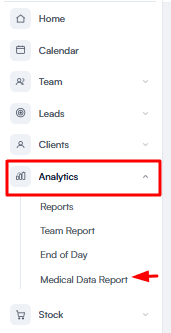
NOTE: The Business section is visible only to users with the "Can access business company reports" permission. No installation is required — the report is available to every account out of the box.
Toolbar controls
| Button | What it does |
|---|---|
| Columns | Opens the "Edit Columns" window — add client and appointment fields alongside the form responses. |
| Export | Downloads the full filtered result set as an Excel or CSV file (the file name starts with "medical_data_report"). |
| Opens your browser's print dialog. | |
| Help | Opens the in-app help modal — an overview of the report, its filters, and its columns. |
| Refresh | Re-runs the report with your current filters. |
Filters
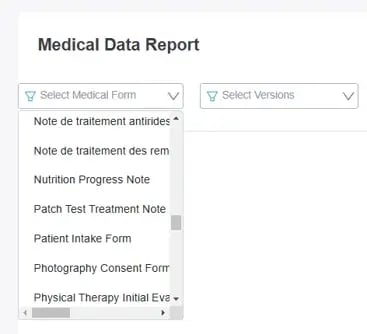
- Medical Form – Required. Choose the form you want to report on — the report stays empty until a form is selected. The dropdown is searchable, so start typing the form's name to find it quickly.
- Versions – Optional, defaults to All versions. Each time a medical form is edited and saved via Medical Form Templates, a new version is created. When you filter to specific versions, a "Form version" column appears in the results.
- Date – Required. Defaults to the last 30 days and can look back a maximum of 90 days, with presets for Today, Last 7 days, Last 30 days, and Last 90 days, or a custom range within that window.
- Location – Optional, multi-select. Matches the location of the form's related appointment. For forms not linked to an appointment, it matches the default location of the staff member who completed the form, or the client's own location for forms the client completed themselves.
There is no "Run" button — the report runs automatically as soon as you change a filter. Use the Refresh button in the toolbar to re-run it at any time.
Understanding the report
Each row is one completed medical form. A client who has completed the form more than once (or across several versions) appears once per completed form.
On the left side of the table you'll find the system columns, followed by one column per question on the selected form:
| Column | What it shows |
|---|---|
| Form name | The name of the medical form. |
| Form type | The form's type. |
| Form version | The version of the form that was completed — only shown when you filter by version. |
| Created date (of the form) | The date the form was completed. |
| Client name | The client who the form belongs to. |
| Client ID | The client's ID in Pabau. |
| Related appointment | The linked appointment, shown as the service and date (for example, "Botox at 15/01/2026"). |
Questions the client didn't answer show a muted "Not set" hint instead of a blank cell.
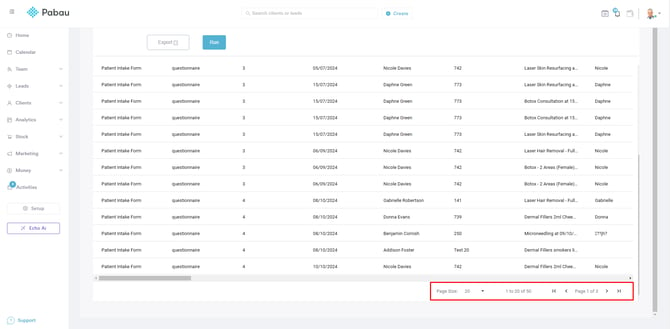
Results are paginated at 20 rows per page — use the page switcher below the table to move between pages.
Adding more columns
To show additional client or appointment fields alongside the form responses, click Columns in the toolbar. The "Edit Columns" window groups the available fields under Client details, Client details (custom fields), Appointment details, and Appointment details (custom fields). Tick the fields you want, use the "Search Columns" box to find one quickly, and click Done. "Reset to default" restores the standard selection.
NOTE: Column choice is managed entirely through "Edit Columns" — the table has no drag-and-drop reordering, header sorting, or per-column filter menus.
Searching the results
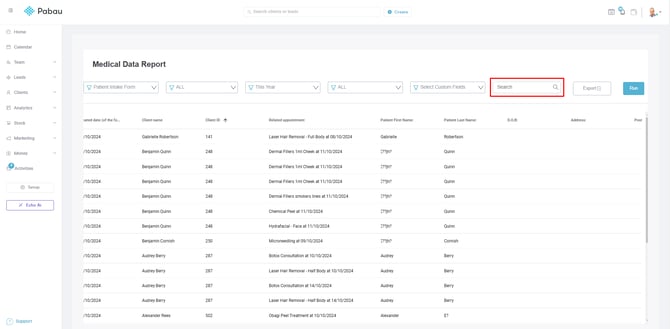
Above the table, use the "Search" bar to filter rows by any value in the responses or system fields.
Exporting the report
To save the data, click Export in the toolbar and choose Excel or CSV. The export includes the full filtered result set — not just the page on screen.
By following these steps, you can view and manage client responses to medical forms, allowing you to organise, filter, and export data efficiently for your records. To report on medical versus non-medical treatments instead, see How to Report on Medical and Non-Medical Treatments.
For more guides, refer to related articles below, select additional guides, or use the search bar at the top of the page. These guides will help you get the most out of your Pabau account.
Additionally, to help you fully utilize and understand your Pabau account, we recommend exploring additional guides and resources offered at the Pabau Academy. It offers in-depth video tutorials and lessons, offering a holistic learning experience that can equip you with the essential skills for achieving success with Pabau.