The Self-pay payment method generates an unpaid invoice as soon as it's selected, giving you the option to instantly email it to the client. This method offers a fast and efficient way to issue invoices while providing your clients the convenience of paying at their own preferred time.
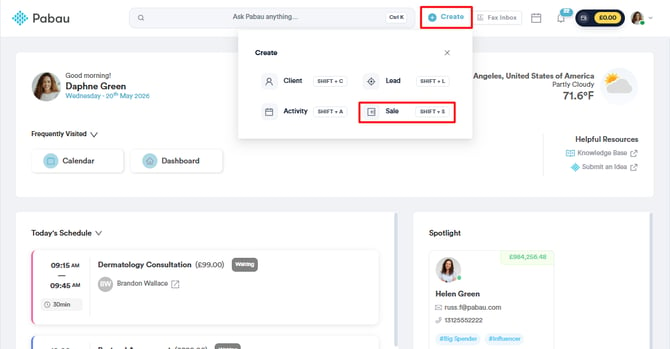
Log into your Pabau account, then click on the "Create" button at the top of the screen, and select "Sale" from the dropdown menu to open the Point of Sale.
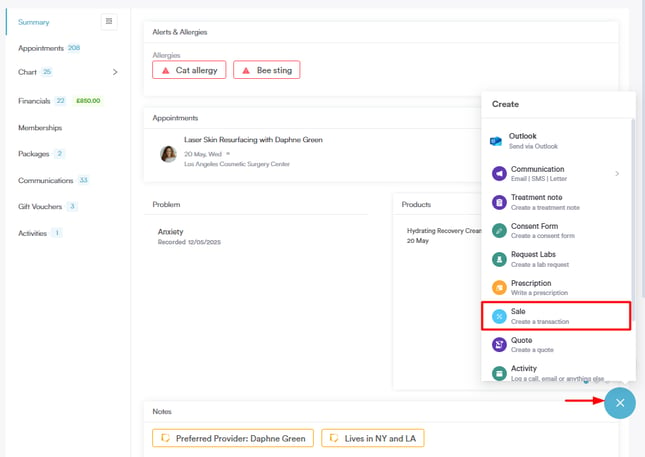
Alternatively, if the client’s profile is already open, you can click on the plus sign in the bottom right corner and choose "Sale" to open the Point of Sale with the client's name pre-populated.
Step 2: Select the Client
Once in the Point of Sale, use the search bar in the top right corner to find the client you’re processing the payment for. If you open the Point of Sale directly from the client card, you can skip this step as the client’s information will already be pre-populated.

Step 3: Add Services and Products to the Invoice
After selecting the client, choose the services and/or products and packages that should be added to the invoice. If you are creating the invoice for an appointment through the calendar, any prepopulated services or products can be modified as needed.
Once you’ve added all the items to the invoice, click "Continue" in the bottom right corner to proceed.

NOTE: Pabau requires integration with Stripe for payment processing.
Reconnecting will ensure that all Pabau Pay terminal features function smoothly and will also unlock 12 additional payment processing options.
Step 4: Choose the Self-Pay Method
From the available payment methods, click on "Self-pay." This action will automatically mark the invoice as unpaid and redirect you to the checkout completed screen, where a pop-up labeled "Email Paylink" will appear.

In the pop-up, you'll see the client's email address and phone number. Choose whether to send the payment link via email, SMS, or both, then click "Send Invoice."

If you would like to configure the email template that clients receive, you can click on the "Configure Template" option, which will take you to the client notification settings.
Step 5: Client Payment Process
The client will receive an email with a link that redirects them to the client portal.

Once there, they can click "View Invoice" to access the details of their invoice. The client can then select "Pay with Card," choose to pay the full amount or a custom amount, and enter their payment details.

After successfully completing the payment, the client will see a confirmation on the screen.
Step 6: Viewing Payment Status
Once the invoice has been paid, you can view the payment status on the client card under the Financials tab.
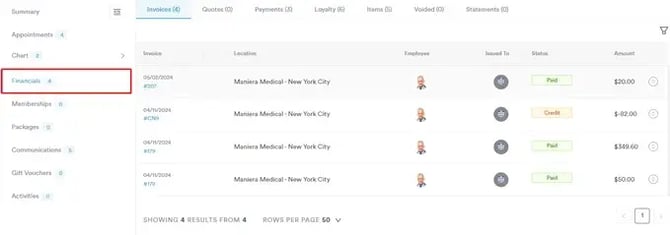
Additionally, you can also check the paid invoice on the Invoices page, which is located under the "Money" section in the left sidebar menu.

You've now successfully processed a payment using the self-pay method. By following these steps, you can easily offer your clients flexibility while keeping your invoicing efficient and organized.
For more guides, refer to related articles below, select additional guides, or use the search bar at the top of the page. These guides will help you get the most out of your Pabau account.
Additionally, to help you fully utilize and understand your Pabau account, we recommend exploring additional guides and resources offered at the Pabau Academy. It offers in-depth video tutorials and lessons, offering a holistic learning experience that can equip you with the essential skills for achieving success with Pabau.