
In this article, you will learn how to connect Google Tag Manager (GTM) to your online booking page. Pabau loads your container on the booking page and pushes each step of the booking journey to the data layer, so any tag you run in GTM — Google Analytics, Google Ads, TikTok and more — can use it.
Before You Start
You need a Google Tag Manager account with a Web container. Your Container ID starts with GTM- and is shown next to your workspace name in Tag Manager. For help, see Google's Set up and install Tag Manager.
Step 1: Open the Tracking Tab
Go to Setup and, under Online presence, click Online Bookings.
- Click the Tracking tab.

The Tracking tab on the Online Bookings page
Step 2: Set Up Google Tag Manager
- Under Your tracking tools, click Set up next to Google Tag Manager.
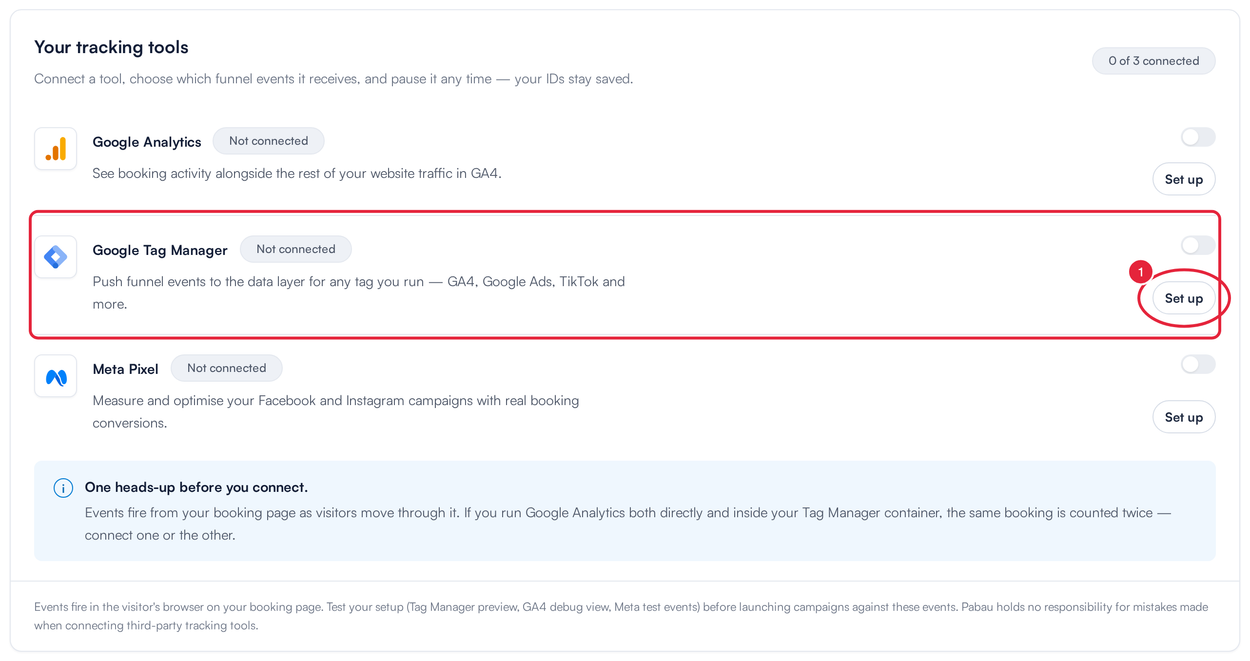
Click Set up next to Google Tag Manager
- In GTM Container ID, enter your ID, for example GTM-AB12CDE.
- Under Tracking events, choose which steps of the booking journey are pushed to the data layer. All eight are switched on to begin with.
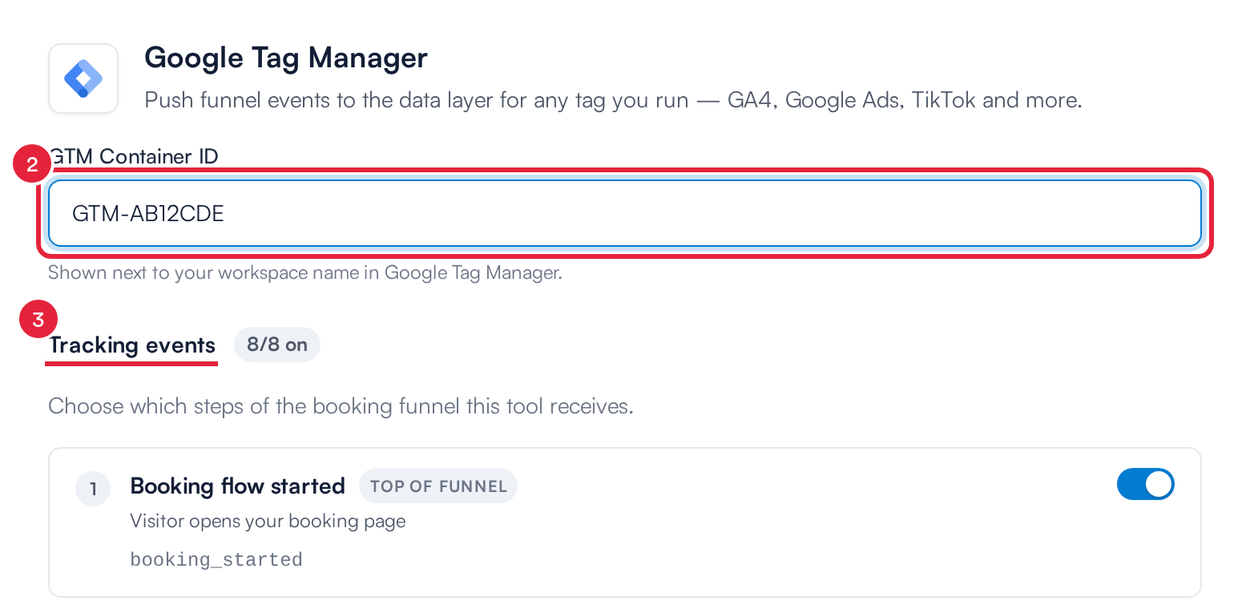
Enter your Container ID, then choose the tracking events
- Click Save.
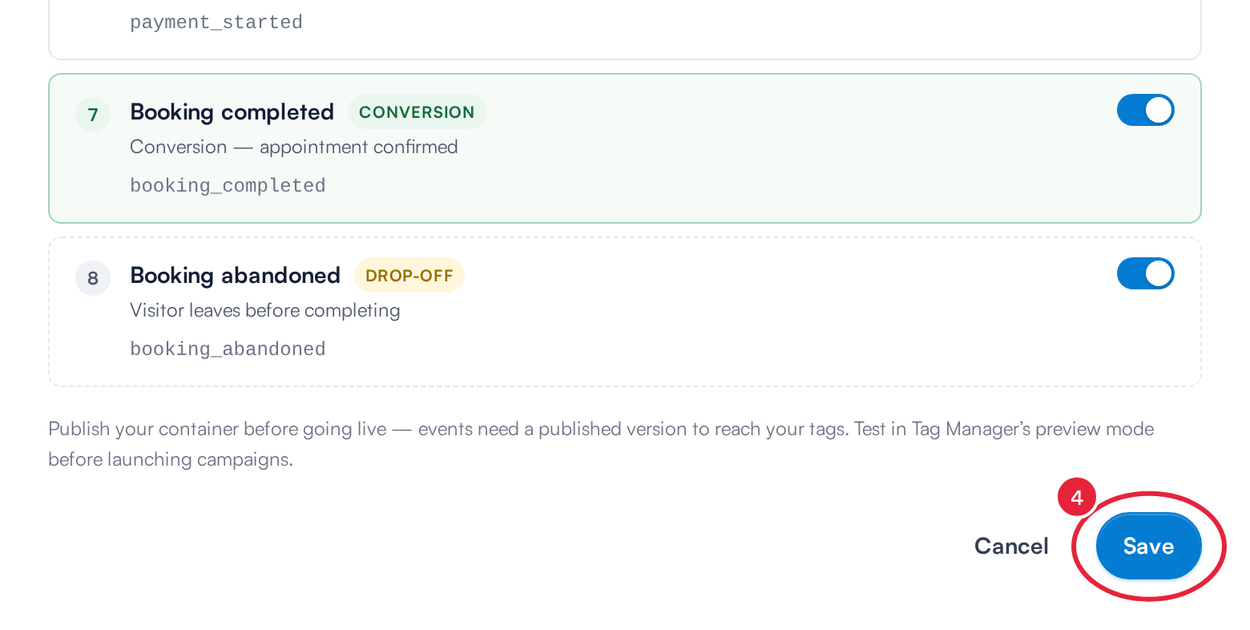
Click Save to connect Google Tag Manager
Google Tag Manager now shows Connected. Your container loads on your booking page, and each step below is pushed to the data layer as an event:
| # | Event in Pabau | Data layer event | When it is sent |
|---|---|---|---|
| 1 | Booking flow started | booking_started |
The client opens your booking page. |
| 2 | Service selected | service_selected |
The client picks a treatment or service. |
| 3 | Provider selected | practitioner_selected |
The client picks a team member. |
| 4 | Appointment slot selected | appointment_slot_selected |
The client picks a date and time. |
| 5 | Client details completed | patient_details_completed |
The client finishes the personal details step. |
| 6 | Payment started | payment_started |
The client reaches the payment step. Includes the amount due now and the currency. |
| 7 | Booking completed | booking_completed |
The booking is confirmed. Includes the booking value and the currency. This is your conversion. |
| 8 | Booking abandoned | booking_abandoned |
The client closes or leaves the page before finishing. |
Along with the event name, the data layer carries the details for that step where they apply: serviceId, practitionerId, date, time, value, currency and serviceIds. No client names, email addresses or phone numbers are pushed.
IMPORTANT: If your container also runs a Google Analytics tag and you connect Google Analytics directly on the Tracking tab, every booking is counted twice. Use one or the other.
Step 3: Fire Your Tags in Tag Manager
In Google Tag Manager:
- Create a trigger of type Custom Event and set the event name to the step you want — for example booking_completed for confirmed bookings.
- To pass the booking value to a tag, create Data Layer Variables for value and currency.
- Attach the trigger to your tag, such as a Google Ads conversion or a GA4 event tag.
- Click Submit and publish your container. Events only reach your tags from a published version.
Step 4: Test Before You Launch
When a tracking tool is connected, clients see a Cookies & analytics card on your booking page. Your container only loads after the client clicks Accept; if they click Decline, nothing is loaded or sent.
- In Tag Manager, click Preview and enter your booking page address.
- On your booking page, click Accept on the cookies card and click through a booking.
- Check that each event appears in Tag Assistant and that your tags fire.
TIP: Use the switch next to Google Tag Manager to pause it at any time — your Container ID stays saved. Click Edit configuration to change the ID or events, or to Disconnect.
NOTE: The classic Custom Confirmation Redirect URL is no longer part of the Tag Manager settings. To send clients to your own thank-you page after they book, see How to Redirect Clients to a Custom Confirmation Page After Booking Online.
Can I paste the Tag Manager snippet onto my booking page?
You don’t need to. Entering your GTM Container ID in Step 2 is what loads your container on the booking page, after the client accepts cookies. There is no field for pasting the Tag Manager code itself.
Can I track Capture Form submissions in Tag Manager?
Not directly. The Tag Manager connection on this page covers your online booking page only. Capture Forms don’t load your container and don’t push events to the data layer, and the form builder removes any script you add to a form.
To count submissions as conversions, send clients to a thank-you page on your own website, where your Tag Manager container already runs:
- Open your form’s settings and click Confirmation Settings.
- Under Confirmation, choose Redirect to a URL and enter your thank-you page in Redirect URL. The address must start with http:// or https://.
- Click Save settings, then in Tag Manager fire your conversion tag on a Page View trigger for that page.
NOTE: If the form is embedded on your website using the embed code from the form’s Share page, the whole page moves to your thank-you page, not just the form.
I added my container ID in the old Analytics settings — why doesn’t it load on the new booking page?
The new booking page only reads the Tracking tab described in this guide. A Tag Manager, Google Analytics or Meta Pixel ID saved in the classic Online Booking setup page (Analytics settings) is used by the classic booking page only — it isn’t copied across. To track bookings on the new page, enter your GTM Container ID again on the Tracking tab, as in Step 2.
If Google Tag Manager already shows Connected and your container still doesn’t load, check that:
- the switch next to Google Tag Manager is on — a Paused tool loads nothing;
- you clicked Accept on the Cookies & analytics card — your container only loads after a visitor accepts;
- your latest container version is published in Tag Manager.
Why does Tag Assistant say my container was 'not found' on the booking page?
The two most common causes are:
- Cookies not accepted yet — your container is only added to the page after the visitor clicks Accept on the Cookies & analytics card. Until then, Tag Manager has nothing to find. In Preview mode, click Accept first, then continue through the booking.
- An old booking link — if the address you entered in Preview (or the link on your website) is a classic booking link, it opens the classic booking page, which doesn't use the Tracking tab. Test with your current booking page address, and update any old links on your website.
NOTE: The booking page remembers each visitor's answer on the Cookies & analytics card for a year, in that browser. If you clicked Decline while testing, the card won't appear again and your container won't load. Test in a private or incognito window, or clear your cookies for the booking page, then click Accept.
Also check that the switch next to Google Tag Manager isn't Paused.
How do I track Google Ads conversions from the new booking page?
There is no separate Google Ads connection — use your Tag Manager container. In Tag Manager, add your Google Ads conversion tag and fire it on a Custom Event trigger for booking_completed, passing the value and currency Data Layer Variables as the conversion value (see Step 3). Make sure Booking completed is switched on under Tracking events.
Where this comes from: the container ID and events are read from the Tracking tab (Setup → Online Bookings → Tracking), and nowhere else.
What's next?
For what each event means and how to use it in your reports, see How to Track Your Online Bookings Using Meta Pixel, Google Tag Manager and Google Analytics. You can also connect Google Analytics or Meta Pixel directly.
Was this guide helpful? Let us know by voting below - your feedback helps us write clearer articles.
For more guides, browse the related articles below or use the search bar at the top of the page. You can also watch our video learning series, the Pabau Academy, or visit the Support page for additional help.