
The Cashup report in Pabau makes it easy to reconcile your clinic’s finances at the end of the day. Whether you’re accepting cash, card, or online payments, Cashup helps you track daily takings, spot any discrepancies, and generate accurate reports.
Step 1: Navigate to Analytics
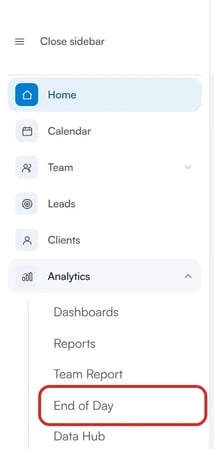
Start by logging into your Pabau account using your login credentials. Then, navigate to the left side bar menu and click the "Analytics" tab to expand and reveal the "End of Day" report.
Step 2: Access Cash Register
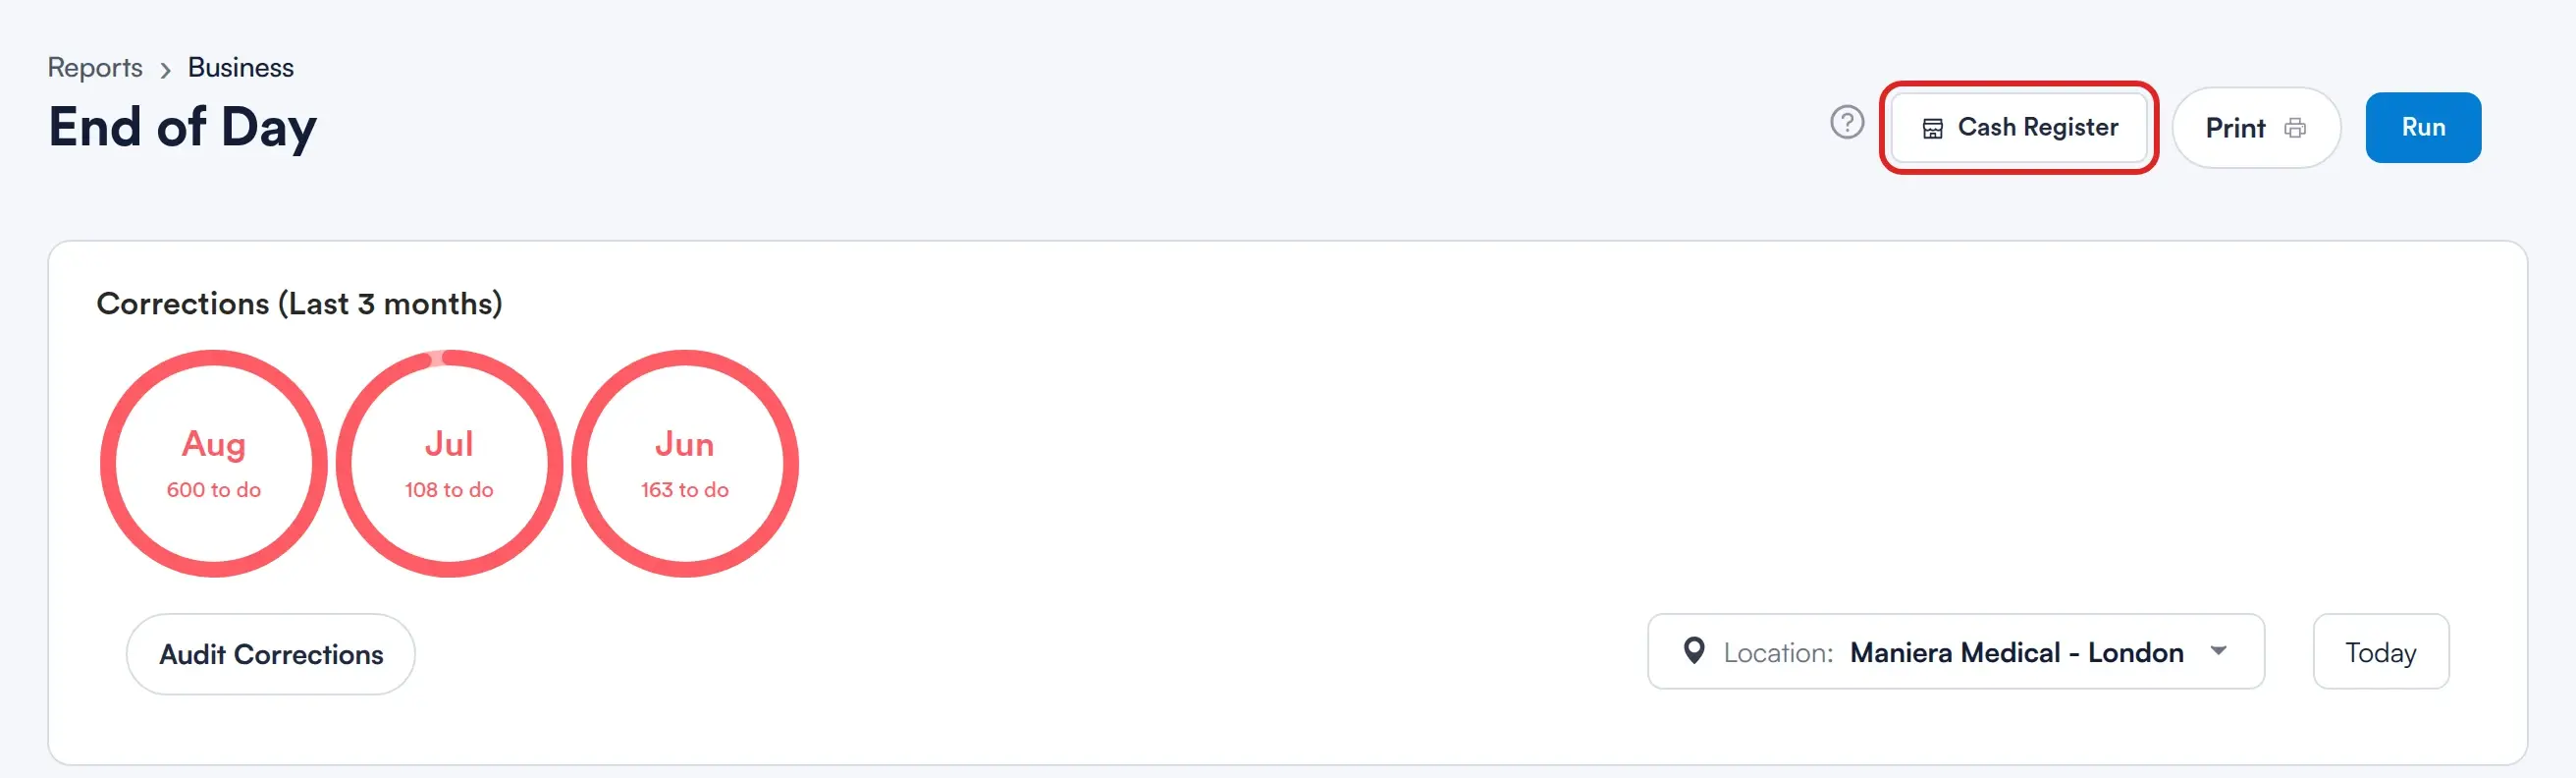
Once you access the End of Day report, navigate to the top right corner of the page and click the "Cash register" button.
Step 3: Open the Register
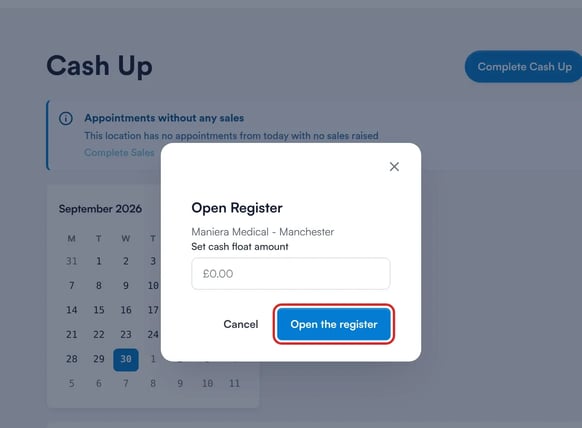
This page will load the Cashup interface for the selected day. If no Cashup has been created yet for the day, you’ll first be prompted to open the register.
Here you can:
-
Define the float — this is the amount of cash in the till at the start of the day.
-
The system will record the opening balance and pre-select your primary location.
-
This creates your first row in the cashup report.
Step 4: Review the Cashup Section
At the top of this page, you’ll see a blue box that checks for:
-
Incomplete Appointments
These are appointments that weren’t marked as complete (but weren’t cancelled or marked as no-show either). -
Incomplete Invoices
These are appointments that don’t yet have an invoice assigned.
NOTE: Make sure to resolve these items before completing your Cashup to ensure all income is properly accounted for.
For detailed steps on how to complete sales for appointments in the Cashup report, please refer to this guide.
Step 5: Finalize Payment Information
On this page, you’ll be guided to complete any missing amounts. Red highlights will appear for fields that haven’t been filled in or don’t match the expected values. Green highlights will confirm that the amounts entered are correct and have been successfully recorded.
You’ll be able to view the following information:
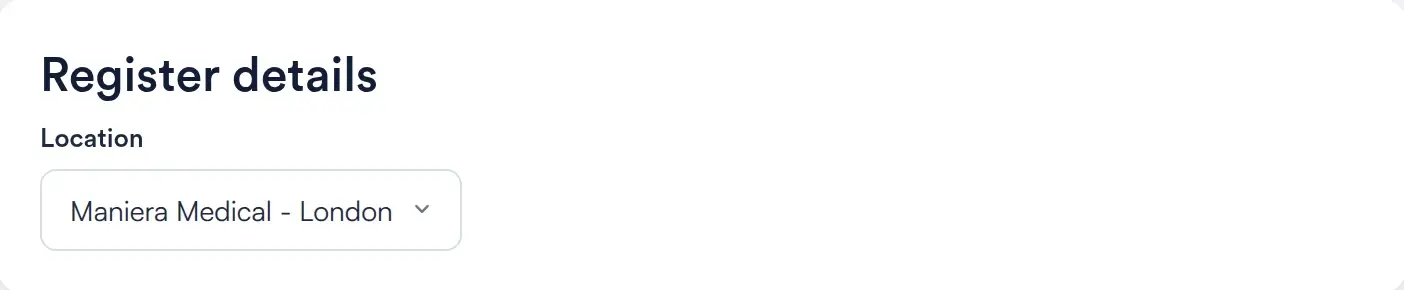
Register Details - This area shows:
-
The location
-
The date/time the register was opened
Cash Section - This section includes:
-
Expected cash: the cash payments taken at this location for the day, minus any cash refunds. Your float is not included, so count the till without it.
-
Actual cash: The amount you’re declaring was actually in the till
-
Difference: If there’s a mismatch, you’ll see the difference right away
Click “Details” to expand and review all cash-related transactions.
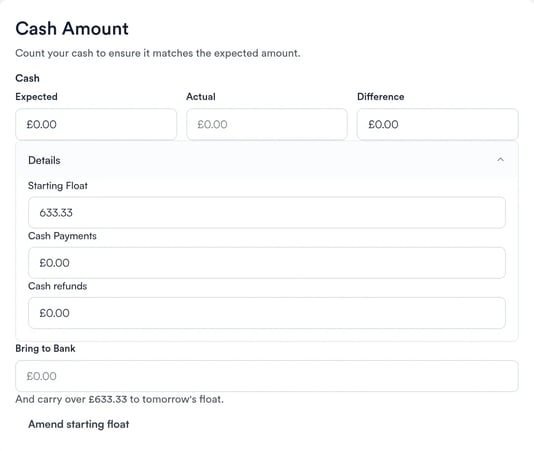
NOTE: The float (opening balance) is carried over to the next day.
How do I record cash paid out of the till?
Open Details under Cash Amount. It shows two figures that Pabau fills in for you, and you cannot type into either:
- Cash Payments — cash taken on invoices at this location on this day.
- Cash refunds — refunds processed in Pabau with Cash as the refund method on this day. These are taken off the Expected cash.
Cash refunds is the only place a cash pay-out is recorded. To have a refund handed back from the till counted, process it in Pabau as a cash refund (see How to Refund an Invoice). It then appears here automatically, even if you've already opened the cash up — reload the page to see it.
There is no field for other cash taken out, such as petty cash for supplies. Count the cash that is actually there and enter it in Actual. The shortfall shows in Difference — explain it in the Cash Up Note.
NOTE: Bring to Bank is not a pay-out. It is the cash you are removing to bank, and it only changes the float you carry over: Starting Float + Actual cash − Bring to Bank.
Other Payment Types
Here, you’ll see a breakdown of expected amounts for:
-
Card payments
-
Online payments (e.g. Stripe)
-
Loyalty points
-
Refunds
-
Any custom payment types you've set up
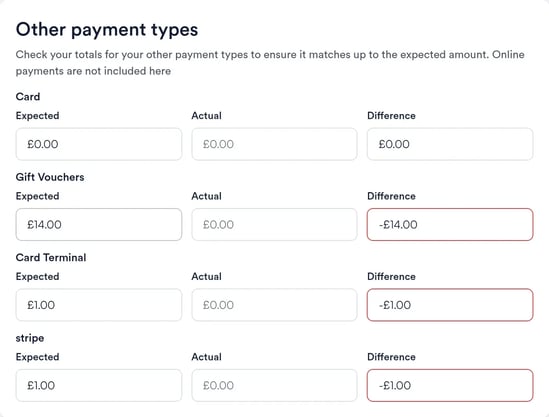
Each will display an expected amount based on actual transactions recorded in Pabau.
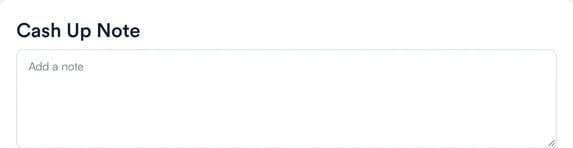
Add a Note (Optional)
Before finalizing, you can leave a Cashup Note—useful for adding context or explaining discrepancies.
Step 5: Complete Cash Up
Once you’ve entered all the required information, scroll to the top of the screen and click the “Complete Cashup” button to finalize the process.
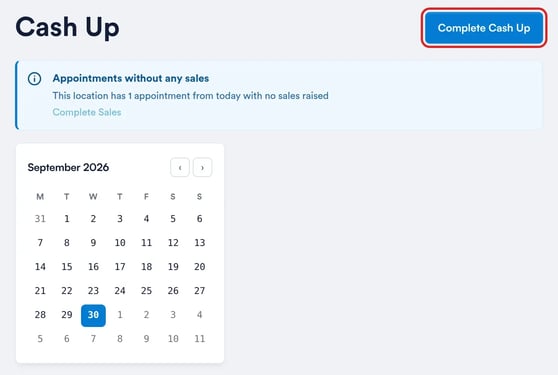
You’ll then be redirected to the Cashup report, where you can view all the recorded details.
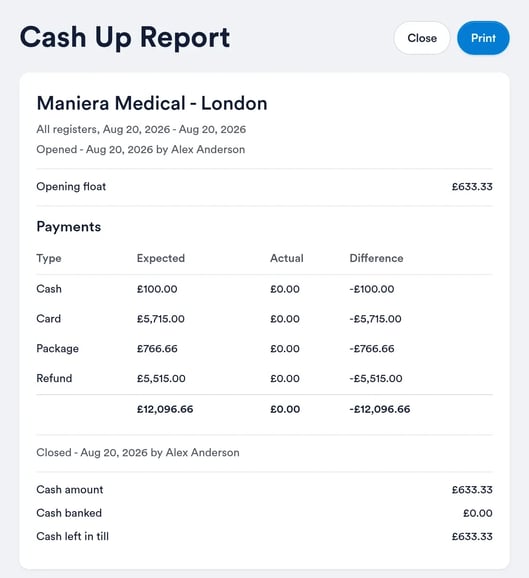
You can also print this report by clicking the blue "Print" button located in the top right corner of the screen.
NOTE: If any adjustments are made in the Calendar, you can always go back to the Cash register and update the information.
Was this guide helpful? Let us know by voting below - your feedback helps us write clearer articles.
For more guides, browse the related articles below or use the search bar at the top of the page. You can also watch our video learning series, the Pabau Academy, or visit the Support page for additional help.